


Polycom RealPresence Collaboration Server (RMX) 1500/2000/4000 Administrator’s Guide
20-2 Polycom, Inc.
Installing the RMX Manager
The RMX Manager application can be downloaded from one of the RealPresence
Collaboration Server systems installed in your site or from Polycom web site at
http://www.polycom.com/support.
To install RMX Manager (downloading the application from the RealPresence
Collaboration Server (RMX)):
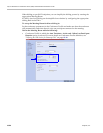
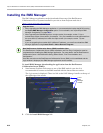
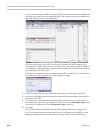
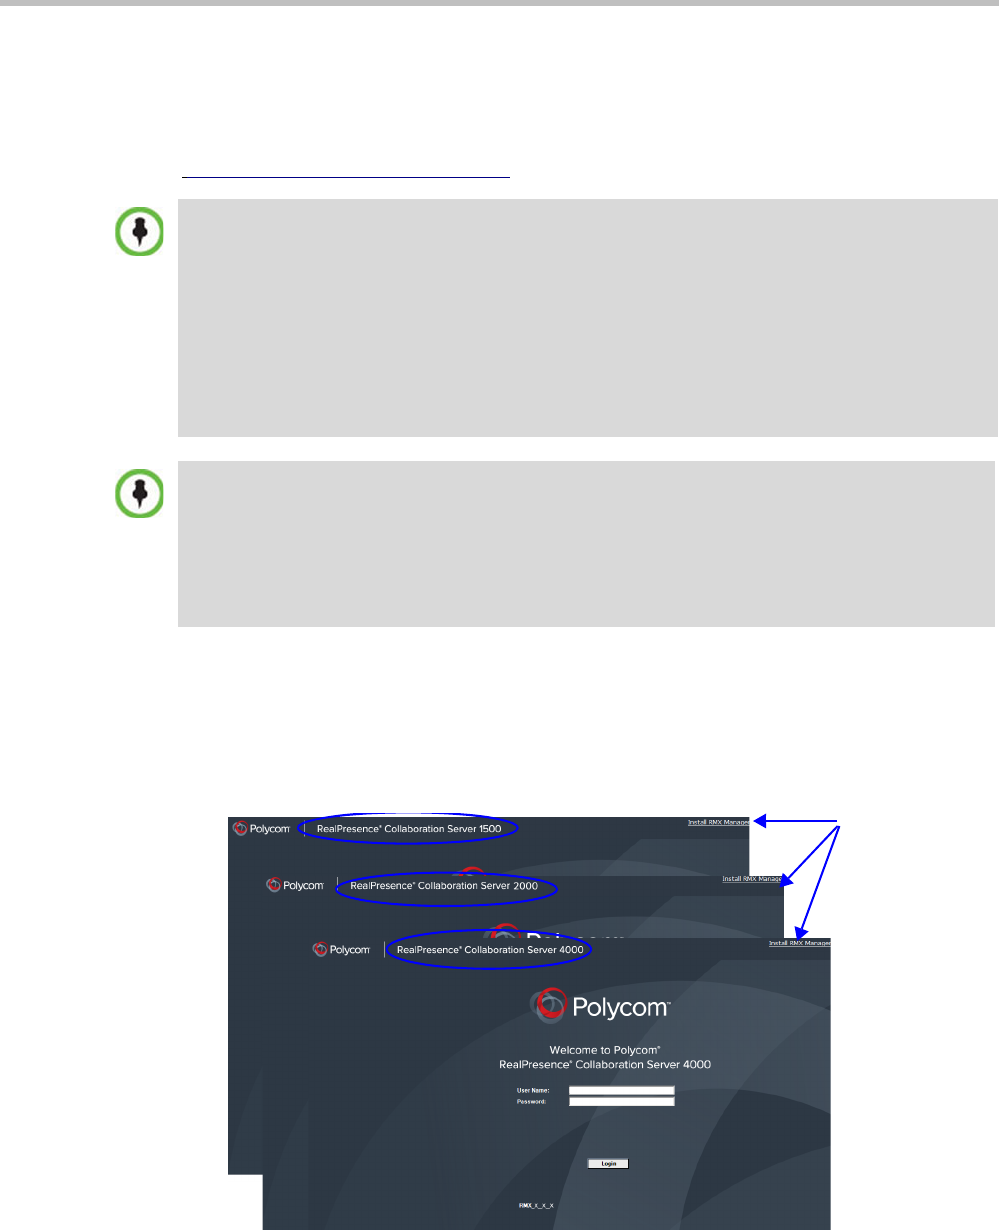
1 Start Internet Explorer and connect to one of the RMX units in your site. It is
recommended to connect to the RMX installed with the latest software version.
The Login screen is displayed. There is a link to the RMX Manager Installer at the top of
the right edge of the screen.
2 Click the Install RMX Manager link.
Upgrade Notes
• When upgrading the RMX Manager application, it is recommended to backup the MCU list using
the Export RMX Manager Configuration option. For more details, see "Import/Export RMX
Manager Configuration” on page 20-21.
• When upgrading the RMX Manager from a major version (for example, version 7.0) to a
maintenance version of that version (for example, 7.0.x), the installation must be performed from
the same MCU (IP address) from which the major version (for example, version 7.0) was
installed.
If you are upgrading from another MCU (different IP address), you must first uninstall the RMX
Manager application using Control Panel > Add or Remove Programs.
New RealPresence Collaboration Server (RMX) Installation Note
The RealPresence Collaboration Server (RMX) Installation and First Entry Configuration must be
completed before installing the RMX Manager application. For more details, see the RealPresence
Collaboration Server 1500/2000/4000 Getting Started Guide, “First Time Installation and
Configuration”.
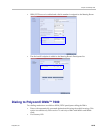
Once the connection to the RealPresence Collaboration Server (RMX) unit is established and the
Login window is displayed, the RMX Manager application can be installed.
Link to
RMX
Manager
Installer