359
SAMPLING
PROJECT SYSTEM DISK/USB MASTERING SAMPLING
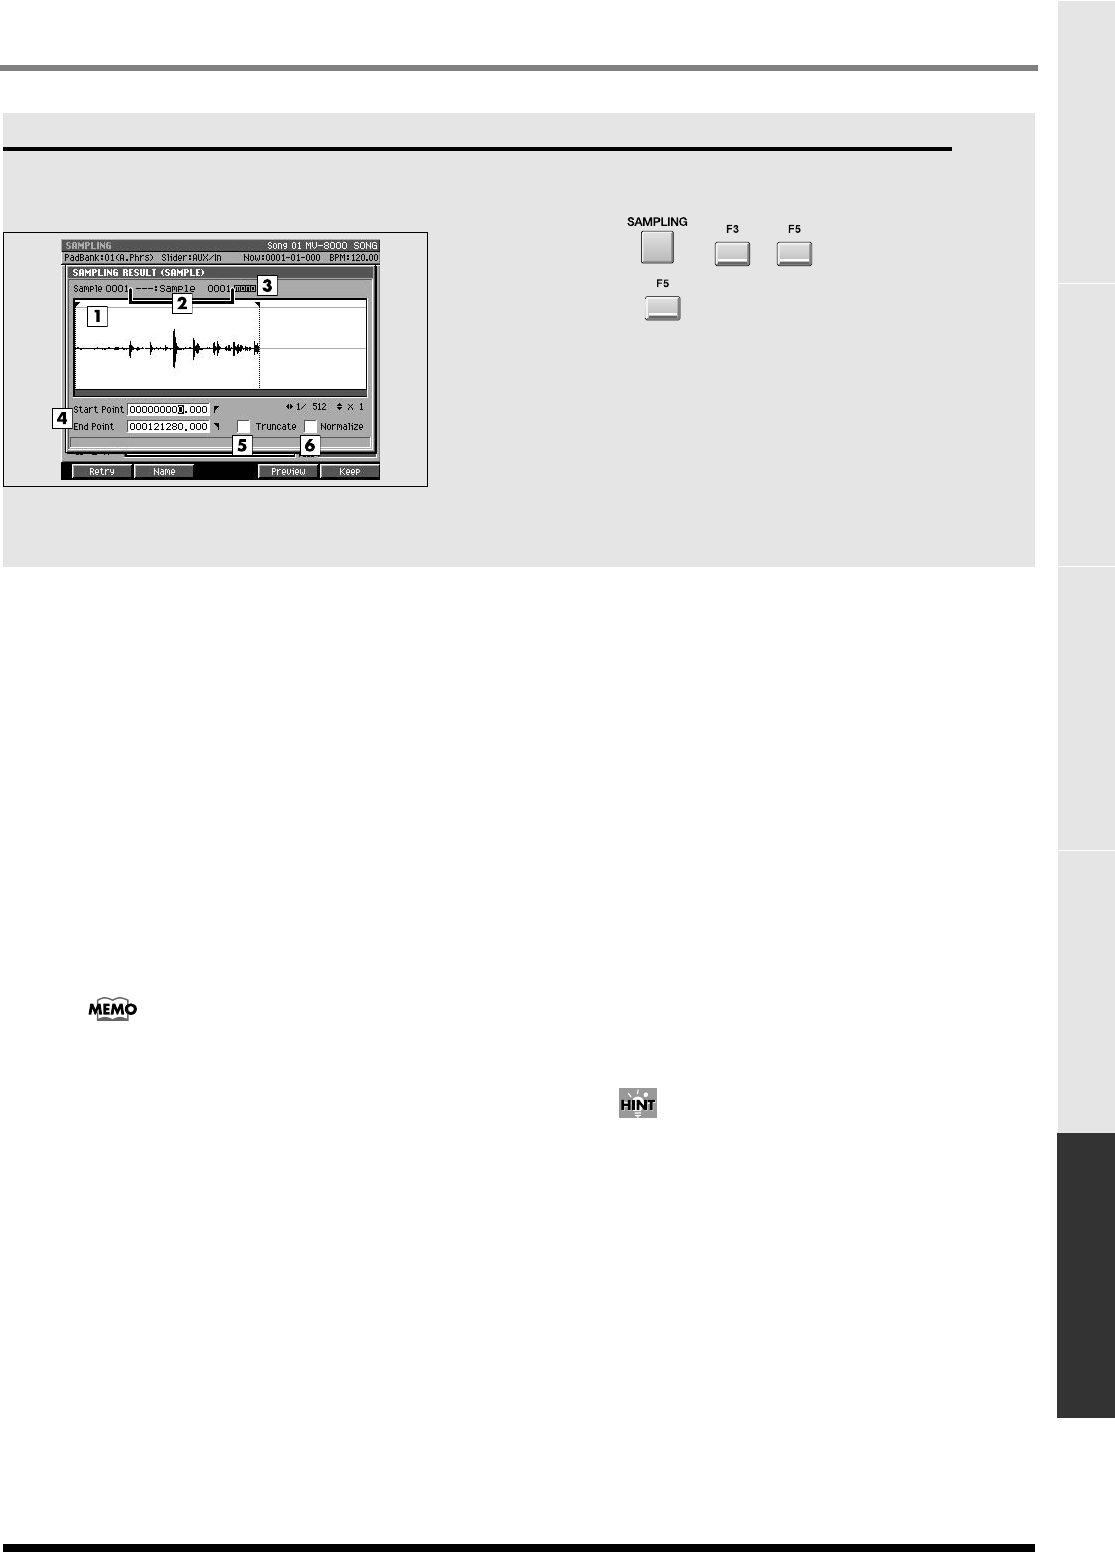
SAMPLING RESULT (SAMPLE) popup
Displays the results of sampling. The sample is saved
in the sample folder of the project.
To access this screen
•
➜➜
(Start / start sampling)
➜
(Stop / stop sampling)
Explanation of each area
1.
Wave window
Displays the sampled waveform.
2.
Sample Name
Displays the name of the sample.
3.
Sample Channel
Displays the number of channel of the sample
(Mono/Stereo).
4.
Start Point / End Point
Specify the points at which the sample will start
playing and stop playing. The Start Point - End Point
region is highlighted.
If Truncate is Off, the Start Point and End Point
settings are ignored.
5.
Truncate
Deletes the portions of the sample before the Start
Point and after the End Point.
Range:
Off
, On
6.
Normalize
Raises the overall level of the sample without
allowing the maximum level to be exceeded.
Range:
Off
, On
F-buttons and menu
Retry
Discards the displayed sample will be discarded, and
retries the sampling operation. The
SAMPLING /
RE-SAMPLING screen
(p. 355) will appear.
Name
Displays the
EDIT NAME popup
(p. 199), where you
can edit the sample name.
Preview
Auditions the currently-highlighted sample. To hear
auditioning, hold down [F4 (Preview)].
Keep
Saves the sample whose waveform is displayed to the
wave memory (in the sample folder of the current
project). If Truncate or Normalize are turned on,
these operations will be performed before saving.
After the sample has been saved, the
SAMPLING /
RE-SAMPLING screen
(p. 355) will appear.
The sample will be saved with an
automatically-assigned name, but this makes it
difficult to find a desired sample later. We
recommend that you use [F2 (Name)] to edit the
name before saving the sample.
EXIT
Discards the sample whose waveform is displayed. If
there is a following sample, the next sample will be
displayed. If the last sample is discarded, the
SAMPLING / RE-SAMPLING screen
(p. 355) will
appear.
