33
Parts of the MV-8000 and what they do
Parts of the MV-8000 and what they doMain FeaturesContents Sampling Editing a sampled sound
1.
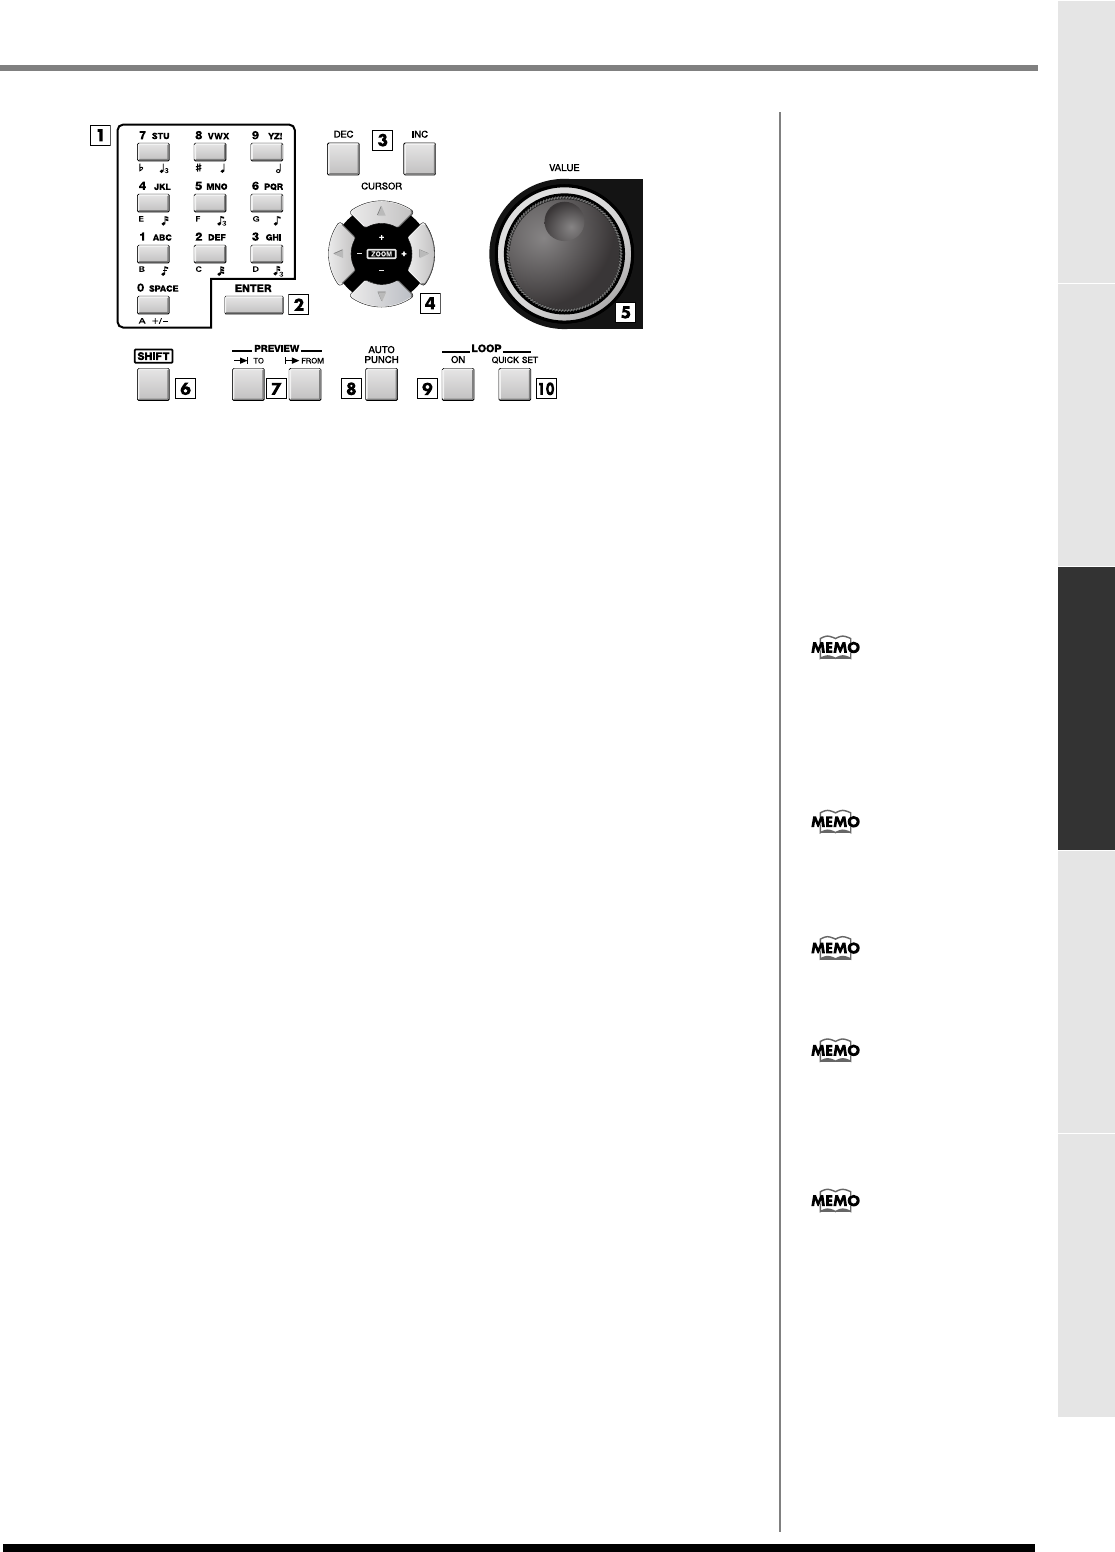
Numeric keys
Use these keys to input sequence data, alphabetical characters for names, or numerical
parameter values. These keys make it easy to input numerical values in rapid
succession.
2.
ENTER button
Finalizes the numerical data that you entered by numeric keys. This button can also
function as an execute/confirm button for the command at the cursor location in the
screen.
3.
DEC/INC buttons
These buttons decrement ([DEC]) or increment ([INC]) the value of a parameter. If you
continue holding down a button, the value will change continuously.
4.
Cursor buttons
Use these buttons to select items from a menu or list, or to move to the parameter that
you want to adjust.
5.
VALUE dial
Use this to increase or decrease the value of a parameter. Turn the dial toward the left
to decrease the value, or toward the right to increase it.
6.
SHIFT button
Use this button to access multiple functions provided by a single button. To use a
function enclosed by a white frame on the top panel (e.g., STEP REC or MARKER SET),
hold down [SHIFT] and press the desired button. If you want to rapidly increase or
decrease the value of a parameter, hold down [SHIFT] and use [DEC]/[INC] or the
VALUE dial.
7.
PREVIEW TO / PREVIEW FROM buttons
[PREVIEW TO] plays the sequence data from a point slightly earlier than the current
location. [PREVIEW FROM] plays the sequence data for a short time starting at the
current location. By using these two functions in conjunction with each other you can
easily find a precise location in your song.
8.
AUTO PUNCH button
This function automatically enters and exits record mode over a specified region of the
sequence. When you press [AUTO PUNCH] the indicator will light orange. When you
begin recording in this state, actual recording will begin at the punch-in point
(recording start location) you specify. When you arrive at the punch-out point
(recording end location), recording will end automatically. To turn off the Auto Punch
function, press [AUTO PUNCH] once again (the indicator will go dark).
9.
LOOP ON button
Press this button when you want playback or recording to loop (continue repeating).
LOOP [ON] will light orange. If you begin sequence playback or recording in this state,
recording or playback will continue repeating between the loop start time and loop
end time you specify. By using the Loop function in conjunction with the Auto Punch
function, you can perform Loop Recording.
10.
LOOP QUICK SET button
This button sets the current measure as the beginning of the loop. You can then
immediately begin loop recording to capture a phrase or other idea.
If you hold down [SHIFT]
while you press [DEC]/[INC]
or turn the VALUE dial, the
amount of the increase or
decrease will be multiplied by
ten.
In this manual, directions such
as [SHIFT] + [INC] mean that
you are to hold down [SHIFT]
and press [INC].
The preview length is set by
the GLOBAL screen (p. 320)
Preview Length parameter.
The auto punch region is set in
the RECORDING
PARAMETER screen that
appears when you press
[REC].


