10. COMMUNICATION INTERFACE SETTING (COMMUNICATION SETTING)
10.1 Communication setting
10 - 5
9
UTILITY FUNCTION
10
COMMUNICATION
INTERFACE SETTING
(COMMUNICATION SETTING)
11
DISPLAY AND
OPERATION SETTINGS
(GOT SET UP)
12
CLOCK SETTINGS AND
BATTERY STATUS DISPLAY
(TIME SETTING AND DISPLAY)
13
FILE DISPLAY AND
COPY (PROGRAM/DATA
CONTROL)
14
GOT SELF CHECK
(DEBUG AND SELF
CHECK)
15
CLEANING DISPLAY
SECTION (CLEAN)
16
INSTALLATION OF
COREOS, BOOTOS
AND STANDARD
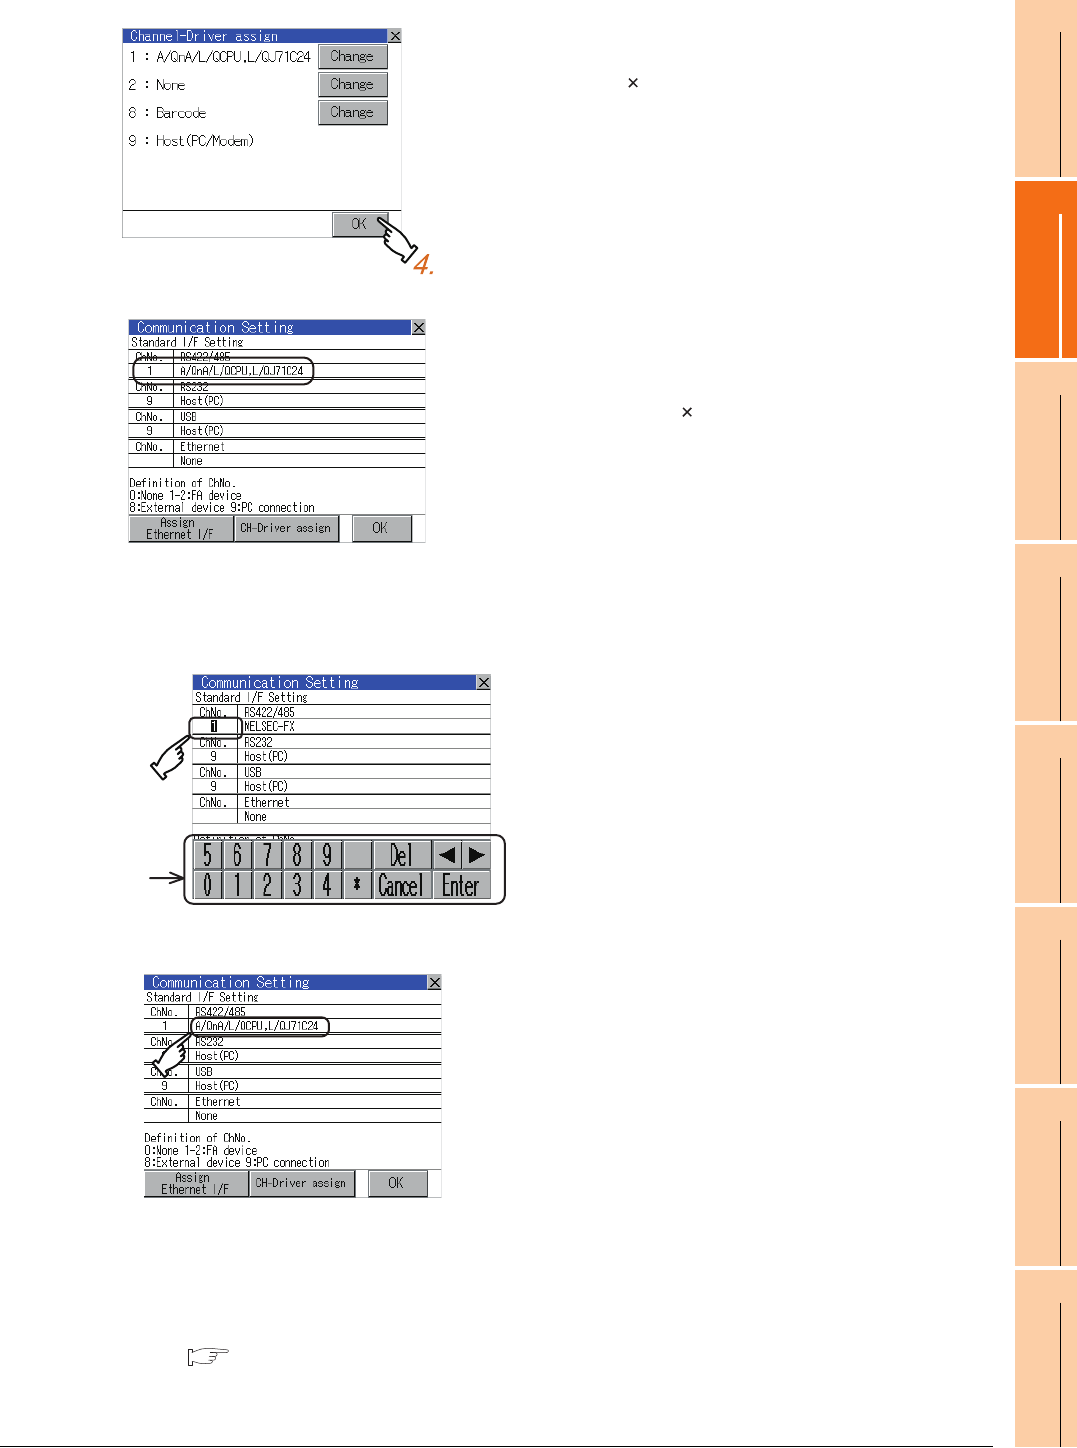
Channel number setting operation
Communication detail setting switching operation
If the driver display BOX is touched on the communication setting screen or Ethernet I/F assign screen, the screen
switches to the detailed setting screen of the related controller device.
( 10.2 Communication Detail Setting)
4. The screen returns to the [Channel-Driver assign]
screen and touch the [OK] button.
5. Touch [ ] button to return to the [Communication
Setting] screen.
6. Confirm that the selected communication driver ([A/
QnA/L/QCPU, L/QJ71C24]) is assigned.
7. After confirming, touch the [OK] button.
8. Touching the [ ] button restarts the GOT and the
GOT operates with the changed settings.
1. Touch channel number specification menu BOX
to be set.
2. The cursor for the channel number specification
menu BOX is displayed.
Simultaneously the keyboard for a numerical
input is displayed.
3. Input the channel number from the keyboard and
touch [Enter] key, and the value is defined.
Simultaneously, the name of the communication
driver corresponding to the channel number
assigned by drawing software is displayed in the
driver display BOX.
Keyboard
