14. GOT SELF CHECK (DEBUG AND SELF CHECK)
14.2 Self Check
14 - 15
9
UTILITY FUNCTION
10
COMMUNICATION
INTERFACE SETTING
(COMMUNICATION SETTING)
11
DISPLAY AND
OPERATION SETTINGS
(GOT SET UP)
12
CLOCK SETTINGS AND
BATTERY STATUS DISPLAY
(TIME SETTING AND DISPLAY)
13
FILE DISPLAY AND
COPY (PROGRAM/DATA
CONTROL)
14
GOT SELF CHECK
(DEBUG AND SELF
CHECK)
15
CLEANING DISPLAY
SECTION (CLEAN)
16
INSTALLATION OF
COREOS, BOOTOS
AND STANDARD
I/O check operation
(1) Connecting target confirmation
Touching [CPU] button carries out the connecting target confirmation communication check.
(2) Self-loopback
Touching [Self] carries out the hardware check of RS-232 interface.
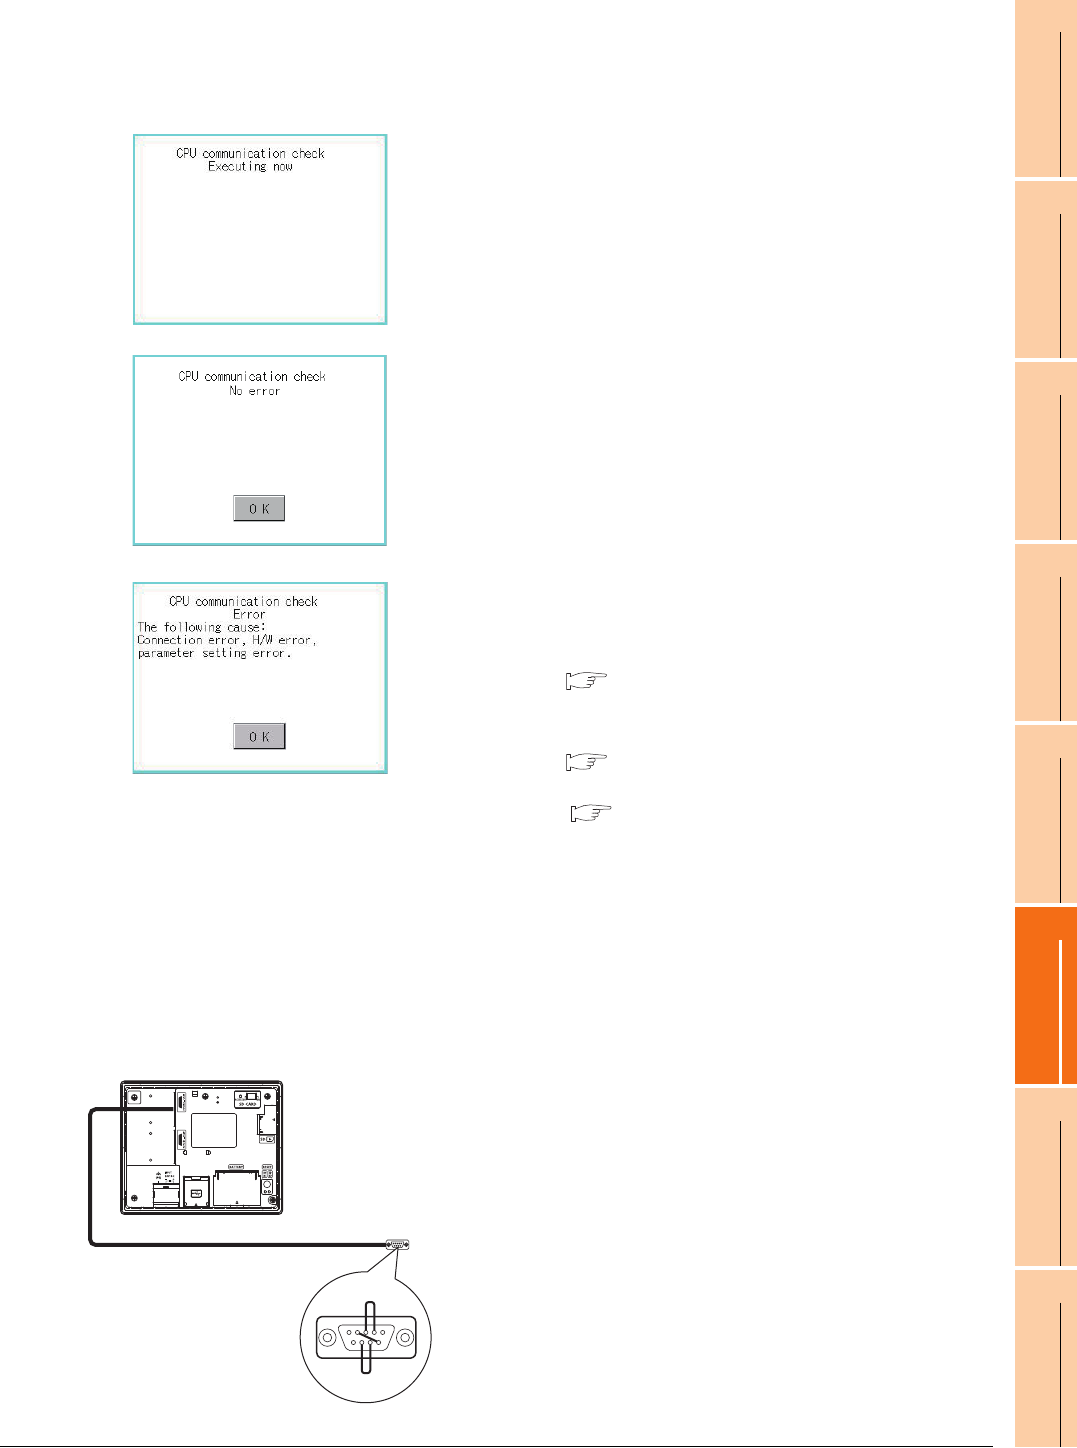
1. After the CPU communication starts normally, the dialog
box mentioned left notifying that it is on checking, until
the connecting target confirmation communication ends
normally.
2. When the connecting target confirmation
communication ends, its result is notified by dialog box.
If the connecting target confirmation communication
ends normally, the dialog box notifying of the normal
termination mentioned left is displayed. Touching [OK]
button after confirming the result returns to [I/O check].
If the dialog box mentioned left is displayed after
selecting connecting target confirmation or during CPU
communication check, confirm the following.
• No misconnection with CPU
( GOT1000 Series Connection Manual for GT
Works3
)
• No missettings of parameter
( 10.2 Communication Detail Setting)
• No hardware error.
(
18. TROUBLESHOOTING)
Touching [OK] button after confirming the result returns
to [I/O check].
1. For preparation for the self-loopback communication
check, insert the connector for self-loopback check
(Customer purchased) shown in the diagram left in
the RS-232 interface.
For this connector, short 2 and 3 pins, 7 and 8 pins
and 4 and 6 pins, respectively.
In the communication setting of the GOT utility, set
the channel number for the RS-232 interface to 0
([None]).
GT14 (Rear face)
Self-loopback
check connector
4 3 2
8 7 6


