


Agilent N5161A/62A/81A/82A/83A MXG Signal Generators User’s Guide 179
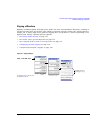
Preliminary Basic Digital Operation (Option 651/652/654)
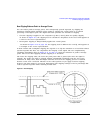
Preliminary Clipping a Waveform
Configuring Rectangular Clipping
Use this example to configure rectangular clipping. Rectangular clipping clips the I and Q data
independently. For more information about rectangular clipping, refer to “How Clipping Reduces
Peak–to–Average Power” on page 175.
CAUTION Clipping is non–reversible and cumulative. Save a copy of the waveform file before you
apply clipping.
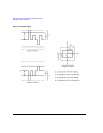
Copy a Waveform File
1. Display the signal generator’s files: Press File > Catalog Type > More > Volatile Segments.
2. Highlight the waveform RAMP_TEST_WFM.
3. Press Copy File.
4. Name the copy (in this example, the name is MY_TEST_REC) and press Enter.
Apply Rectangular Clipping to the Copied Waveform File
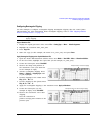
1. Open the DUAL ARB Waveform Utilities menu: Press Mode > Dual ARB > More > Waveform Utilities.
2. In the list of files, highlight the copied file (in this example, MY_TEST_REC).
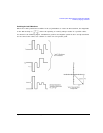
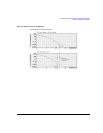
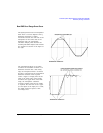
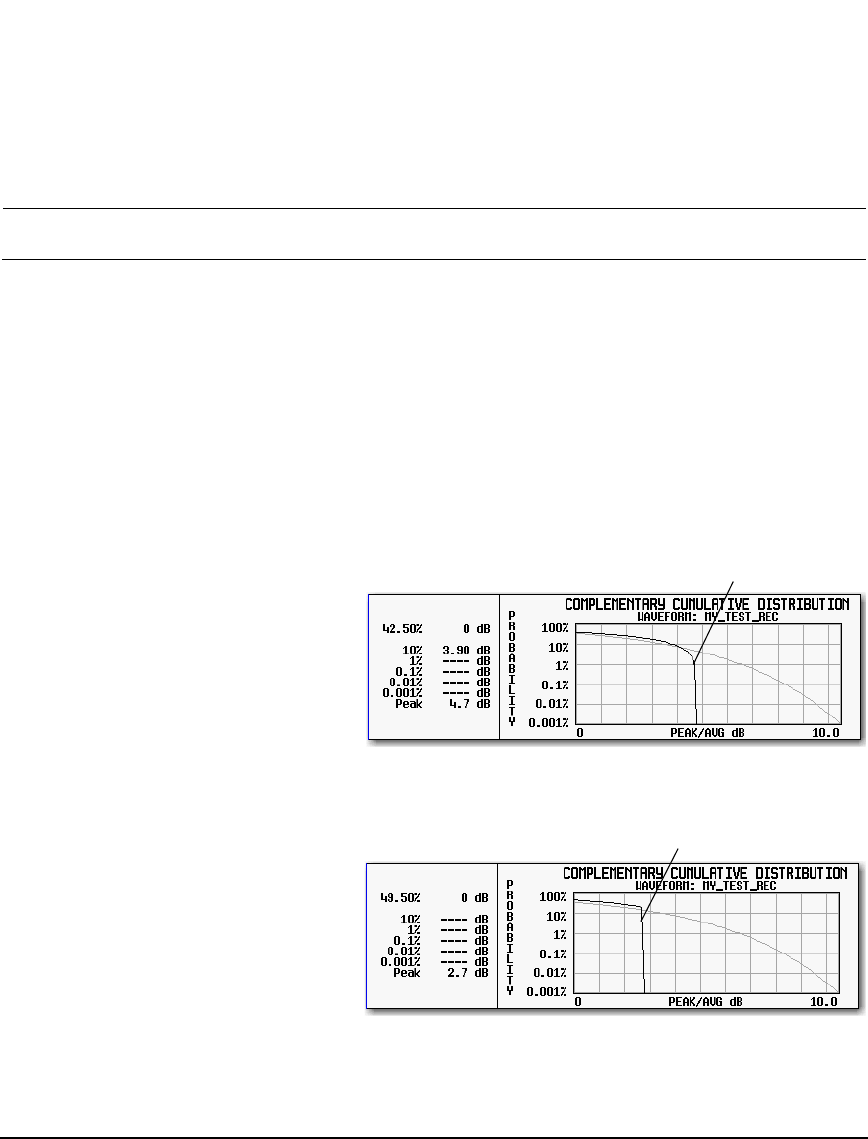
3. Create the CCDF plot: Press Plot CCDF.
4. Observe the shape and position of
the waveform’s curve (the dark line
in the example at right).
5. Activate rectangular clipping: Press
Return > Clipping > Clipping Type until
|I|,|Q| highlights.
6. Set 80% clipping for the I data: Press
Clip |I| To > 80 > %.
7. Set 40% clipping for the Q data: Press
Clip |Q| To > 40 > %.
8. Apply the rectangular clipping to the waveform: Press Apply to Waveform.
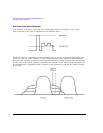
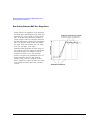
9. Create the CCDF plot (see the
example at right): Press Plot CCDF.
10. Observe the waveform’s curve after
clipping.
Note the reduction in
peak–to–average power relative to the
previous plot.
Example waveform curve before clipping
Example waveform curve after rectangular clipping