


AW1600 Owner’s Manual
Punch-in/out
6
Overdubbing
60
2
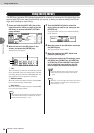
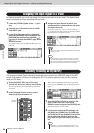
Locate to the point at which you want to
punch-in.
3
In the Locate section, hold down the [SET]
key and press the [IN] key.
The current location will be registered as the In point.
4
Locate to the point at which you want to
punch-out.
5
In the Locate section, hold down the [SET]
key and press the [OUT] key.
The current location will be registered as the Out
point.
6
In the Locate section, press the [AUTO
PUNCH] key.
The [AUTO PUNCH] key will light, and the Auto
Punch-in/out function will be enabled. You will auto-
matically locate to a point a specific distance (the “pre-
roll time”) ahead of the In point. This point is called
the “pre-roll point.”
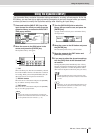
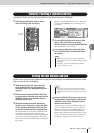
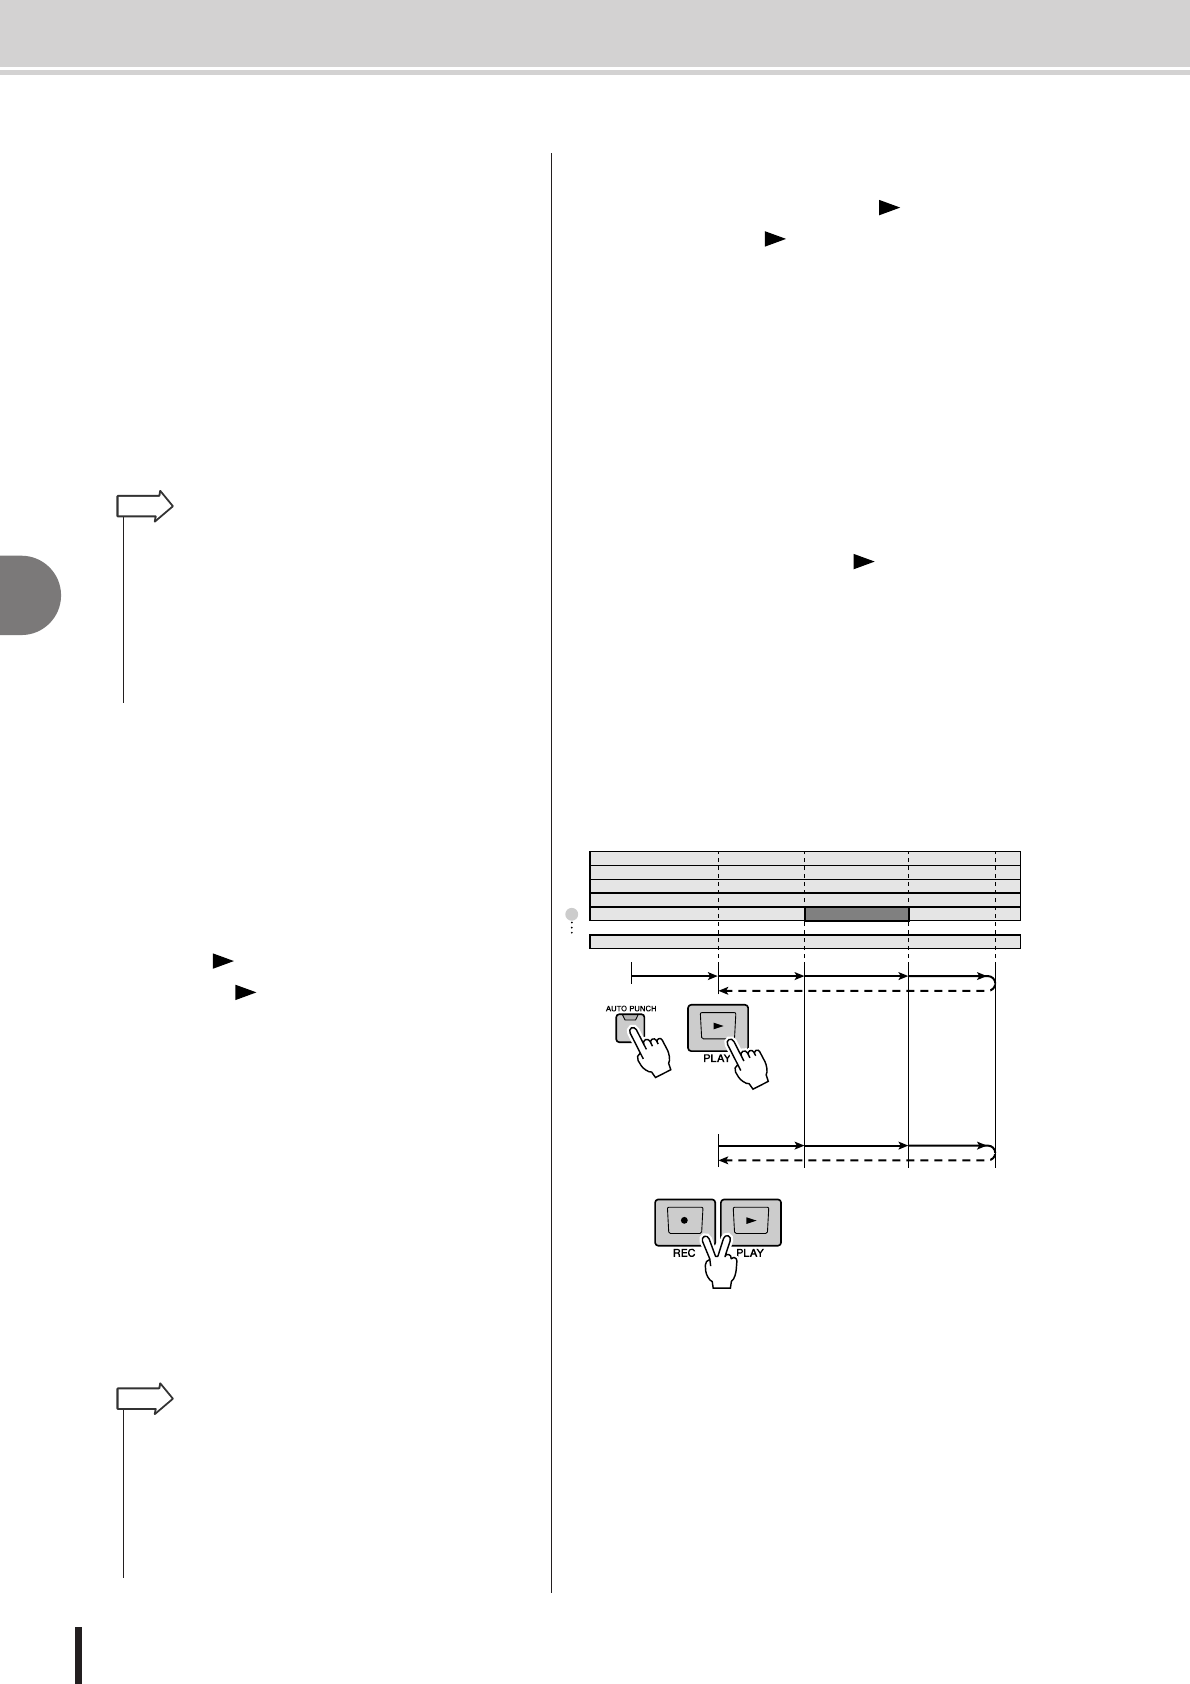
7
To rehearse the auto punch-in/out, press
the PLAY [ ] key.
1 The PLAY [ ] key will light, and playback will
begin from the pre-roll point.
B When you reach the auto punch-in point, the REC
[●] key will begin blinking, and the signal that you
are monitoring from the recording-destination
track channel will switch from the track playback
to the input signal (recording-source). (However,
recording will not actually occur.)
C When you reach the auto punch-out point, the
REC [●] key will go dark, and the signal that you
are monitoring from the recording-destination
track channel will return to the track playback.
D When you reach a point that is a specific distance
(the “post-roll time”) after the Out point (this point
is called the “post-roll point”), you will return to
the pre-roll point and stop.
8
To perform the actual auto punch-in/out,
stop the recorder, then hold down the REC
[●] key and press the PLAY [ ] key.
1 Only the PLAY [ ] key will light, and playback
will begin from the pre-roll point.
B When you reach the auto punch-in point, the REC
[●] key will light, and recording will begin
(“punch-in”).
C When you reach the auto punch-out point, the
REC [●] key will go dark, recording will stop, and
you will return to playback mode (“punch-out”).
D When you reach the post-roll point, you will return
to the pre-roll point and stop.
9
To check the newly-recorded content, press
the [AUTO PUNCH] key to make it go dark,
and then press the PLAY [ ] key.
10
If you are satisfied with the newly-recorded
content, save the song. (For the Save pro-
cedure → p. 63)
If you decide to re-do the recording, you can go back
to the best take using the Undo list after performing
several overdubs by repeating steps 6–9 (→ p. 61).
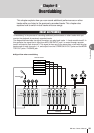
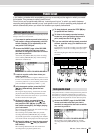
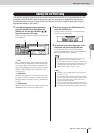
The following diagram shows the auto punch-in/out
procedure.
• If you want to set the In and Out points more precisely, you
can use the Nudge function (
→
p. 71) which repeatedly plays
a short region before or after the current location, or use the
WAVE DISPLAY popup window (
→
p. 72) which lets you view
the contents of the track as a waveform.
• The In point and Out point will be updated each time you
record. The location at which you last started recording will be
registered as the In point, and the location at which you last
stopped recording will be registered as the Out point.
HINT
• If you turn the Locate section [REPEAT] key on before step 7,
operations
1
–
4
of step 7 will be repeated up to fifteen times.
(The A-B Repeat function is disabled during this time.) If you
want to stop repeating the rehearsal, press the [REPEAT] key
once again or press the STOP [
■
] key.
• With the initial settings of the AW1600, the pre-roll and post-
roll times are each set to four seconds. You can adjust these
values in a range of 0–5 seconds (
→
p. 169).
HINT
3
2
1
4
5
16
play playrehearsal
punch-in punch-out
locate
rehearsal
actual recording
Pre-roll
point
Post-roll
point
Auto punch-out
point
Auto punch-in
point