Creating a tempo map
13
Song management
149
AW1600 Owner’s Manual
The “tempo map” contains data to change the tempo or time signature at the beginning of the
song or at any measure or beat within the song. The measure/beat display counter, the Quick
Loop Sampler, the internal metronome, and the MIDI clock data generated within the AW1600
are all based on this tempo map.
The AW1600’s tempo map can also record data to switch scenes (→ p. 73) or Pad sample banks
(→ p. 111). You can use this to switch scenes as the song progresses, or to switch the sounds
that are played by the Quick Loop Sampler.
When you create a new song, the following tempo map
event will be input at the beginning of the tempo map (the
first beat of the first measure).
• Time signature: 4/4
•Tempo: 120.0
•Pad sample bank: Pad 1=A, Pad 2=A,
Pad 3=A, Pad 4=A
• Scene number: not assigned
Here’s how to edit the values of this tempo map event.
1
In the Work Navigate section, press the
[SONG] key.
The SONG screen will appear.
2
Repeatedly press the [SONG] key or hold
down the [SONG] key and use the CURSOR
[ ]/[ ] keys to access the TEMPO page.
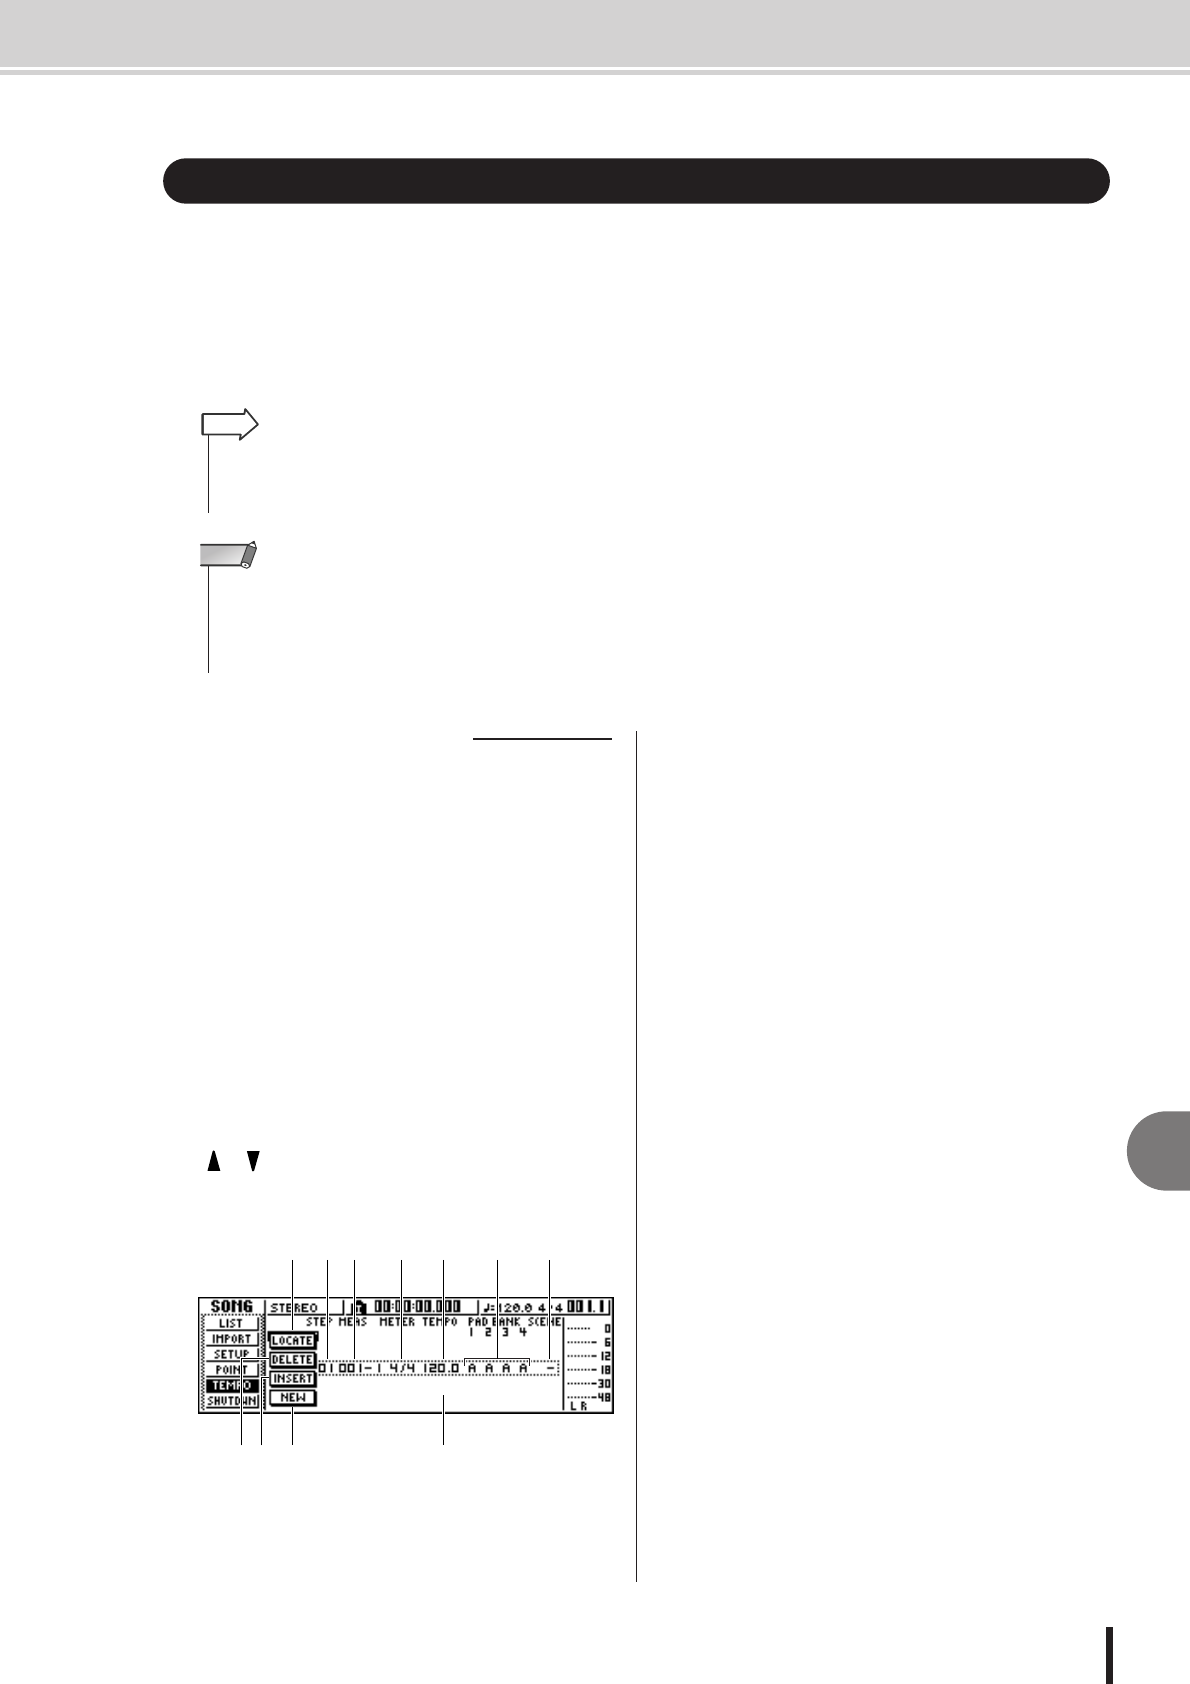
In this page you can input or edit tempo map events
for the current song.
This page contains the following items.
1 List
This area lists the tempo map events that have been
input for the current song. The line enclosed by a dot-
ted frame is the currently selected tempo map event.
B LOCATE button
By moving the cursor to this button and pressing the
[ENTER] key, you can move the song to the location
of the tempo map event currently selected in the list.
C DELETE button
To delete the tempo map event currently selected in
the list, move the cursor to this button and press the
[ENTER] key.
D INSERT button
To insert a blank event at the step preceding the tempo
map event currently selected in the list, move the cur-
sor to this button and press the [ENTER] key.
E NEW button
To create an event at the beginning of the measure fol-
lowing the last step, move the cursor to this button and
press the [ENTER] key.
F STEP
Indicates the step number of the tempo map event.
G MEAS
Indicates the location (measure/beat) at which the
tempo map event is input.
H METER
I TEMPO
J PAD BANK 1–4
K SCENE
These fields show the time signature, tempo, pad sam-
ple bank, and scene number of each tempo map event.
Creating a tempo map
• The Start point of the song corresponds to the starting location of the tempo map.
• The data (“tempo map events”) recorded in the tempo map will continue to apply until the
location at which the next event of the same type has been input.
HINT
• If you modify the tempo map after recording on an audio track, the measure/beat counter
display values will be affected. For this reason if you want to use MIDI clock to synchro-
nize with an external MIDI device, or if you want to control the song in measure units, you
should create the tempo map before you record. If you modify the tempo map after a
track has already been recorded, a popup window will ask you for confirmation.
NOTE
■ Editing a tempo map event
5 1
2 6 7 8 9 K
43
J


