Recording/playing a pad performance
11
Quick loop sampler
115
AW1600 Owner’s Manual
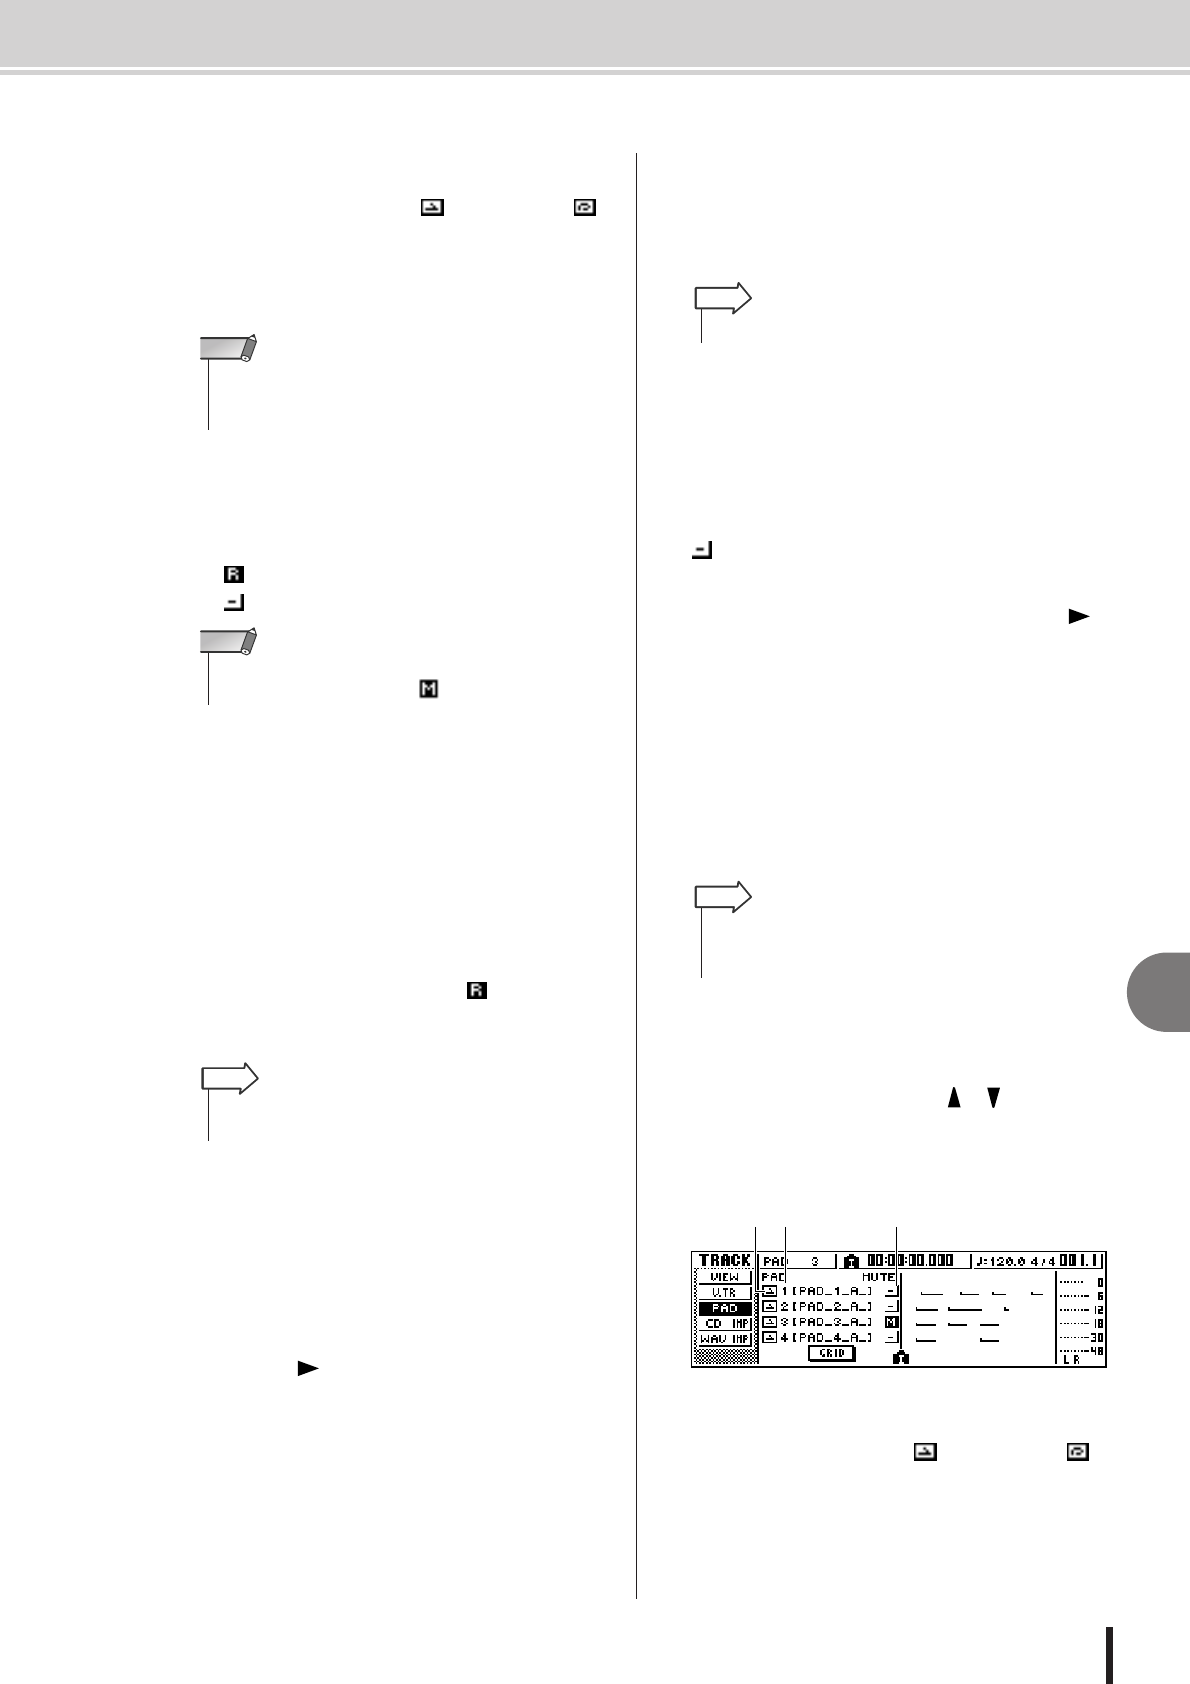
1 One Shot/Loop mode
An icon indicates whether the sample assigned to the
pad is set to One Shot mode ( ) or Loop mode ( ).
B Pad track number
This shows the pad track number 1–4. At the right is
shown the name of the sample for the sample bank
selected for that pad.
C Track status button
This indicates the operating state of the track. If you
move the cursor to this button and press the [ENTER]
key, the following two displays will alternate.
• .............The pad track can be recorded.
• .............The pad track can be played.
D Pad track view
In this area, the pad events recorded in the pad track
are shown as a bar graph. Locator positions are shown
as icons in the lower part of the screen.
E GRID button
Grid-records (step-records) pad performances in one-
measure increments (→ p. 116).
2
Move the cursor to the track status button,
and press the [ENTER] key several times to
switch the button display to (ready to
record). (You may select more than one pad
track.)
3
Use the track channel faders and the [STE-
REO] fader to set the audio tracks to an
appropriate level for monitoring.
4
Locate the song to the point at which you
want to begin recording.
5
To begin recording on the pad track, press
the PLAY [ ] key.
The recording will begin running, and pad event
recording will begin.
6
Play the pads while you listen to the audio
tracks play back.
Pad events will be recorded on the pad tracks. The pad
events that are recorded will appear in the pad track
view in realtime.
7
To stop recording, press the STOP [■] key.
The recorder will stop.
8
To play back the events that were recorded
on the pad tracks, move the cursor to the
track status button and press the [ENTER]
key several times to switch the display to
.
9
Locate to the point from which you want to
start playing back, and press the PLAY [ ]
key.
The pad track(s) will play back in synchronization
with the recorder. If you want to re-do the recording,
repeat steps 6–9.
It is also possible to re-record just a specific region of
a pad track. In this case, the newly recorded pad events
will overwrite the previously-recorded events. How-
ever, you need to be careful, since this will also affect
any overlapping pad events before or after the re-
recorded region.
10
If you want to mute a specific pad track,
press the Work Navigate section [TRACK]
key repeatedly or hold down the [TRACK]
key and use the CURSOR [ ]/[ ] keys to
access the PAD page of the TRACK screen.
In the PAD page of the TRACK screen you can switch
muting on/off for each pad track.
1 One Shot/Loop mode
An icon indicates whether the sample assigned to the
pad is set to One Shot mode ( ) or Loop mode ( ).
• Sample banks recorded in and played back with a song are
specified via the Tempo Map. Check the Tempo Map setup (
→
p. 149) when recording phrases played on the pads to a song.
NOTE
• Depending on the settings in the PAD page of the TRACK
screen, this may also indicate (muted).
NOTE
• The track status button can be switched only when the
recorder is stopped.
HINT
•Pad tracks record only the pad on/off status.
HINT
• The contents of a recorded pad track can be edited in a vari-
ety of ways using editing commands. For details, refer to
“What you can do using editing commands” (
→
p. 127).
HINT


