


AW1600 Owner’s Manual
Exporting WAV files and importing audio CD or WAV files
12
Track editing
136
In this section we’ll discuss transferring (exporting) audio data from the AW1600 tracks to a com-
puter in WAV file format, and transferring (importing) audio data in WAV file format from a com-
puter or CD into the AW1600 audio tracks or pads. It is also possible to directly access the internal
hard disk from a computer and edit the audio data using appropriate audio editor software.
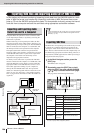
Computer WAV file operations can be carried out either
via an import/export folder, or by directly accessing the
audio track or pad data.
When transferring via an import/export folder, the files
must first be written to the folder named “Transport” pro-
vided specifically for import and export. The AW1600 can
then be connected to the computer via a USB cable, and
the Transport folder can be opened from the computer.
The required WAV files can then be copied from the
Transport folder to the computer, or WAV files to be used
in the AW1600 audio tracks or pads can be copied from
the computer to the folder from which they can be
imported to the appropriate locations.
To directly access audio track or pad data the AW1600
must be connected to the computer via a USB cable, after
which the WAV files can be directly accessed inside the
appropriate folders in the AW1600. You can use a wave-
form editor application running on your computer to
directly edit the AW1600 audio data. For operational
details see “Transferring WAV Files To and From a Com-
puter” on page 137, and refer to “Song Folder Organiza-
tion” on page 144 for information on how the folders are
organized.
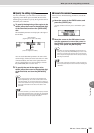
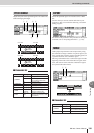
The WAV files corresponding to the audio tracks you want
to transfer to a computer must first be exported to the
“Transport” folder on the internal hard disk drive. Once
these files have been transferred to the computer they can
be edited using appropriate waveform editing software, or
imported into a DAW application for further processing or
integration with other projects.
1
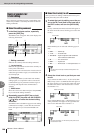
In the Work Navigate section, press the
[EDIT] key.
The EDIT screen will appear.
2
Repeatedly press the [EDIT] key or hold
down the [EDIT] key and use the CURSOR
[ ]/[ ] keys to access the EXPORT page.
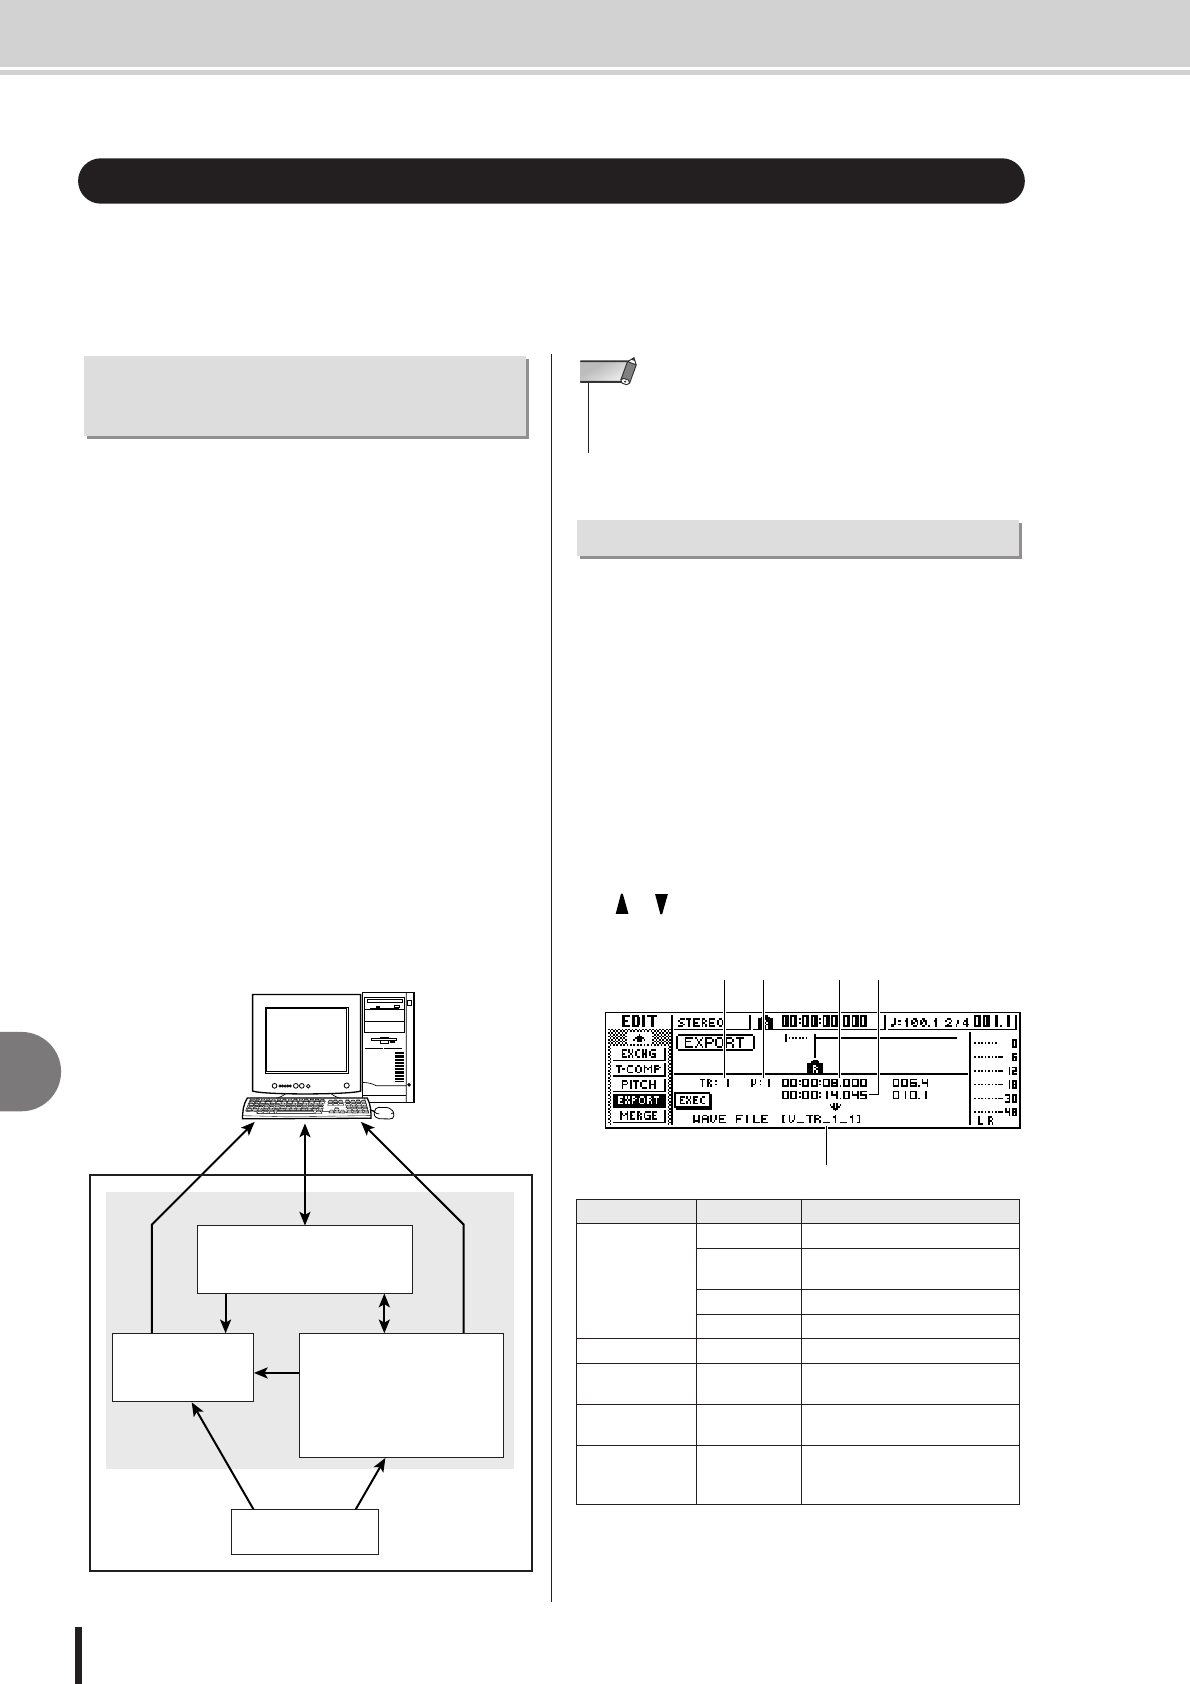
This page shows the following information.
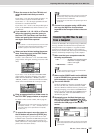
Exporting WAV files and importing audio CD or WAV files
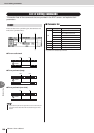
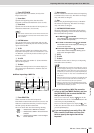
Importing and Exporting Audio
Data From and To a Computer
AW1600
WAV files via
USB cable
“Transport” folder
for WAV files
Audio tracks
Quick Loop
Sampler
(sample data)
CD-RW drive
Internal
hard disk
WAV files/
Audio CD
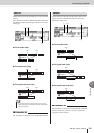
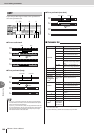
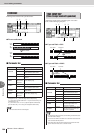
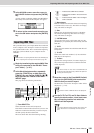
Parameter Range Explanation
1 From TR
1–16 A single audio track
1/2–15/16 A pair of adjacent odd-numbered/
even-numbered audio tracks
ST The stereo track
1–16 The current track of tracks 1–16
2 From V.TR 1–8 Virtual track number
3 From Start
Specify a point Beginning of the audio track
region that will be written
4 From End
Specify a point End of the audio track region that
will be written
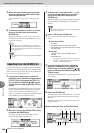
5 File Name
*1
*1. The name of the individual source track (or odd-numbered track in
the case of a pair) will be assigned by default.
Up to eight
alphanumeric
characters
Displays the name of the file to
which the data will be written
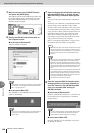
• Either the Windows XP SP1 or Mac OS X 10.3 or higher operating
system is required for computer WAV file management with the
AW1600 (
→
p. 137).
NOTE
Exporting WAV files
5
1 2 3 4