


AW1600 Owner’s Manual
Adjusting the input level
4
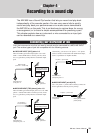
Recording to a sound clip
34
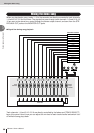
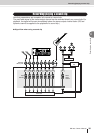
The signals that are input from MIC/LINE INPUT jacks 1–8 are sent to input channels 1–8
respectively. Here’s how to adjust the input level of the input channel, and make settings so that
you can hear the sound from your monitor system via the stereo bus.
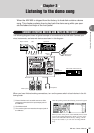
1
Lower the [STEREO] fader to the – ∞ posi-
tion. Also turn down the [GAIN] knob for the
MIC/LINE INPUT jack to which your instru-
ment/mic is connected.
2
Press and hold the [INPUT SEL] key for the
jack to which your instrument/mic is con-
nected.
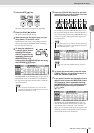
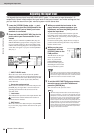
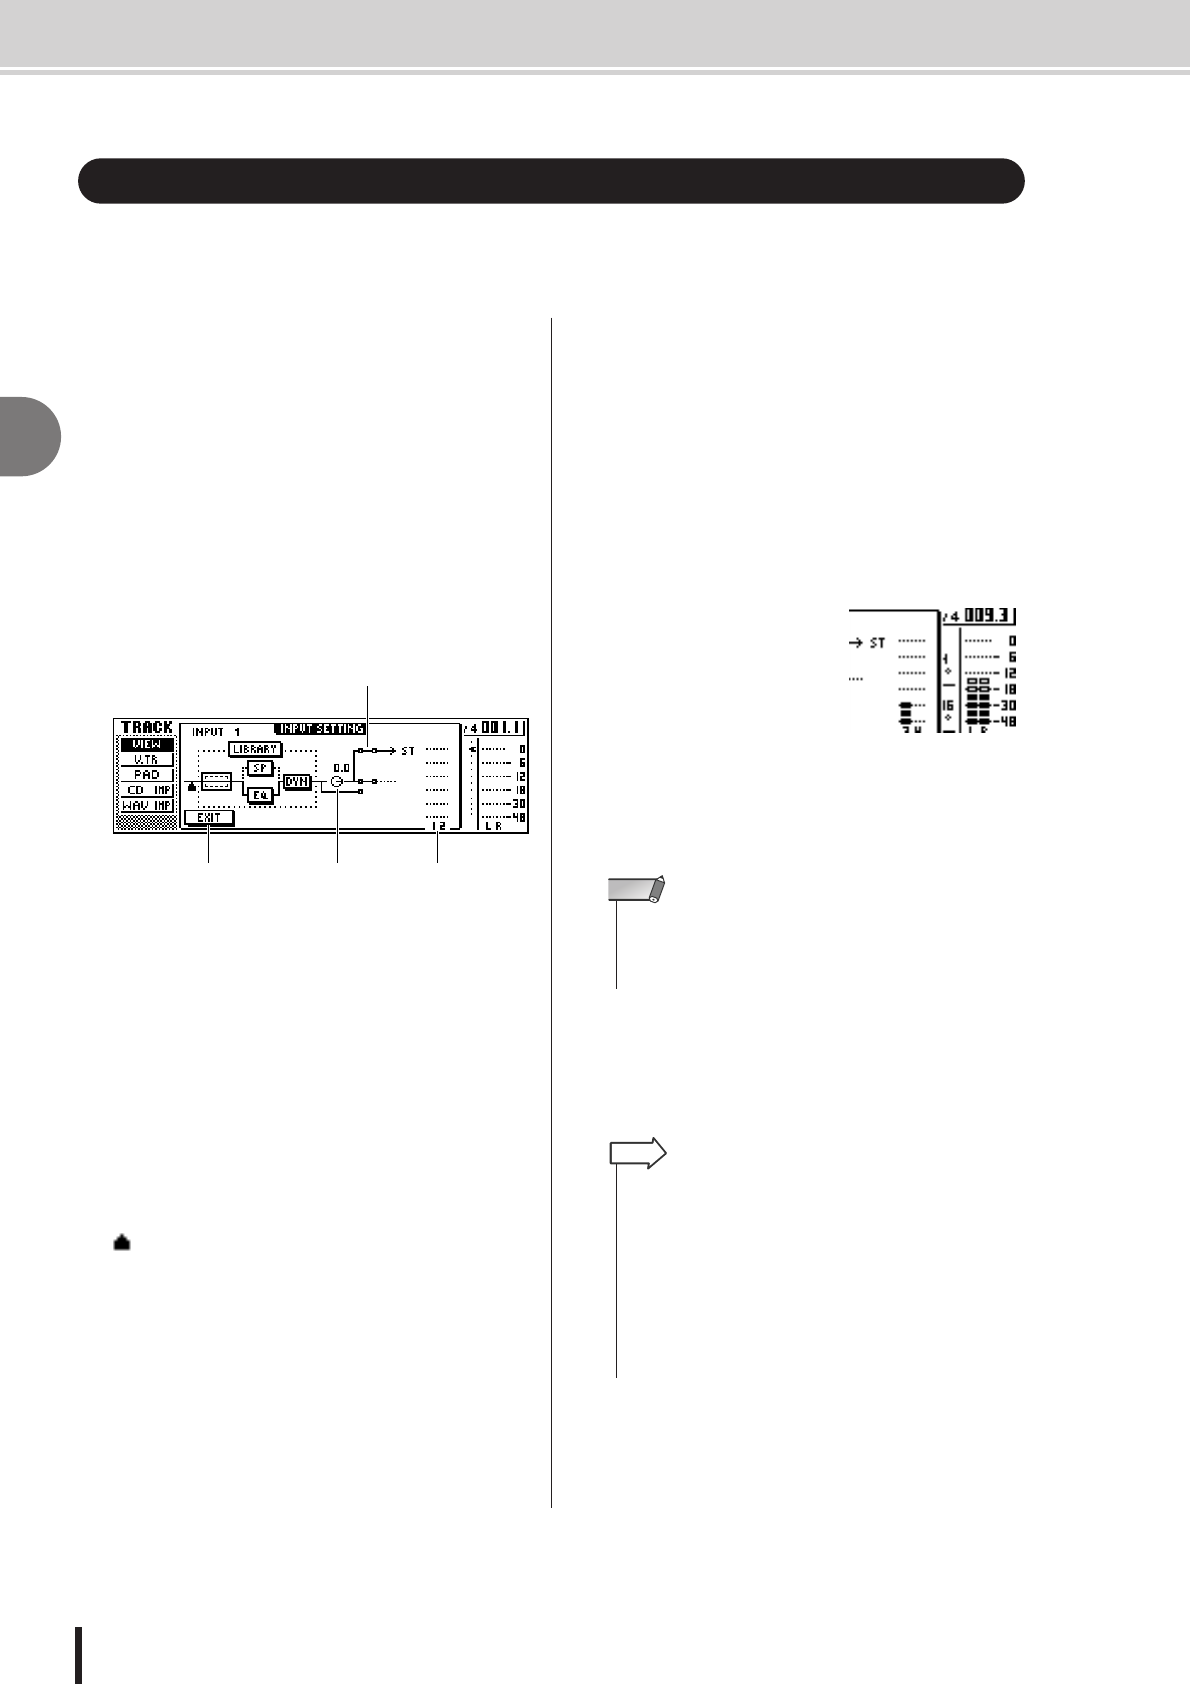
When you press and hold an [INPUT SEL] key, the
INPUT SETTING popup window will appear, allow-
ing you to make settings for the corresponding input
channel. The following diagram is an example of the
screen that will appear if you press and hold [INPUT
SEL] key 1.
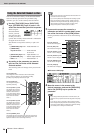
1 INPUT LEVEL knob
Move the cursor to this knob and turn the [DATA/
JOG] dial to adjust the level of the input channel. Nor-
mally you will leave this at the default setting of 0 dB.
The current level is shown by the value (dB units)
above the knob.
B Stereo bus assign switch
When you move the cursor to this knob and press the
[ENTER] key, the signal that is sent from the corre-
sponding input channel to the stereo bus will be
switched on/off.
C Level meter
This indicates the input level of the input channel. The
symbol in the window indicates the location at
which the level is detected.
D EXIT button
Move the cursor to this button and press the [ENTER]
key to close the popup window and return to the previ-
ous screen.
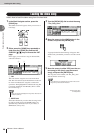
3
While you watch the level meter in the
popup window, produce sound on your
instrument, and turn the [GAIN] knob to
adjust the input level.
As you turn the [GAIN] knob toward the right, the
level meter in the popup window will move more
widely. (However, you will not yet hear anything from
your monitor system.)
For the best audio quality, adjust the level as high as
possible without allowing the meter to clip when the
loudest volume occurs.
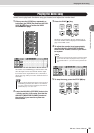
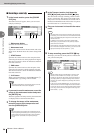
4
While you play your
instrument, raise the
[STEREO] fader to the
0 dB position.
The LR meters at the right
of the screen will now
move. As you turn the
[MONITOR/PHONES]
knob toward the right, you
should begin to hear sound
from your monitor system.
5
To exit the INPUT SETTING popup window,
move the cursor to the EXIT button and
press the [ENTER] key.
You will return to the previous screen.
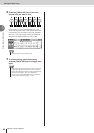
Adjusting the input level
2
4 1 3
• If you still do not hear sound after raising the [STEREO] fader,
check the INPUT SETTING popup window to make sure that
the stereo bus assign switch is turned on, and that the INPUT
LEVEL knob value has not been set below 0.0 dB.
NOTE
• The level settings described above are the basic settings for
any type of recording — not just for a sound clip. By using the
[GAIN] knob to raise the level as far as possible without allow-
ing distortion to occur, you can ensure that the input signal is
converted into digital form with the highest possible quality
before it is input to the mixer section. If the [GAIN] knob is not
raised sufficiently, you may not be taking full advantage of the
available dynamic range of the mixer section and recorder
section. When the input LEVEL knob and [STEREO] fader are
set to the 0 dB position, the input level will be output without
change to the recorder and monitor.
HINT