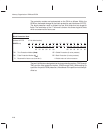
Timer Registers
2-28
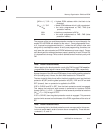
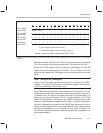
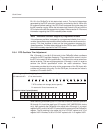
Selection between the timer-source options is made using two control bits in
the interrupt/general control register (IntGenCtrl). The IntGenCtrl is a 16-bit
port-addressed register at 0x38. Clearing bit 8 selects 1/2 MC as the source
for TIMER1. Setting bit 8 selects the reference oscillator as the source for TIM-
ER1. Similarly, clearing bit 9 of the IntGenCtrl selects 1/2 MC as the source for
TIMER2. Setting bit 9 selects the reference oscillator as the source for TIM-
ER2. The default value after a RESET LOW is zero: select 1/2 MC as the
source.
Each of the TIMERs counts from the value stored in its period register to
0x0000. These maximum and minimum counts each receive a full clock cycle
from the TIMER source. This means that the true period of the TIMER, from
one underflow event to the next, is the value stored in the period register plus
one:
Time duration btwn. underflows = (value in PRD + 1) ÷ (frequency of Timer
Source)
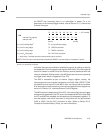
TIMER1 and TIMER2 must be enabled for use. This is done at the IntGenCtrl
register. Bit 10 of the IntGenCtrl is the enable bit for TIMER1, and bit 11 is the
enable bit for TIMER2. Setting the enable bit enables the TIMER, i.e., starts
count-down running. Clearing the enable bit disables the TIMER, i.e., stops
the count-down. The default setting after a RESET LOW is zero: both TIMERs
disabled. Refer to Section 3.4,
Interrupt/General Control Register
, for sum-
mary information regarding the IntGenCtrl.
The TIMER enable bits may be used to start and stop the TIMERs repeatedly
in software. Switching the enable bit from 1 to 0 stops the TIMER, but the
current value in the count-down register is retained. When the enable bit is
subsequently switched from 0 to 1, count-down then resumes from the held
value. The following procedure outlines one (of many) possible ways to start
the TIMERs. TIMER2 is given as an example:
1) Select the TIMER2 clock source: 1/2 MC or RTO/CRO (bit 9 of the Int-
GenCtrl, address 0x38).
2) Clear the TIMER2 enable (bit 11 in the IntGenCtrl).
3) Load the count-down register (TIM2) with the desired period value ahead-
of-time. This prepares TIM2 for counting, and also loads the period regis-
ter (PRD2) with its value.
4) Be sure the TIMER2 interrupt (INT2) has been enabled for service (set bit
2 of IntGenCtrl).
5) Flip the TIMER2 enable bit from 0 to 1, at the precise time you want count-
ing to begin.


