b. Run the process fluid through the sensor until the sensor temperature reaches
the normal process operating temperature.
c. Stop flow through the sensor by shutting the downstream valve, and then the
upstream valve if available.
d. Verify that the sensor is blocked in, that flow has stopped, and that the sensor is
completely full of process fluid.
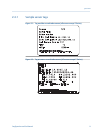
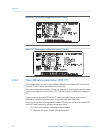
2. Choose ProLink > Calibration > Zero Verification and Calibration > Verify Zero and wait until
the procedure completes.
3. If the zero verification procedure fails:
a. Confirm that the sensor is completely blocked in, that flow has stopped, and that
the sensor is completely full of process fluid.
b. Verify that the process fluid is not flashing or condensing, and that it does not
contain particles that can settle out.
c. Repeat the zero verification procedure.
d. If it fails again, zero the flowmeter.
For instructions on zeroing the flowmeter, see Zero the flowmeter.
Postrequisites
Restore normal flow through the sensor by opening the valves.
2.6.2 Verify the zero using ProLink III
Verifying the zero helps you determine if the stored zero value is appropriate to your
installation, or if a field zero can improve measurement accuracy.
Important
In most cases, the factory zero is more accurate than the field zero. Do not zero the flowmeter unless
one of the following is true:
• The zero is required by site procedures.
• The stored zero value fails the zero verification procedure.
Prerequisites
ProLink III v1.0 with Patch Build 31, or a later release
Important
Do not verify the zero or zero the flowmeter if a high-severity alarm is active. Correct the problem,
then verify the zero or zero the flowmeter. You may verify the zero or zero the flowmeter if a low-
severity alarm is active.
Procedure
1. Prepare the flowmeter:
a. Allow the flowmeter to warm up for at least 20 minutes after applying power.
Quick start
Configuration and Use Manual 13


