


29—Expanding the VS-2480
384 www.rolandus.com Roland VS-2480 Owner’s Manual
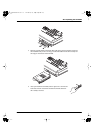
7. Reinstall the effect expansion board (VS8F-2) removed in Step 5. Insert the plastic
pins into the VS8F-2’s holes, making sure the board is securely fastened in place.
8. Use the screws that you removed in Step 3 to re-fasten the VS-2480’s bottom cover.
This completes the process of exchanging the lithium battery.
9. Connect the cables that you disconnected earlier.
10. Turn on the power, as described in “Powering Up” on Page 63.
11. Confirm that the message saying the lithium battery is depleted no longer appears
in the display.
12. Press EFFECT and verify that effect patch symbols for Effects 1 and 2 are visible. If
they’re not, re-install the VS8F-2 card you removed in Step 5 (see Page 379 for help).
13. Reset the VS-2480’s clock and calendar (Page 65).
Installing A New Internal Hard Drive
You can purchase and install a new internal hard drive for your VS-2480 in order to gain
additional storage space—you can swap internal hard drives as desired.The
requirements for a VS-2480 drive are noted on Page 85. Mount the new drive in the
required HPD35-K20 mounting kit according to the HPD35-K20’s instructions prior to
its installation in the VS-2480.
Installation Precautions
• Use the correct Phillips screwdriver—a Number 2 screwdriver—for the size of the
VS-2480’s screws. The head of the screw may become stripped if you use the wrong
screwdriver.
• To remove a screw, turn the screwdriver counter-clockwise. To tighten a screw, turn the
screwdriver clockwise.
• When installing a hard drive, remove only the specified screws.
• Be careful that the screws you remove do not drop into the interior of the
VS-2480.
• Re-attach the VS-2480’s front panel after the installation—do not leave its internal
components exposed.
• Do not touch any printed circuit pathways or connection terminals.
• Be careful not to cut your hand on the edge of the installation bay.
• After you’ve installed the hard drive, double-check your work.
Installation Procedure
1. Power down the VS-2480 (Page 80) and all connected devices, and disconnect all
cables from the VS-2480.
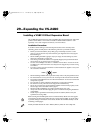
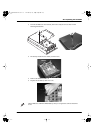
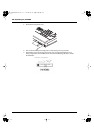
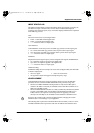
2. Remove the drive cover from the VS-2480, as shown in the following illustration.
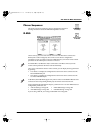
The VS-2480’s clock is powered by its battery. Changing the battery may stop the clock
or cause it to display the wrong time or date.
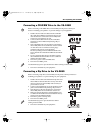
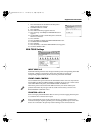
TightenLoosen
VS2480OMUS.book 384 ページ 2006年2月7日 火曜日 午後4時16分