


© 2003 Shure Incorporated DFR22 Software Guide 28
SECTION 4 Preset and Device Management
In Design Mode after you create a preset, you can save it either to the computer, or to the device, depending on whether or
not you are connected to the DFR22. At any time, one and only one preset is active in the DFR22. This preset is referred to
as the live preset. When you are in Live Mode, the preset you are viewing or modifying is the current live preset. You can
save it to the PC at any time by clicking the [Save As] button on the control bar of the main window.
Preset Files
You can design an entire library of presets with the DFR22 software without being connected to the device. Presets saved
to PC can be later recalled, revised, and then sent to the device. They are saved with a “.d22” file extension.
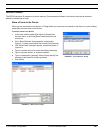
Saving a New Preset to Your Computer
If you are not connected to the device, you will be saving each new preset to the computer.
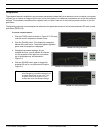
To save a new preset to the computer:
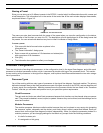
1. In the main window, select [File>Save As] from the main menu or click the [Save As] button on the
control bar.
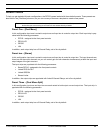
2. The “Save As” dialog will appear.
3. Navigate to the drive and directory location for the new file.
4. Type in a file name and, optionally, a description.
5. Click [Save].
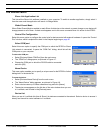
Revising Preset Files
When you make changes to an existing preset, you can either save it to PC with a different file name, or overwrite
the previous version.
To revise a preset stored on the computer:
1. In the main window, select [File>Open File] from the main menu or click the [Open] button on the control bar.
2. The “Open” dialog will appear.
3. Navigate to the drive and directory location of the preset file you wish to open.
4. Click on the file to select it, then click the [Open] button.
5. Make the necessary changes.
6. Select [File>Save As] from the main menu or click the [Save As] button on the control bar.
7. The “Save As” dialog will appear.
8. Click on the original file name to select it, then click [Save].
9. A dialog box will appear that prompts you to verify that you want to overwrite the previous preset file.
10. Click [Yes] to overwrite the file.
Note: The first fifteen characters of the file name and the first 80 characters of the description
appear in the information box on the control bar.