Chapter5—Recording on the AW4416
76 — Operation Guide
3. Move the cursor to the YES button to save the current song, or to the
NO button if you do not wish to save it. Then press the [ENTER] key.
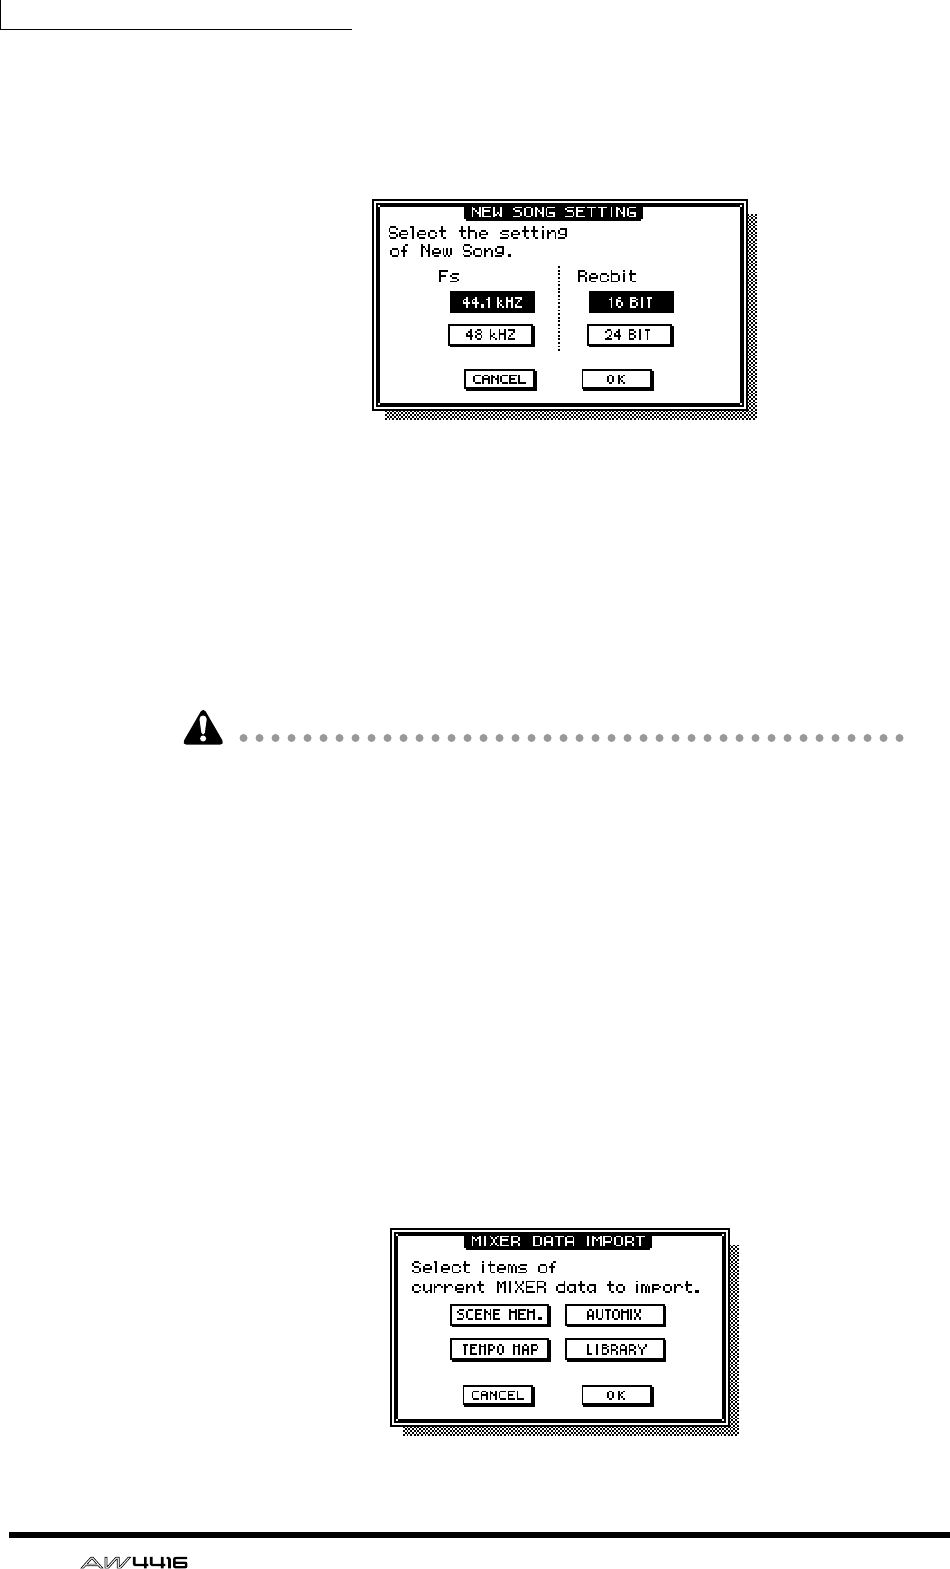
The NEW SONG SETTING popup window will appear. In this popup window
you can specify the basic settings for the new song.
❍ Fs
This is the sampling frequency at which the input signals are converted into digi-
tal form. Move the cursor to either the 44.1 kHz or 48 kHz button, and press the
[ENTER] key to make your selection.
❍ Recbit
This is the number of quantization bits for the audio data recorded on the hard
disk. Move the cursor to either 16 BIT or 24 BIT, and press the [ENTER] key to
make your selection.
• It is not possible to change the sampling frequency or quantization after creat-
ing a song.
• The number of tracks that can be simultaneously played or recorded will
depend on the specified quantization.
• If you intend to use a CD-RW drive to create an audio CD of your song when it
is completed, you must select 44.1 kHz as the sampling frequency. A song
with a sampling frequency of 48 kHz cannot be recorded on an audio CD.
4. After you have selected the sampling frequency and the quantization,
move the cursor to the OK button and press the [ENTER] key.
If you selected 48 kHz as the sampling frequency, the display will indicate “Not
for Audio CD -48 kHz- ARE YOU SURE?”, warning you that an audio CD cannot
be produced from this song. Move the cursor to either the OK button or the CAN-
CEL button, and press the [ENTER] key.
The MIXER DATA IMPORT popup window will appear. This popup window
allows you to import mixer data from an existing song. For this example, it is not
necessary to make any settings.
