


Chapter5—Recording on the AW4416
88 — Operation Guide
Assign the signal to a bus
Here we will make settings so that the electric bass signal being input from input
channel 8 will be sent to recorder track 3 via bus 3.
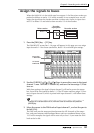
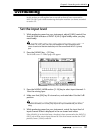
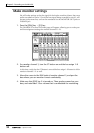
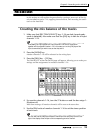
1. Press the [VIEW] key → [F1] key.
The VIEW screen CH View page will appear. The CH View page shows all mix
parameters of the currently selected channel. (Major parameters can also be
operated here.) It is convenient to use this page when you wish to control all the
mix parameters of a specific channel.
In the preceding section “Recording the first track,” we used the PAN/ROUTE
screen to set bus assignments and pan for multiple channels at once. Here, how-
ever, we are going to use the VIEW screen CH View page to perform the same
operations.
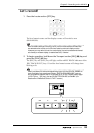
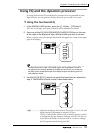
2. In the MIXING LAYER section, press the [1–16] key → [SEL] key 8.
On the AW4416, you select the channel to be controlled by selecting a mixing
layer in the MIXING LAYER section, and then pressing a [SEL] key to select a
channel. When you are using the CH View page, the currently selected channel
will be shown in the upper left of the display. The corresponding [SEL] key will
also light.
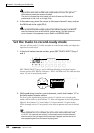
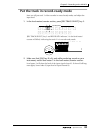
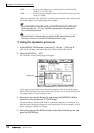
3. Move the cursor to the PAN/ROUTE area. Turn the ST button off and the
bus assign 3 button on.
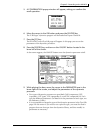
4. Make sure that the PAN/ROUTE area PAN knob is positioned in the cen-
ter (CENTER).
With these settings, the signal of input channel 8 will no longer be sent to the ste-
reo bus, but will be sent to bus 3 instead.
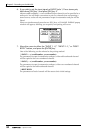
Note that the level of a channel that is not paired will rise 3 dB when the PAN
knob is positioned at full left (L16) or full right (R16).
ST button
Bus assign
1–8 buttons
PAN knob
Selected
channel