


EDIT screen
110 — Reference Guide
• CD-DA data can be imported only into
songs whose sampling frequency is
44.1 kHz. If the current song has a sampling
frequency of 48 kHz, a message of “Current
Song is 48 (kHz) Fs Type” will appear, and
this page cannot be used.
• The keys of the transport section will have
no effect while the CD Import page is dis-
played.
If a “Prohibit CD Import!” message is dis-
played and the import cannot be executed,
access the UTILITY screen Prefer.2 page, and
after reading the warning regarding copy-
right, switch the CD/DAT DIGITAL REC “DIS-
ABLE” button to “ENABLE.”
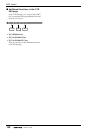
■ Additional functions in the CD
Import page
In the CD Import page you can press the [SHIFT]
key to assign the following additional functions to
the [F1]–[F2] keys.
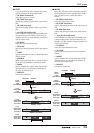
• [F1] (CD LOAD) key
Close the tray of the CD-RW drive.
• [F2] (CD UNLOAD) key
Eject the tray of the CD-RW drive.
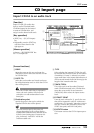
● Importing CD-DA data into a
track
[Procedure]
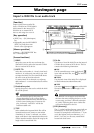
1. Access the EDIT screen CD Import page,
and press the [SHIFT] key + [F2] (CD
UNLOAD) key.
The CD-RW drive tray will be ejected.
2. Place the audio CD or mixed-mode CD-
ROM on the tray, and press the [SHIFT]
key + [F1] (CD LOAD) key.
The CD-RW drive tray will close, and the disc
will be inserted.
3. Move the cursor to the DRIVE area, use
the [DATA/JOG] dial to select the SCSI ID
of the CD-RW drive, and press the
[ENTER] key.
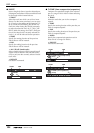
The AW4416 will detect the inserted CD, and a
screen like the following will appear.
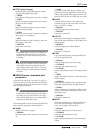
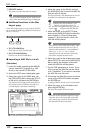
4. Move the cursor to PASTE TO, and use the
[DATA/JOG] dial to specify the track num-
ber and virtual track number of the track
in which the CD-DA data will be placed.
In this page, identically-numbered virtual tracks
of adjacent odd-numbered/even-numbered
tracks will be selected (e.g., 1–1/2–1, 1–2/2–2),
and the L/R channels of the CD-DA data will be
assigned to these tracks.
5. Move the cursor to the destination point
area, and use the [DATA/JOG] dial to spec-
ify the location in the track where the CD-
DA audio data will be placed.
6. Move the cursor to the TYPE area. Select
“Insert” if you want the CD-DA audio data
to be inserted into the track, or “Over-
Write” if you want the data to be overwrit-
ten onto the track.
7. To execute the Import operation, move
the cursor to the EXECUTE button and
press the [ENTER] key.
A message will ask you to confirm.
8. Move the cursor to the OK button and
press the [ENTER] key.
The CD-DA import will be executed.
Execution of this operation will require more
time than the actual data length. Also, execu-
tion of the operation cannot be halted once it
has begun.
F1 F2