


Chapter7—Punch-in/out
132 — Operation Guide
4. If you wish to rehearse once again, press the [PLAY] key once again while
the transport is stopped.
Tip!
If you press the [REHEARSAL] key before or during rehearsal, operations
1
–
4
of
step 3 will continue repeating. (In this case, the A-B Repeat function will be
defeated.) To stop repeating the rehearsal, press the [REPEAT] key once again, or
press the [STOP] key.
❒ Recording with auto punch-in/out
5. To actually record using auto punch-in/out, stop the transport, and hold
down the [REC] key and press the [PLAY] key.
1 The [PLAY] key will light and the [REC] key will blink, then playback will
begin from the pre-roll point.
B When you reach the auto punch-in point, the [REC] key will light, and
recording will begin on the track you selected in step 1 (punch-in).
C When you reach the auto punch-out point, the [REC] key will blink, recording
will end, and playback will resume (punch-out).
D When you reach the post-roll point, the transport will locate to the pre-roll
point and stop.
6. If you wish to listen to the recorded result, press the [AUTO PUNCH] key
to make it go dark, and then press the [PLAY] key.
Tip!
If you make a mistake during auto punch-in/out recording, stop the transport and
press the [UNDO] key to cancel the previous recording and return the data to the
state before recording.
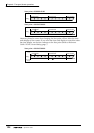
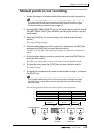
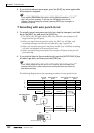
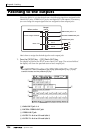
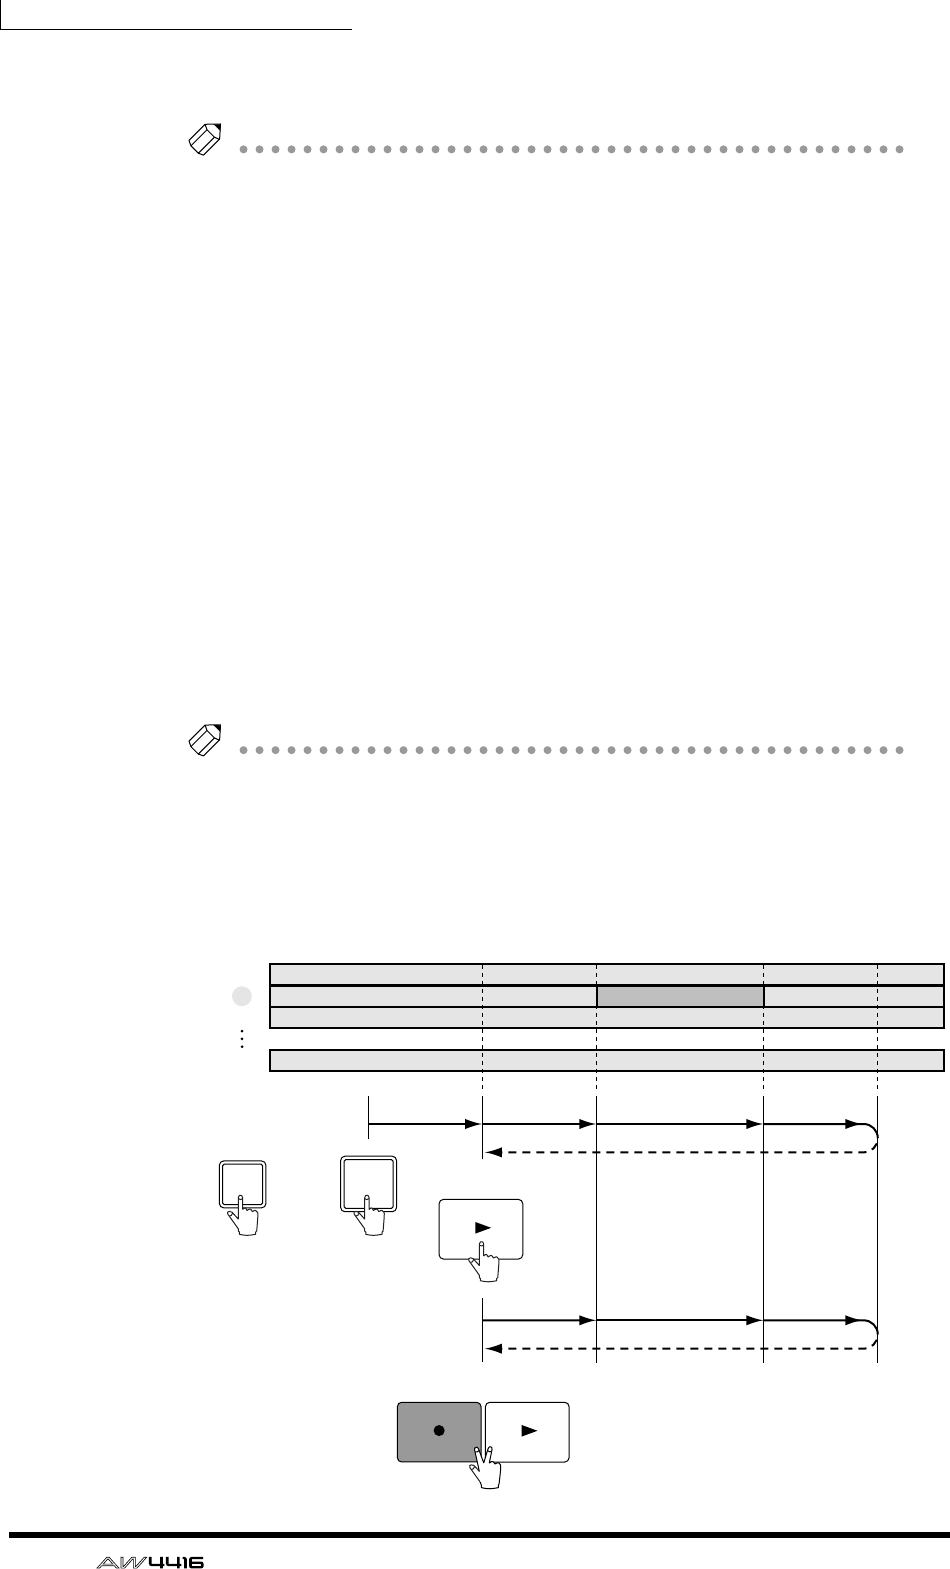
The following diagram shows the operating procedure for auto punch-in/out.
PLAY
PLAY
REC
REC TRACK SELECT
2
AUTO
PUNCH
1
2
3
16
Rehearsal
Rehearsal
Actual recording
PlaybackPlayback
Recording PlaybackPlayback
Locate
Auto punch-in
point
Pre-roll
point
Post-roll
point
Auto punch-out
point