


SINGLE MODE
Page 30 CD3000XL OperatorÕs Manual
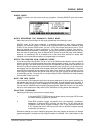
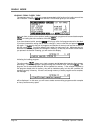
SCROLLING THROUGH MARKED FILES
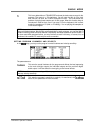
The key allows you to sequentially step through marked files. Each press of this key will
take you to each marked file in turn. If no files are marked, you will receive this prompt:
NOTES ON SAVING SETUPS
If you have edited any samples or programs, when you save a setup, you are not actually saving
the changes at this point. This must be done in the main DISK mode. If you edit any samples,
before you power down or clear and load any new material, you must first go to the DISK mode
and save the changes. When you press SAVE, you will be asked if you want to save all the
samples or want to save just the changes. If you edit any programs, you must save them -
programs do not have special ‘changes only’ format but must be saved as programs. Because
they take up so little disk space and load within a fraction of a second, even from floppy, this is
not a problem or an oversight on our part!! When you subsequently load via a setup, the
original samples and programs will be loaded from the CDROM followed by the changes and
the programs off floppy. Please refer to the DISK section for more information on this.
USING SETUPS
The setups on the CD3000XL are designed to allow you edit samples and save those changes
economically to floppy disk as well as allowing you to customise the way you load material from
the CD-ROM . One example of uses for this would be live on-stage where you could program all
your setups for the night ahead of time, load them before the concert and then load sounds
from the CD-ROM by way of the setups (typically using MIDI program change commands).
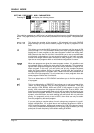
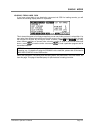
To do this, the method would be to load in the first sounds you require, edit them if you wish
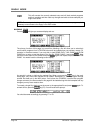
and, when everything is as you want it, create a new SETUP file - go to the main SETUP page,
press to create a new setup file and give it an appropriate name. Now go to the EDIT
page and mark the file(s) you want to save in that setup using the key. You can check
you have the correct files using the key. When you are happy with everything, assuming
a suitable formatted floppy is in the drive, press SAVE to save your setup to floppy disk. You
should now go to the DISK mode and save the changes you made to the samples and the
programs (if any) to the same floppy disk.
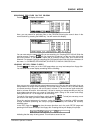
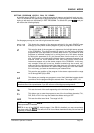
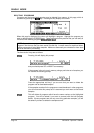
To load the material back at a later date, power up the CD3000, go to the SETUP page and
press to take you to the LOAD page. You may now either specifically select the setup file
you wish or load all of them. In the main setup page, select the appropriate setup file and press
. This will find and load the original data from the CD-ROM and will then go to the floppy to
load the sample changes followed by the programs. Alternatively, assuming you have set it
accordingly, you may do this remotely from a MIDI program change.
NOTE 1: Because the data on the floppy is associated with data on a specific CD-ROM, you
must have the correct CD-ROM in the disc compartment when you try to load via a setup. If the
wrong CD-ROM is inserted, nothing will happen. As a result, it is recommended to keep one
floppy associated with its own CD-ROM and use them together. Although one floppy can hold
the data for more than one CD-ROM, it will be easier to keep track of things if each CD-ROM you
own has its own unique floppy disk associated with it.
NOTE 2: If an S1000 or S1100 CD-ROM is inserted into the disc compartment, although it is
possible to load files from it, the SETUP functions described above cannot be used with it. As a
result, the all the SETUP pages are removed as soon as the CD3000XL ‘senses’ the presence
of an S1000 or S1100 CD-ROM.