


SAMPLE
CD3000XL OperatorÕs Manual Page 125
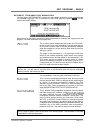
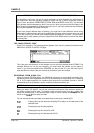
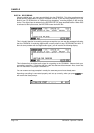
This field allows you to select an input source. Options are ANALOG (INPUT
L/MONO, R connector on the rear panel), DIGITAL (DIGITAL IN connector on
the rear panel), and CD-AUDIO (internal CD-ROM drive). If you have selected
CD-AUDIO, insert an audio CD, not a CD-ROM, in the drive.
NOTE: The internal CD-ROM drive of the CD3000XL converts digital data of the loaded audio
CD into analogue data prior to playback. If you wish to record samples from the CD digitally,
connect the digital out terminal of the external device to the DIGITAL IN connector of the
CD3000XL. In this case, select DIGITAL as input source.
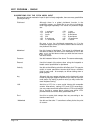
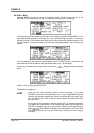
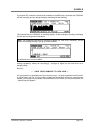
This field allows you to select how recording will be initiated. The choices are:
INPUT LEVEL - this selects that recording will begin once a threshold level has
been exceeded. This is the default setting and one that is used by most
people. The threshold is set in the REC page.
MIDI NOTE - this selects that recording will begin when any MIDI note is
received. This is very useful when sampling a sound from a synth because the
note-on that makes the sound can also be used to start the recording.
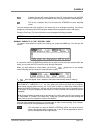
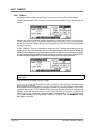
When CD-AUDIO is selected for an input source, this parameter determines
whether or not pause mode is automatically engaged at the end of recording.
Options are AUTO and MANUAL.
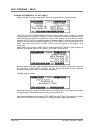
This is not accessible but merely shows the amount of free memory. The
percentage of free memory is also displayed. The ‘F’ is in parentheses
because this field is shown in other pages of the SAMPLE mode as an
abbreviation.
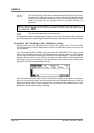
This sets the bandwidth for the recording you are about to make and you have
two choices - 20kHz and 10kHz. Don’t be put off by the 10kHz option because
you can make very respectable recordings at this sample rate. It is not possible
to sample at any other rates but, if you wish, you may sample at 44.1kHz (i.e.
20kHz) and then re-sample it later to, say, 15kHz to save on memory space.
This sets the base pitch for the sound you are about to sample. At this point,
you don’t have to worry too much about this because you can set this
parameter in the REC page and you can re-tune your sample in the SAMPLE
EDIT mode later if necessary.
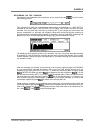
Here you may set the length of the sample you are about to make. The range is
limited only by available memory space and whether the sample is stereo or
mono. Again, you needn’t worry about setting this field now as you can set it
later in REC if you prefer. As you set this field, the fields below show you how
much memory the new sample will take.
If you are not sure how long to set this, it is best to set it longer than you think
you need. Samples can always be trimmed and edited later.
Once you have set the parameters as you like on this setup page, you don’t have to worry
about them for the rest of the sampling session as these are retained from sample to sample as
you record them.