133
Chapter 8 Customizing the AV Source SettingAV
❒ When video is viewed in a wide screen mode
that does not match its original aspect ratio, it
may appear differently.
❒ Remember that use of this system for com-
mercial or public viewing purposes may con-
stitute an infringement on the author’s rights
protected by the Copyright Law.
❒ Video will appear grainy when viewed in Cin-
ema or Zoom mode.
❒ The navigation map and the rear view camera
picture is always Full.
Operating the Picture Adjust-
ment
• For safety reasons, you cannot use some of
these navigation functions while your
vehicle is in motion. To enable these func-
tions, you must stop in a safe place and
apply the parking brake (see page 13 for
details).
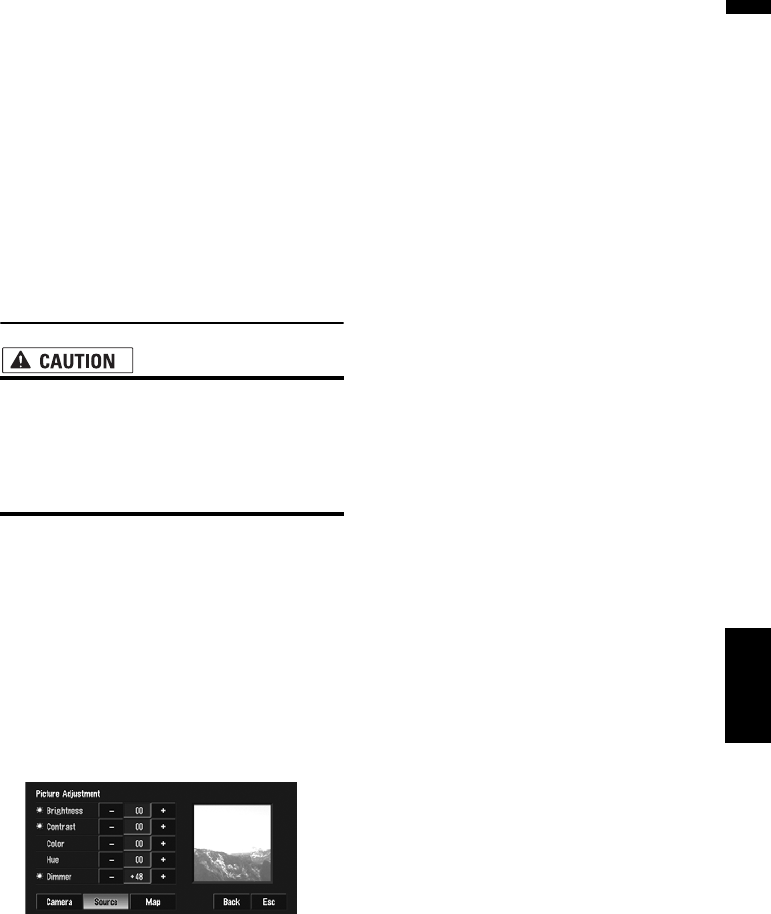
1 Touch “V.Adjust” in the System menu.
2 Select the desired item you want to
adjust.
• Camera — Switch to the picture adjust-
ment display for the rear view camera
• Source — Switch to the picture adjust-
ment display for the AV source screen
• Map — Switch to the picture adjustment
display for the map screen
❒ When the display is already on the screen,
a message to that effect appears.
Brightness — Adjust the black intensity
Contrast — Adjust the contrast
Color — Adjust the color saturation
Hue — Adjust the tone of color (red is empha-
sized or green is emphasized)
Dimmer — Adjust the brightness of display
❒ The adjustments of Brightness, Contrast
and Dimmer are stored separately when
your vehicle’s headlights are off (daytime)
and when your vehicle’s headlight are on
(nighttime). These are switched automati-
cally depending on the vehicle’s head-
lights are on or off.
❒ You cannot adjust Color and Hue for the
source without a video and navigation map
display.
❒ If you select “Source”, sources without
video and sources with video are saved
separately in the memory.
❒ The picture adjustment may not be able to
be used with some rear view cameras.
❒ The same setting is selected for the normal
background picture and the navigation
map display.
❒ Because of the LCD screen characteris-
tics, you may not be able to adjust the
screen at low temperatures.
3 Touch “+” or “–” to adjust the selected
item.
Each time you touch “+” or “–” increases or
decreases the level of selected item. +24 to
–24 is displayed as the level is increased or
decreased.
❒ Dimmer can be adjusted in the range of
+1 to +48.
4 Touch “ESC” to return to the previous
screen.
Switching the backlight On/Off
By turning off the backlight of the LCD screen,
you can turn off the screen display without turn-
ing off the voice guidance.
1 Touch “Screen Off” in the System menu.
The backlight turns off, and the screen turns
off.
❒ To turn on the backlight, touch the screen
again or press the MAP button.
Operating the Picture Adjustment
