92 C1624M-F (9/07)
To create a new camera group:
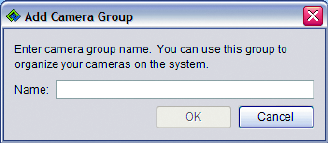
a. Click New. A dialog box appears.
b. Enter a new camera group name.
c. Click OK to save the new group name or click Cancel to exit without saving.
d. The new camera group name appears in the list, already checked to apply to the currently active camera.
Figure 109. Adding a New Camera Group
To delete a camera group, highlight the group name and then click Remove.
Or do the following:
a. Click Add. The Set Camera Groups dialog box appears.
b. Click the check boxes of camera groups you wish to remove from the camera. If there is a check in the box, the group is assigned; if
there is no check, the group is not assigned.
The actions described above delete only that camera from the camera groups. To delete a group entirely from the system:
a. Click Add. The Set Camera Groups dialog box appears.
b. Highlight the name of the group you want to delete, and then click Delete. Or right-click the name and then select Delete from the
shortcut menu.
c. A dialog box appears, asking you to confirm the deletion.
d. Click Yes to confirm or No to cancel.
To assign a new name to a camera group:
a. Click Add. The Set Camera Groups dialog appears.
b. Highlight the name of the group you want to rename, and then click the Rename button. Or right-click the name and then select
Rename from the shortcut menu.
c. The text background turns blue and the cursor appears at the end of the name. Press the Backspace or Delete key to delete the
existing name, or position your cursor within the name to edit it.
d. Click anywhere else in the interface to exit renaming mode. A dialog box appears, asking you to confirm the group’s renaming.
e. Click Yes to confirm or No to cancel.
8. Edit the audio associations. You might have several cameras monitoring an area, but only a few of them supports audio feeds. You can
associate, or link, several cameras together so that the audio feed from one camera is included with video recorded from the other
cameras.
To associate an audio feed from one with several cameras:
a. Click Add. Refer to Figure 107. The Audio Associations dialog box appears.
b. Select each camera that you want to associate with the current camera. To expand the list, click the plus sign (+) next to an entry.
c. Click OK to save your changes, or click Cancel to exit without saving.


