76 C1624M-F (9/07)
3. Edit the export settings of the clip you are about to export if needed:
• Start and stop date and time
• File format (default is Pelco Video File)
• Directory location (default is C:\Program Files\Pelco\Endura\GUI\Export on the Endura workstation hard drive)
• Include the Endura Player (default is to include the Endura Player when exporting video as a Pelco Video File)
To change the default export settings go to the Users tab of the Setup screen. Refer to Managing Users on page 121 for more information.
4. Review the Export Statistics to be sure the video clip you have selected is not too large for the intended destination.
NOTE: If you change the date and time range or export format, the duration and estimated file size automatically update.
5. Click the Start Export button to export the clip, or click Cancel to exit without exporting. The video clip is sent to the Export Manager and is
exported in the background while you continue with other tasks. To track the progress of the video, open the Export Manager. Refer to
Managing Exported Video on page 77 for more information.
Refer to Using the Endura Player on page 154 for information on opening exported files and playing them back.
EXPORTING SNAPSHOTS
To take a snapshot of live video or of recorded video being played back:
1. If you do not want your video saved to the default export location (C:\Program Files\Pelco\Endura\GUI\Images) and default video format
(Portable Network Graphics files [*.png]), go to the Users tab of the Setup screen to change the default settings. Refer to Managing Users
on page 121 for more information.
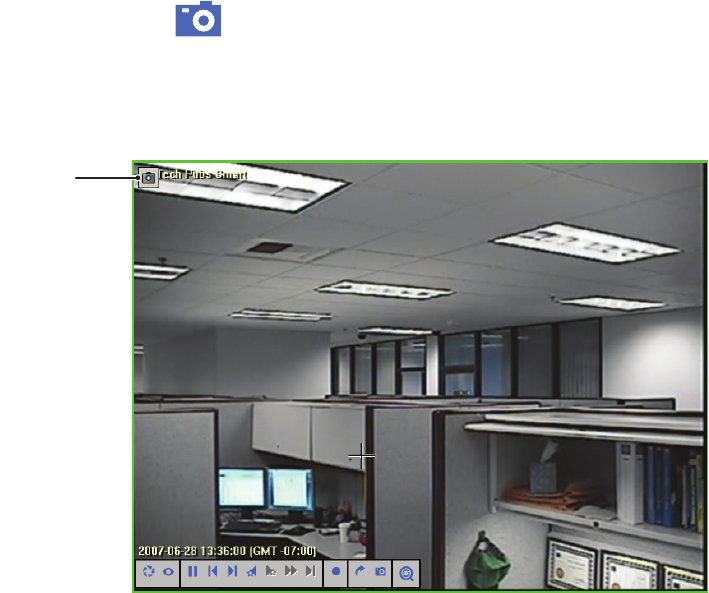
2. Position your mouse in the video pane displaying the video you want to capture. The video controls should appear at the bottom of the pane.
3. Click the Snapshot button . A camera icon appears momentarily in the upper-left corner to confirm that the snapshot has been
saved.
4. The file is saved to your default Snapshot location in your default file format. From this location, you can then open and print the image, or
burn it to a CD or DVD using the Nero StartSmart software installed on your Endura workstation. Refer to the Nero help viewer for detailed
instructions on burning CDs and DVDs.
Figure 94. Capturing a Snapshot
SNAPSHOT
INDICATOR
