106 C1624M-F (9/07)
NETWORK VIDEO RECORDERS
An Endura network video recorder (NVR) records MPEG-4 and digital audio streams. The NVR comes in two versions (NVR5124 and NVR5148).
The number of digital input streams range up to 48 in the high-end unit (NVR5148). The unit can also output from 4-32 digital streams depending
on the version. The NVR’s maximum storage capacity ranges from 1.5 to 4.8 TB. You can also add a Pelco-made storage expansion box (SEB5100)
to increase the storage capacity.
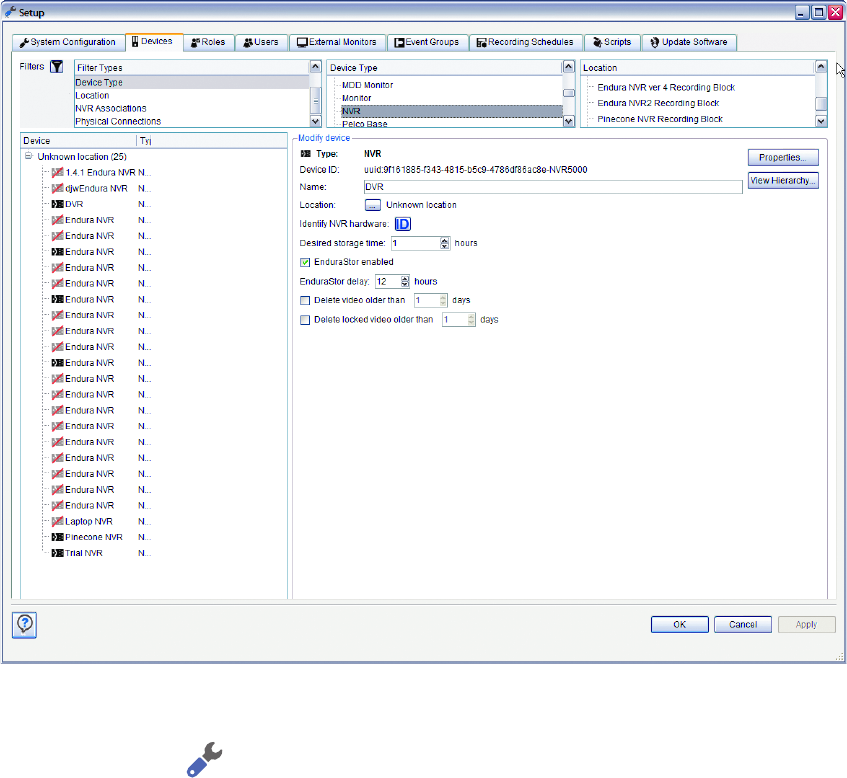
Figure 120. NVR Configuration
To configure an NVR:
1. Click the Setup button .
2. Click the Devices tab.
3. In the device tree, click the NVR you want to configure. The screen updates to display the current settings for that NVR.
4. Enter a user-friendly name for the NVR.
5. Assign a location to the NVR. Refer to Configuring Individual Devices on page 88.
6. Enter the desired storage time, in hours. This is the number of hours of storage you would like to retain on the NVR. If the NVR cannot
achieve the targeted number of hours, you will be alerted and instructed to adjust your system settings. The default value is 168 hours.
7. Click the check box to enable or disable EnduraStor
TM
, which helps maximize the storage capacity of the NVR by compressing older sections
of video. The default setting is disabled.
8. Set the EnduraStor delay. The delay is the number of days of stored video you want to retain at full size. Video recorded outside of this
delay window will be compressed to make room for newly recorded video. The default setting is 72 hours.
9. Select the check box to delete video older than a certain number of days, and then set the number of days for which video will be retained
before it is deleted. Only locked video is retained on the system even if it is older than the number of days you specify.
10. Click Apply to save the settings. Click OK to exit and save the settings (if not already saved through Apply). Click Cancel to exit without
saving the new settings.


