


2-20
Master and Slave Controllers
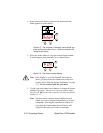
Studio Color LCD Controller
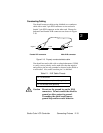
5. Connect other devices to the Studio Color fixtures as desired,
using the instructions in the documentation provided with
those devices.
6. Place a male 120 ohm terminator on the female Data Out
connector of the last device in the link. The procedure for
making a terminator can be found in the section titled
“Terminators” on page 2-16.
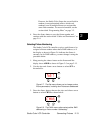
Master and Slave Controllers
Each controller supports up to 8 unique fixtures (8 fixtures
that can be programmed to operate independently of each
other). In order to expand your system to more than 8
independently-programmable fixtures, you can interconnect
master and slave controllers.
There is no limit to the number of slave controllers you can
have in your system.
Designating Master and Slave Controllers
The differences between master and slave controllers are
explained below:
•The master controller determines the modes of playback
for all controllers that are slaved to it. The master
controller sets all standby, advance and modulate
settings. Only the master controller (not any of the
slaves) communicates with a lighting console, if any.
Only one master controller is allowed per link.
•The slave (also called slaved) controllers retain their
programming and editing functions, but cannot play back
any programs. (Programs on the slaved controllers are
played back by the master controller.) The accessible
function keys on the slaved controllers are the power key
switch,
<Home>
,
<Select>
,
<Record>
,
<Erase>
, and all of
the Construct keys.