


6-22
Remote Preset Access
Studio Color LCD Controller
auto advance (page 4-18), audio 1 and 2 advance (page 6-27),
color modulate (page 6-27), and dim modulate (page 6-27) as
needed. These settings are stored with the preset.
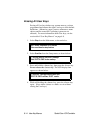
6. Convert the preset number you wish to use to a binary
number using Appendix A. Then enable all analog controller
channels corresponding to binary 1s and disable controller
channels corresponding to binary 0s.
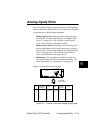
0V = Disabled
5V-10V = Enabled
Examples:
• Preset 1: preset 1 in binary is 1000000000. Enable
controller channel 1 but do not enable channels 2 through
10.
• Preset 948: preset 948 in binary is 0010110111. Enable
channels 3, 5, 6, 8, 9 and 10 but do not enable channels 1,
2, 4 or 7.
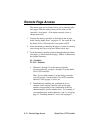
Analog controller channels 11 and 12 control blackout and
standby, as shown below:
• Channel 11 (blackout): closes all fixtures’ shutters but
wheels and effects continue to run.
• Channel 12 (standby): activating channel 12 when the
controller is in standby (Standby LED is ON) takes the
controller out of standby. Activating channel 12 when
the controller is not in standby (Standby LED is OFF) has
no effect. When the controller is in standby, all fixtures’
shutters close and any in-progress wheel changes stop
immediately. Controller pages continue to advance.
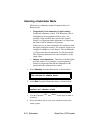
7. Press the
<Record>
key. The Select LED stops flashing and
one of the Preset LEDs on the front panel comes ON,
indicating that you recorded a preset. The “Preset Key”
column in Table A-1 shows which LED will be ON.
Note If enabling analog controller channels does not call up
presets in memory, make sure there are no submasters
assigned. See the section titled “Submasters” on page
6-23.