Basic Operation
RT-10
2-11
Note:
The trigger input switch setting does not take effect
until the RT-10 is power cycled with the front panel
On/Off button.
10.Trigger Input Connector
Allows the RT-10 to be controlled with an associated
component that includes a 12V DC trigger output connector,
such as the MC-12 or MC-8 Digital Controllers. All versions
include one trigger input connector labeled TRIGGER INPUT,
which is available on a removable terminal block.
To configure the RT-10 for trigger control:
1. Connect the trigger input connector on the RT-10 to a 12V
DC trigger output connector on an associated component
component.
2. Set the RT-10 trigger input switch (previous page) to ON.
3. Power cycle the RT-10 with the front panel On/Off button
(2-2).
The RT-10 will respond when standby mode is activated or
deactivated for the connected component. The RT-10 will not
respond to the remote control POWER button.
11.IR IN Connector
Provides input of infrared data from industry-standard infrared
distribution equipment. All models include one female 3.5mm
Tip/Ring/Sleeve connector labeled IR IN.
REAR PANEL CONNECTIONS
The RT-10 is manufactured for sale in several different countries.
Each version features a rear panel that includes connectors and
safety instructions appropriate to that particular region.
Note:
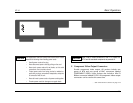
The rear panel shown on page 2-9 includes all
possible connectors. However, certain connectors are
not included on some versions. These instances are
noted in the rear panel connector descriptions that
begin on page 2-8.
All versions require at least one video and one audio connection.
These are the minimum connections required for playback.
However, it is recommended to configure a digital and an analog
audio connection for optimal performance. An analog audio
output connection is required for SACD playback and
recommended for DVD-A playback. All connections require
standard video and audio cables.
Video Connections
Note:
All video output connectors are active at all times
unless deactivated with the remote control VIDEO
ON/OFF button (2-15).
. . . Video Connections continues on page 2-12


