


Installation
36 Runco SC-30d/SC-35d Installation/Operation Manual
PRE
L
IMINAR
Y
3.8
System
Interconnections
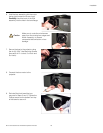
Proceed as follows to connect the SC-30d/SC-35d system components to each other
and to AC power.
When connecting your equipment:
• Turn off all equipment before making any connections.
• Use the correct signal cables for each source.
• For best performance and to minimize cable clutter, use high-quality cables that are
only as long as necessary to connect two devices. (Don’t use a 20-foot cable when a
6-foot cable will suffice.)
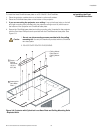
• Route all cables through the opening at the bottom of the projector.
• Ensure that the cables are securely connected. Tighten the thumbscrews on
connectors that have them.
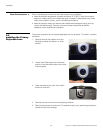
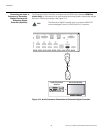
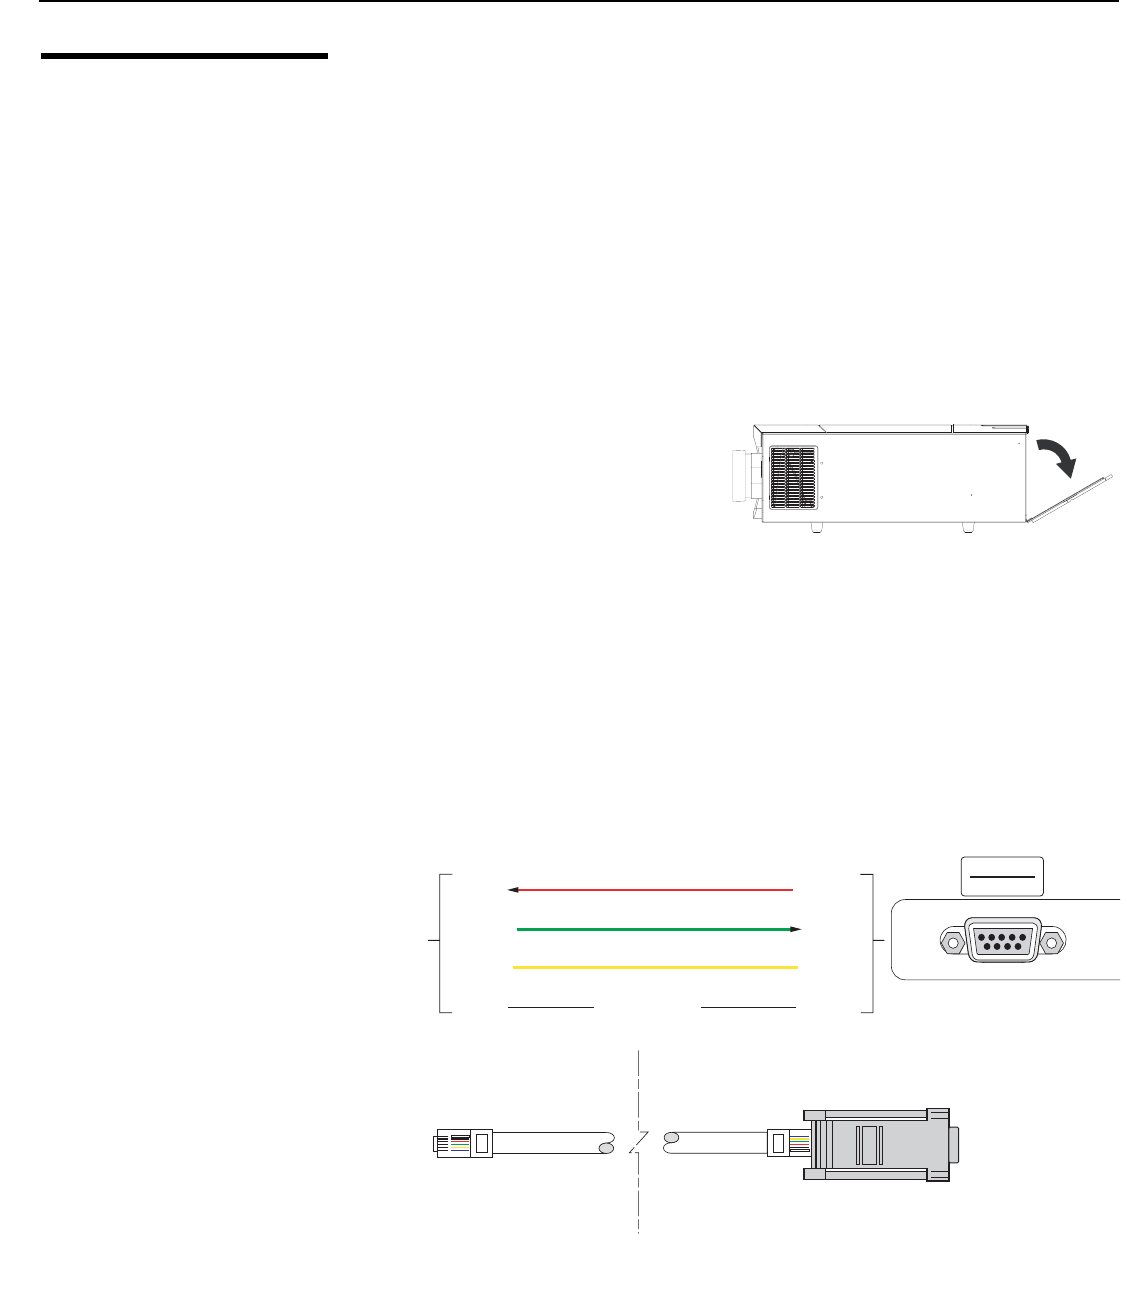
Connector Panel Access To access the connector panel, pull firmly
on the cable access cover to open it.
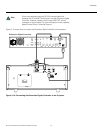
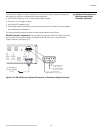
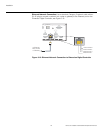
Connecting the Dimension
Digital Controller to the
Projector
Digital Video Connection: Connect the HDMI Out To Pri. Display connector on the
Dimension Digital Controller to the PRIMARY input on the projector. Similarly connect the
HDMI Out To Sec. Display connector on the Dimension Digital Controller to
SECONDARY input on the projector.
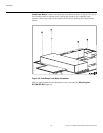
RS-232 Connection: Connect the Pri. Display Control output from the Dimension
Digital Controller to the RS232 input on the projector.
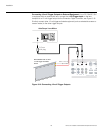
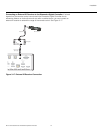
Use a standard, modular telephone cable with RJ11 plugs at both ends. On the projector
end, use the provided RJ11-to-DB9 adapter. This adapter is wired as shown in Figure
3-12.
Figure 3-12. RS-232 Connection from the Dimension Digital Controller to the
Projector
➤
➤
4
3
RCV DATA
3
2
XMT DATA
XMT DATA
RCV DATA
2
5
SIG GND
NO CONNECTION
1, 5, 6
1, 4, 6,
7, 8, 9
To/From
Dimension
Digital
Controller
6-position
RJ-11 Male
DB-9 Male
6
1
1
6
RS232
RS232