


38
Chapter 3 Menu
Chapter 3 Menu
• After executing KEEP, do not turn off the power
while the cursor indication changes to an arrow
showing that the data has been processed or while the
LED on the floppy disk drive is on. In such a case,
the unit is writing the data in the flash memory or is
storing in the floppy disk. If you turn off the unit
during this process, the Current Title may be lost.
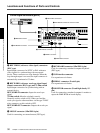
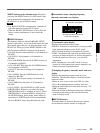
2 Snapshot display
The name of the snapshot last recalled is displayed on
the SNAPSHOT button.
3 AUTO (automation) MODE display
Displays the Automation mode and return time mode
settings.
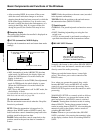
NEXT: Holds the position to the next event (recorded
in the dynamic automation).
TO END: Holds the position to the end and renews
the automation data. (HOLD TO END)
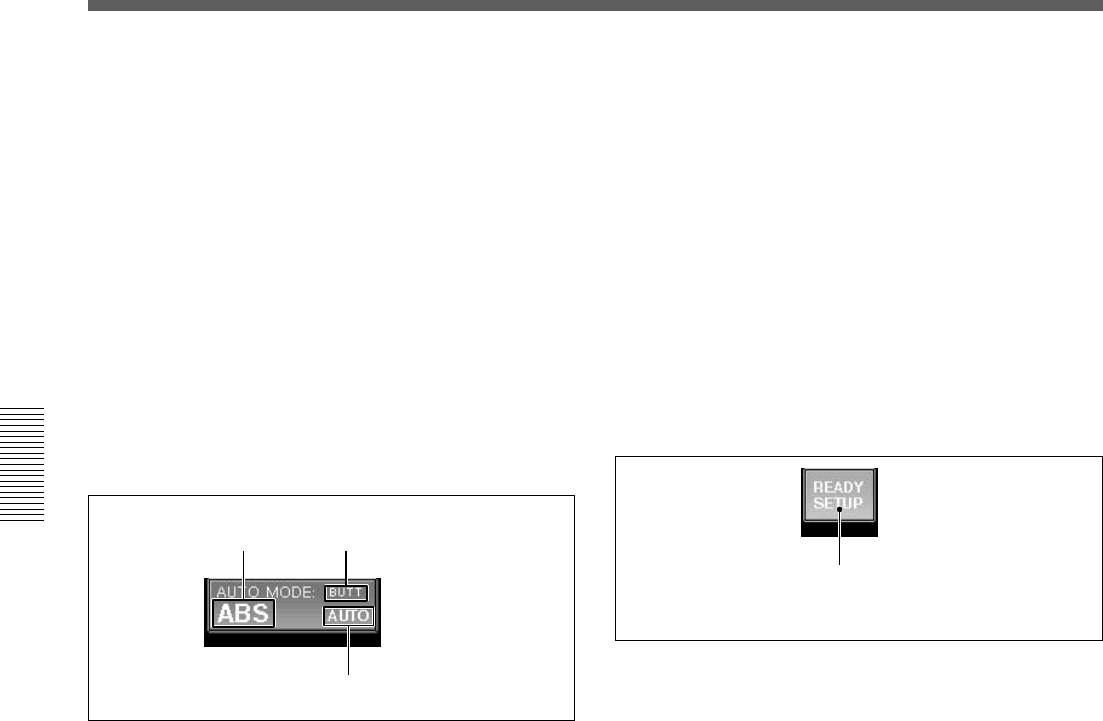
C Punch in mode
• NORMAL: The punch in/punch out functions are not
set.
• FOOT: Punching in/punching out using the foot
switch is set.
• AUTO: An auto punch is performed according to a
specified time entered on the Automation window.
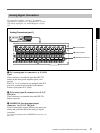
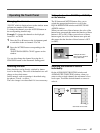
4 READY SETUP button
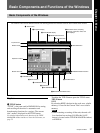
Basic Components and Functions of the Windows
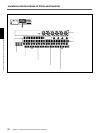
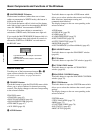
A Automation operation mode
• ABS: Automation is in the ABSOLUTE (absolute
value) mode. In ABS mode, the display lights red.
(When the SAFE button is lit on the console, the
display is dark red.)
• TRIM: Automation is in the TRIM (fine adjustment)
mode. In TRIM mode, the whole display is green.
(When the SAFE button is lit on the console, the
display is dark green)
• OFF: Shows the automation is off. In OFF mode, the
whole display is black.
For information on the fader operation and its results in
ABS mode and trim mode, see page 100.
B Automation return mode
Sets the automation return mode when the Drop Out
function is performed.
BUTT: When the automation is dropped out (i.e.
changes from WRITE mode to READY status), the
faders and other controls immediate jump back to the
position stored in the previous data.
RAMP: Faders and other controls ramp back to the
position stored in the previous data in a number of
frames.
Dark yellow (OFF): Normal status
Light yellow (ON): Ready setup status
(Available to set READY/SAFETY)
B Automation return mode:
BUTT
A Automation operation
mode: ABS
C Punch in mode: AUTO
Normally, this button is dark yellow (READY SETUP
is off). In this case, the buttons, controls and switches
directly control the audio processing.
When you touch the button shown, it turns light
yellow. This allows you to select controls to the
READY status.
Now, when you operate the controls, they switch
between READY active and READY off, and the
controls do not control the audio processing. Press
READY SETUP again to revert the controls to audio
processing.
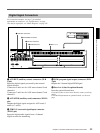
With READY SETUP on, controls switch as follows:
Buttons: Whenever you operate the buttons on the
panel and window, the READY status is switched.
Controls: Turning them clockwise results in setting
them to READY. Turning them counterclockwise
results in setting them to SAFETY. Also touching the
numerical value on the display window results in
switching READY/SAFE.
Faders: Whenever you touch the fader, READY/
SAFE is switched. Also pressing the numerical value
on the display window results in switching READY/
SAFE.