


LED-PRO • User’s Guide 19
3. Installation
Rack-Mount Installation
o~ÅâJjçìåí=fåëí~ää~íáçå
LED-PRO units are designed to be rack mounted and are supplied with front rack-mount
hardware. Please note the following important points:
• Rear rack-mount brackets are available as a kit, and are recommended for use
when units are mounted in transit cases.
• When rack mounting the unit, remember that the maximum ambient operating
temperature for the unit is 40 degrees C.
• Leave sufficient front and rear space to make sure that the airflow through the fan
and vent holes is not restricted.
• When installing equipment into a rack, distribute the units evenly to prevent
hazardous conditions that may be created by uneven weight distribution.
• Connect the unit only to a properly rated supply circuit.
• Reliable grounding (earthing) of rack-mounted equipment should be maintained.
• Rack mount the unit from the front rack ears using four rack screws (not supplied).
Rack threads may be metric or otherwise — depending upon the rack type.
• Install the lower of the two mounting holes first.
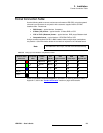
mçïÉê=fåëí~ää~íáçå
Use the following steps to install power to the LED-PRO:
1. Connect an AC power cord to the AC Power Connector on the rear of the LED-
PRO, and then to an AC outlet.
2. Connect AC Power cords (or AC adapters) to all peripheral equipment, such as
video sources and PCs. Please note:
~ Connect each unit only to a properly rated supply circuit.
~ Reliable grounding of rack-mounted equipment should be maintained.
3. Ensure that your LED wall is properly assembled, and that all power cords are
distributed and connected to all tiles — in the proper sequence. Refer to your
specific LED tile’s “User’s Guide” for details.