


HDMI UTPro WebConsole
74
Instruction Manual – HDMI-UTPRO-0808
Security Settings
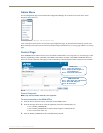
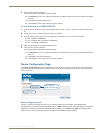
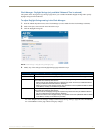
Select Security Settings from the Admin drop-down menu to open the Security Settings page (FIG. 48). Use the options
on the page to specify security settings and login information for the HDMI UTPro.
Note: If Security Settings are disabled and then enabled again, Login information remains in affect.
Important: The Admin menu option “Restore Settings” will restore the factory default settings (as specified in
the two tables below) for both the Security Settings and the Login Information on the Security Settings page.
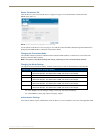
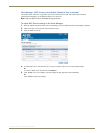
Enable / Disable Security Settings
The security setting options and their functions are described in the following table.
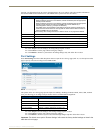
Click Accept to save the changes (applies to the security settings and login information). Changes on the
Security Settings page take effect immediately.
Click Cancel to exit the page without saving any changes.
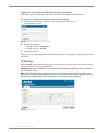
Login Information
Use the Login Information fields to specify a user name and password. Login information is required only if one or more
of the Security Settings are enabled.
FIG. 48 Security Settings page
Security Settings Page
Web Security Click this box to enable Web Security.
When Web Security is enabled, a user name and password are required to access any
system Web pages (default = disabled).
Telnet Security Click this box to enable Telnet Security.
When Telnet Security is enabled, a user name and password are required to establish a
Telnet or SSH connection (default = disabled).
Admin Security Click this box to enable Admin Security
When Admin Security is enabled, a user name and password are required to modify any
system configuration item (default = disabled).
Login Information
Username Enter the user name that will be required to log in to HDMI UTPro information if security is
enabled (default = administrator).
New Password Enter the new password that will be required to log in to HDMI UTPro information if
security is enabled (default = password).
Confirm Password Re-enter the new password in this field.