


Installation and Setup
36
Instruction Manual – HDMI-UTPRO-0808
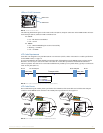
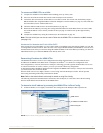
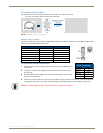
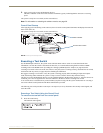
2. Right-click anywhere in the Workspace and select Refresh Zero-Config List to generate an initial listing of all
Zero-Config devices that have been detected (FIG. 20).
3. Click the plus symbol (+) to the left of the “AMX HDMI-UTPRO-0808” in the Zero-Config list to expand its
information. The HDMI UTPro’s current IP Address is listed below the device name.
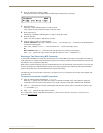
To test the HDMI UTPro WebConsole connection:
1.
Launch a browser on your PC.
2. In the address bar of the browser, type the IP address and press Enter (to determine the IP address, see the previous
instructions or contact your Network Administrator).
If the WebConsole does not open, see the “WebConsole Troubleshooting” section on page 80.
For WebConsole setup details, see the “HDMI UTPro WebConsole” chapter on page 69.
Note: For additional information on Zero-Config or the WebConsole, see the “Programming Guide – NetLinx
Integrated Controllers” at www.amx.com
.
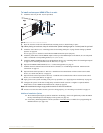
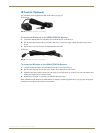
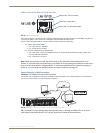
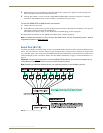
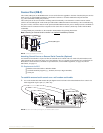
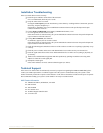
Serial Port (RJ-12)
The Serial port displays in NetLinx Studio as Port 2 of the HDMI UTPro and can be used to control an additional local
device. The port is an RJ-12 connector and may require an adapter cable to connect to the external device under control
(e.g., a Blu-Ray player). The Serial port on the HDMI UTPro has same functionality as the Serial ports on the Receivers
(which also display as Port 2 in NetLinx Studio). For cable adapter information, see page 37. Pinout information is on
page 38.
Important: This port cannot
be used to control the HDMI-UTPRO-0808 or to send serial commands to any
of the Receivers (the LAN 10/100 port is used for both of these functions).
Note: Attaching an additional external device is an optional procedure in the installation process.
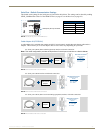
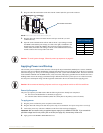
FIG. 21 Device control flow diagram