Appendix C – Managing Configuration Files
115
Instruction Manual – HDMI-UTPRO-0808
To set the password and load it to the control panel:
1.
Discover the system (see page 112) or open the .xcl file (see page 111).
2. In the Hardware view, right-click the CP-15 control panel icon – this icon is used for the HDMI UTPro control
panel. (If control panel icon is not displayed, double-click the Optima icon.)
3. Select Set Password from the drop-down menu.
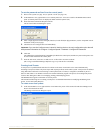
The Set Control Password dialog box opens.
4. Enter a single digit between one and eight (inclusive) in each field (for digit parameters, see the “Important” note at
the bottom of the previous page).
5. Check the box for Configure Password Immediately.
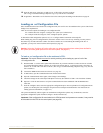
Important: If you use the Configure menu instead of checking the box, the only configuration option that will
load password information is Configure \ Configure Special - Hardware \ Configure All Passwords.
6. Click OK.
The updated password information is immediately loaded to the control panel, and the new password sequence must
be used to lock and unlock the control panel.
7. From the File menu, select Save As and save an .xcl file with a new name to the PC.
(We strongly recommend making a duplicate copy every time the file is modified.)
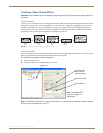
Creating Local Presets
A local preset is a predetermined collection of switches on the same virtual matrix to be routed simultaneously.
Executing a local preset affects only those inputs and outputs specified, not the whole system. Local presets are defined
using XNConnect and can be executed using a control panel (local or remote) or using BCS commands as part of a
macro in APControl 3.0 or APWeb or entered in a terminal emulation program. The process for creating local presets
involves three dialog boxes that cover managing, naming, and modifying presets.
The HDMI UTPro supports a maximum of 16 local presets.
The instructions following are for creating a local preset. For detailed information on modifying and deleting local
presets, see the XNConnect Help file.
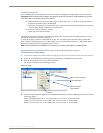
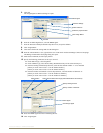
To create a new local preset:
1.
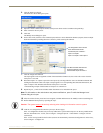
In the Virtual Matrices view, right-click the virtual matrix the preset will be created for and select Manage Local
Presets from the shortcut menu.
The Manage Local Presets dialog box opens.


