


Installation and Setup
40
Instruction Manual – HDMI-UTPRO-0808
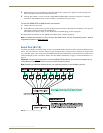
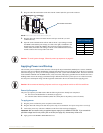
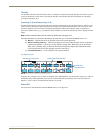
2. Plug one end of the null modem serial cable into the Control (RS-232) port on the enclosure.
3. Plug the other end of the serial cable into the serial port on the PC (or serial
controller/device).
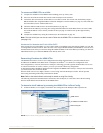
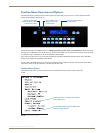
4. Open the serial communication software and set the PC’s port settings to match
the HDMI UTPro default port settings (see table to the right). In addition to the
default baud rate of 9600, the HDMI UTPro enclosure supports baud rates of
19200, 38400, and 57600. The settings on the PC serial communication software
and the enclosure must correspond to each other.
Applying Power and Startup
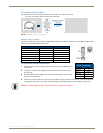
The universal power receptacle on the enclosure will accept all major international standard power sources. Standard
US power cords are provided for installations within the US. Maximum power specifications are on the power receptacle
(also listed on page 17). Always use an earth-grounded power cord / system with an HDMI UTPro. The source electrical
outlet should be installed near the HDMI UTPro, easily accessible, and properly grounded. Power should come from a
building branch circuit. We strongly recommend using a dedicated line for the system’s power. To avoid an overload,
note the power consumption rating of all the equipment connected to the circuit breaker before applying power.
Power-Up Sequence
The power-up sequence provided assumes that the following items have already been completed:
The sources and destinations are attached (see page 29).
External control has been attached (unless the control panel is the primary source of control).
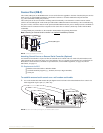
To apply power:
1.
Plug the power cord into the power receptacle on the enclosure.
2. Plug the other end of the power cord into a power strip (we recommend a 30 A power strip) that is turned off.
3. Turn on the power strip. The Power Indicator on the front of the enclosure illuminates.
Important: We recommend using a regulated power supply for the HDMI-UTPRO-RX. If you exceed the
specified voltage level for the power jack on the RX (see page 22), the warranty will be void.
4. Apply power to the HDMI-UTPRO-RX Receivers.
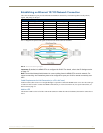
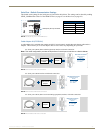
FIG. 29 Attach null modem serial cable to serial port
Null modem serial cable
HDMI UTPro
DB-9 Port Settings
Baud Rate 9600
Data Bits 8
Parity None
Stop Bits 1
Flow Control None
Caution: To avoid system damage, follow the power-up sequence on page 40.
Caution: We recommend attaching all power cords to a surge protector and/or an AC line conditioner.