


Installation and Setup
41
Instruction Manual – HDMI-UTPRO-0808
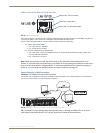
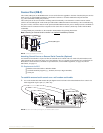
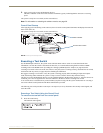
5. Apply power to the source and destination devices.
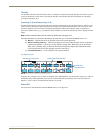
The Power indicator on the front of the enclosure illuminates (green), indicating that the enclosure is receiving
power.
The system is ready for a test switch (see the section below).
Note: For information on checking the software version, see page 56.
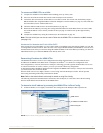
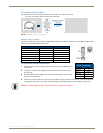
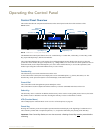
Control Panel Startup
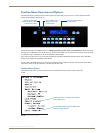
After applying power and turning on the enclosure, the LCD on the control panel illuminates and displays the Function
menu screen (FIG. 30).
The system is ready for a test switch (see the section below).
Executing a Test Switch
For the HDMI input connectors, the system stores sink information when a switch is executed and retains that
information even after the switch is disconnected. Therefore, we recommend becoming familiar with how HDMI
switching works in the HDMI UTPro by reading the “Setting Up HDMI Systems” chapter (see page 60) before
executing a test switch. Then execute the test switch to verify the system is working correctly, disconnect the test switch,
and clear the sink key cache (see page 68) before finishing the installation.
We suggest executing a test switch to verify the system is working properly before attaching all inputs and outputs.
Aside from having cables attached, the system is ready to execute switches when it ships from the factory.
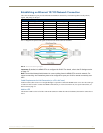
The first two source and destination devices must be cabled according to the directions on page 31. After the devices are
connected, power must be applied to the enclosure and then to the devices before executing a test switch.
A test switch can be executed from any control method you plan on using with the system. Instructions for executing a
test switch with the control panel and with BCS commands are provided.
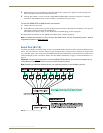
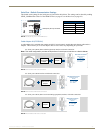
The following test switch procedure routes Input 1 to Output 2 (Level 0), disconnects all currently routed signals, and
clears the cache.
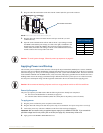
Executing a Test Switch Using the Control Panel
To execute a test switch from the control panel:
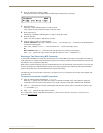
1.
Press the Function Key.
The Function menu appears.
FIG. 30 Control panel startup screen
Function menu screen
Power indicator