


Appendix D – Creating Virtual Matrices
123
Instruction Manual – HDMI-UTPRO-0808
15. Click OK.
The Manage Virtual Matrix Groupings dialog box opens again.
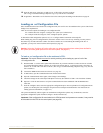
16. Under Select a Method, click Group by Pattern (this time through, the destinations will be assigned).
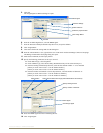
17. Specify the following parameters for the output channels:
Under Pattern Type, select Sequential.
Under Channel Type, select Destinations Only.
From the Starting Channel drop-down list, select the first channel number “1” to be included.
[When you create VM 2: select “1” for the channel number.]
[When you create VM 3: select “5” for the channel number.]
From the Number of Channels to Create drop-down list, select the number of channels “8”.
[When you create VM 2: select “4” for the number of channels.]
[When you create VM 3: select “3” for the number of channels.]
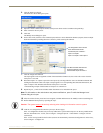
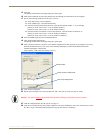
18. Select the HDMI signal from the Available Signals list.
19. Click Assign Signal and click OK.
The Manage Virtual Matrix Groupings dialog box opens again.
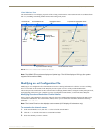
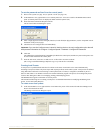
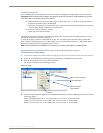
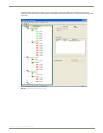
20. Under Grouped Connectors, check the virtual channel assignment for each connector by selecting the Source and
Destination Channels tabs. For VM 1, the Source Channels tab displays 6 channel tabs and the Destination
Channels tab displays 8 channel tabs.
[VM 2 displays 1 and 4 and VM3 displays 1 and 3.]
21. Click Accept Assignments.
22. Repeat Steps 3 through 21 for VM 2 and again for VM 3. See FIG. 79 on the next page for results.
23. Load the configuration file onto the system; see page 117.
24. Using Save As (under the File menu), make a duplicate copy of the modified file with a new name and save it to the
PC. (We strongly recommend making a duplicate copy any time the file is modified.)
Check connector assignments
Channel tabs
Click Accept Assignments
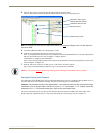
Caution: The system must not be actively switching when loading this information onto the system.