


82
to the cable/satellite inputs. If you
have programmed the cable or satel-
lite set-top box’s remote control
codes, the device will be turned on.
c. Press and hold the
VCR Selector
3, and the CVR700 will switch to
the source device connected to the
VCR inputs. If you have programmed
the VCR's remote control codes, the
device will be turned on, and the play
command will be transmitted to it.
d. Press and hold the
DR (Digital
Recorder) Selector
3, and the
CVR700 will switch to the source
device connected to the DR inputs.
If you have programmed the DR's
remote control codes, the device
will be turned on, and the play com-
mand will be transmitted to it.
e. Press and hold the
AUX Selector
3, and the CVR700 will switch to
the source device connected to the
AUX inputs. If you have programmed
the device's remote control codes,
the device will be turned on, and the
play command will be transmitted to it.
f. Press and hold the Game/Cam
Selector
3, and the CVR700 will
switch to the source device connected
to the Game/Cam inputs. If you have
programmed the device's remote
control codes, the play command
will be transmitted to it. Note that
for video game consoles and cam-
corders, there are no power on or off
commands. Therefore, only the Play
command (or start/stop command for
camcorders) will be transmitted.
g.
Press and hold the
DVI Selector
3, and the CVR700 will switch to
the source device connected to the
DVI inputs. If you have programmed
the device's remote control codes,
the device will be turned on, and
the play command will be trans-
mitted to it.
3. The
PIP Swap Button c is activated
while in screen mode by pressing and
holding that button until the video source
in the picture-in-picture frame swaps
position with the main video source.
Erasing a Macro
Once a macro has been created and
stored in the remote’s memory, you have
the option of erasing it (except the pre-
programmed macros). You may do this
at any time by following these steps:
1. Press and hold the
Remote Menu
Button
b
for about 3 seconds
while the message shown in Figure
54 appears in the remote’s
LCD
Information Display
2
. Release
the button when the red light under
the
Set Button
s
appears.
2.
The remote’s
MAIN MENU message
(Figure 55), will appear in the LCD
display and the
Set Button
s
will
remain illuminated in red. Press the
⁄
Navigation Button
q
so that
MACRO appears on the bottom line
of the LCD screen, as shown in Figure
78. Press the
Set Button
s
to
enter the main macro menu branch.
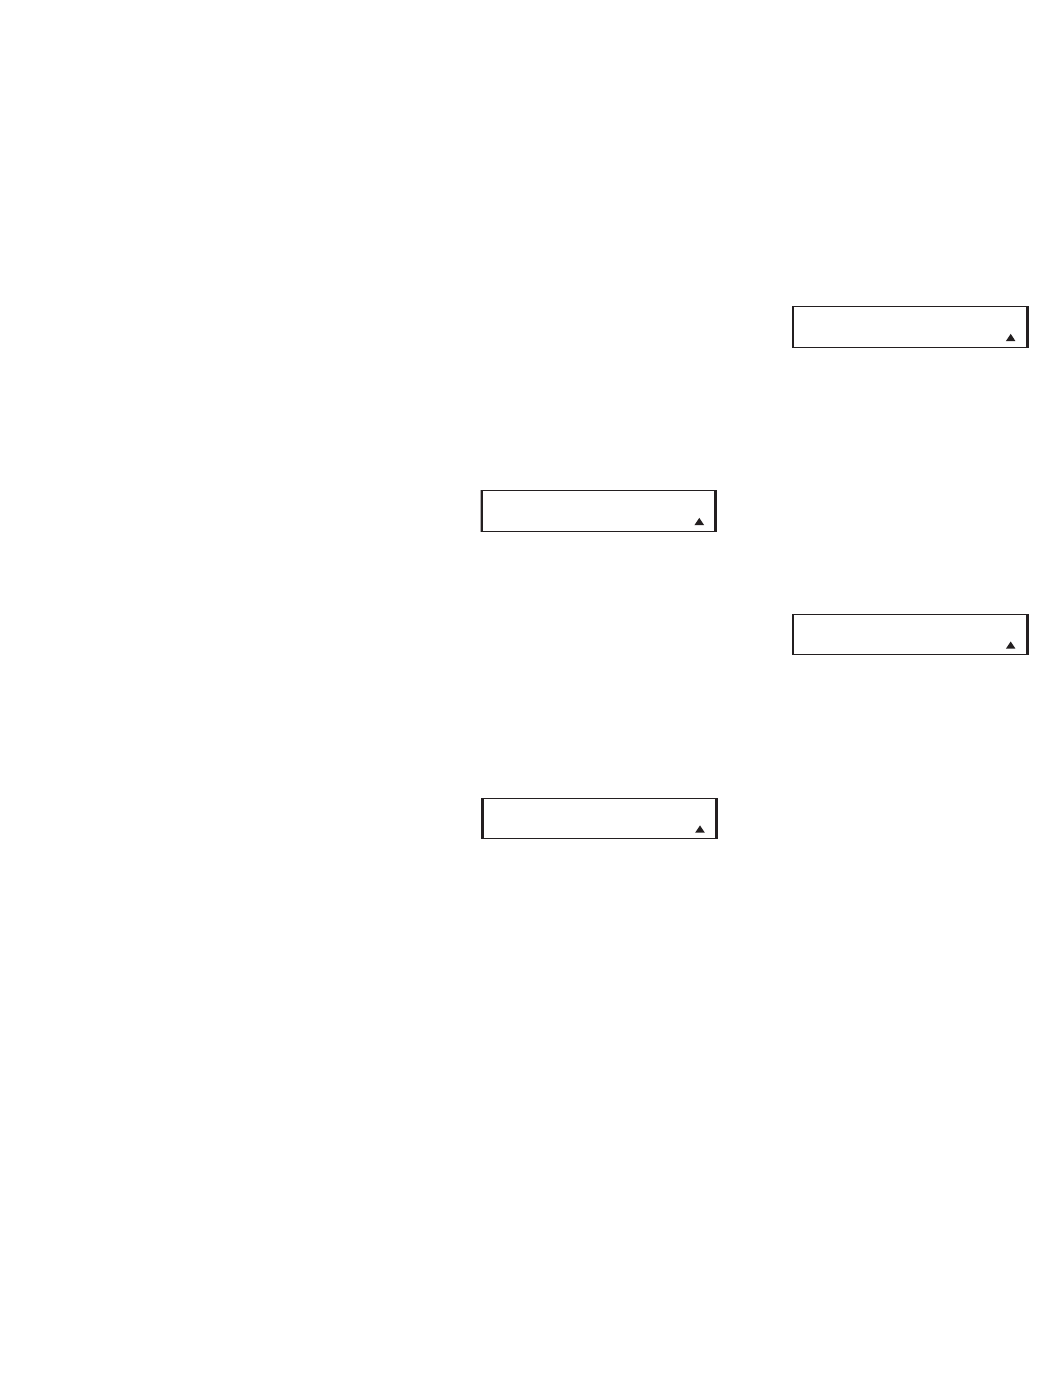
3. At the next menu screen (Figure 84),
press the
⁄
/
¤
Navigation Button
o until the bottom line in the
remote’s LCD display reads
ERASE A
MACRO
. Press the Set Button
q
to begin the process of erasing a
macro.
Figure 84
4. The next display screen (Figure 85) is
where you select which macro will be
erased. Press the
⁄
/
¤
Navigation
Button
q until the number of the
macro you wish to erase appears. For
this example we will erase the Power
On macro created in the previous sec-
tion. When the name of the macro to
be erased appears, press the
Set
Button
s
.
Figure 85
5. The word ERASED will flash four
times in the bottom line of the
remote’s LCD display, and then the
display will return to its normal condi-
tion. When that happens, the macro
is erased and the remote is returned
to normal operation.
Read a Macro
To check the commands stored in the
remote’s memory
for one of the macro
buttons, follow these steps:
1. Press and hold the
Remote Menu
Button
b
for about three seconds
while the message shown in Figure
54 appears in the remote’s
LCD
Information Display
2
. Release
the button when the red light under
the
Set Button
s
appears.
2. The remote’s
MAIN MENU message
(Figure 55), will appear in the LCD
display and the
Set Button
s
will
remain illuminated in red. Press the
⁄
Navigation Button
q
until
MACRO appears on the bottom line
of the LCD screen, as shown in Figure
78. Press the
Set Button
s
to
enter the main macro menu branch.
3. At the next menu screen, press the
⁄
/
¤
Navigation Button q until
the bottom line in the remote’s LCD
display shows
READ A MACRO
(Figure 86). Press the Set Button
s
to begin the process of reading a
macro.
Figure 86
4. The next display screen (Figure 87)
is where you select the macro to be
read. Press the
⁄
/
¤
Navigation
Button
q until the name of the
macro you wish to read appears. For
this example, we will read back the
Micro 1 macro created in a previous
section. When the name of the macro
to be read appears, press the
Set
Button
s
.
Figure 87
5. As soon as the Set button is pressed,
the first two steps in the macro will
be appear in the remote’s LCD
screen. You may then use the
⁄
/
¤
Navigation Button q to step
up or down through the list of com
-
mands stored as the macro. As you
read the display, you will see
Input
Selector Buttons
3
appear in
brackets, (e.g.,
[M/DVD]). When
the step in the macro is a function,
navigation or any other button, it
will appear next to the bracketed
read-out of the underlying device
(e.g.,
[M/DVD] POWER ON).
6.
When you are finished reviewing
the macro’s contents, press the
Set
Button
s
to return the remote to
normal operation.
NOTE: It is not possible to edit the steps
in a macro. If you notice an error
, you will
need to erase the macro as described
above, and reprogram all of the steps.
R
EAD A MACRO
MICRO 1
MACRO
READ A MACRO
ERASE A MACRO
MICRO 1
MACRO
E
RASE A MACRO
CVR700 OM 12/17/04 4:24 PM Page 82