


79
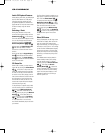
appears. The available options are
DVD/MAIN, SYSTEM, SCREEN,
DVI/DVD, TIVO, GAME, CABLE, VCR,
TV and FM/AM [TUNER]. We recom-
mend that you learn new codes only
for devices that are external to the
JBL Cinema V
ision system. For this
example, we will select “DVI/DVD” to
enter the codes needed to operate an
external DVD player with a DVI output.
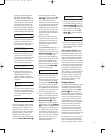
Figure 67
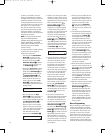
4. The next menu screen (Figure 68) will
prompt you to select the button on
the remote that you wish to program.
Press that button on the remote.
Figure 68
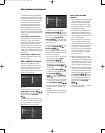
5. Once you press the button to be pro-
grammed on the remote, press and
hold the button on the remote control
for the device to be programmed
within five seconds, as instructed on
the next menu screen (Figure 69).
Figure 69
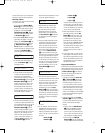
6. Continue to hold the button on the
original remote until the menu on the
CVR700R2 remote’s LCD screen
changes. If the code is successfully
learned, you will see the display shown
in Figure 70.
Figure 70
If you see that menu, proceed to Step 9.
If the code is
not successfully learned,
you will see the display shown in Figure
71. If that menu appears, proceed to
Steps 7 and 8.
Figure 71
If you don’t attempt to “teach” a remote
code to the CVR700R2 remote within 5
seconds, the words “TIME OUT” will
appear briefly on the second line of the
LCD display, and you will be prompted to
start over by pressing a button on the
CVR700R2 remote (see Figure 68).
Y
ou may exit the process at any time by
pressing the
Remote Menu Button b.
7. If the message shown in Figure 71
appears in the display, press the
Set
Button
s to try programming the
button again. When the remote
prompts you to press and hold the key
on the original remote again by show-
ing the display shown in Figure 69,
immediately press the button on the
source remote again. To avoid anoth-
er failed attempt, make certain that
the windows on the two remotes are
facing one another.
8. Continue to hold the button on the
original remote until the LCD display
changes again. If the code was suc
-
cessfully learned, you will see the
display shown in Figure 70. In that
case, go to Step 9.
If the
CODE FAILED display (Fig. 71)
appears again, you may either try to
program the key again, or press the
⁄
Navigation Button q to stop the
process. It is possible that some
remotes may use code sequences or
infrared frequencies that are not com-
patible with the CVR700R2 remote,
and those codes cannot be learned.
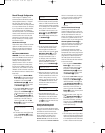
When the display shown in Figure 72
appears, press the
Set Button s
to exit the Learning system.
Figure 72
9. When a code has been learned suc-
cessfully, you have three options.
When the display shown in Figure 70
is on the LCD screen on the remote,
you may press the
Set Button s to
learn additional codes from the but
-
tons on a original source remote into
the CVR700R2 remote. Follow Steps 4
through 6 as often as needed to com
-
plete the code-learning process.
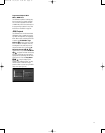
10. If you wish to change the name that
appears in the LCD display when the
button that has just had a new code
learned is pressed, press the
⁄
Navigation Button q until the
display shown in Figure 73 appears in
the LCD display. Press the
Set Button
s to be taken to a EDIT BUTTON
display
. Enter the new name for the
key following the instructions shown
in the Renaming Individual Keys sec
-
tion of this manual on page 86. If you
find it more convenient to rename the
buttons at a later time, you may do
that separately by following the
instructions on page 85.
Figure 73
11. When you have programmed all keys
for the desired device, press the
⁄
Navigation Button q repeatedly
when the
LEARN MENU (Figure 70)
appears until you see the display
shown in Figure 74. Press the
Set
Button
s to return the remote to
normal operation.
Figure 74
12. If you wish to program the codes for
another device, repeat the procedure
outline above, but select a different
device in Step 3.
Note on Learning Function: Remote
control signals can vary from one con-
troller to the next due to different stan-
dard formats adopted by each manufac-
turer. For example, some manufacturers
repeat the code sequence in the initial
transmission, and others insert a special
code to identify the brand or model. Due
to the variety of formats, occasionally an
error may occur in the learning process
even though the CVR700R2 remote has
indicated that the code was learned cor-
rectly.
Therefore, it is recommended that
you test the newly learned codes with
the source component. If the code was
not learned correctly, try relearning it.
Usually
, after several tries, the code
can be learned correctly
.
Changing Devices
In the factory default settings, the remote
is programmed so that the commands
transmitted correspond to the device
selected by pressing one of the
Input
Selectors
3
. This is logical, as you
want the remote to control the device you
have selected.
However
, in some circum-
stances you may have configured your
system so that the devices connected
to the CVR700 do not correspond to the
default device settings and the legends
printed on the remote. For example, if
your system has two VCRs you may
connect the second VCR to the digital
recorder input. There is no problem in
doing that, but in normal operation the
commands issued after selecting the digi
-
tal recorder input are not for a VCR.
The remote allows you to correct that sit
-
uation through the “Changing Devices”
process. This enables you to assign the
codes from one type of device to a differ
-
CODE LEARNED
EXIT
CODE LEARNED
E
DIT BUTTON
CODE FAILED
EXIT
CODE FAILED
AGAIN
CODE LEARNED
CONTINUE
PRESS BUTTON ON
O
RIGINAL REMOTE
P
RESS BUTTON
TO BE PROGRAMMED
L
EARN CODE
DVI/DVD
CVR700 OM 12/17/04 4:24 PM Page 79