


52
NOTE: Remember to verify that the
speakers have been properly connected.
As the test noise circulates, listen to
make certain that the sound comes from
the speaker position shown in the
Lower
Display Line
E. If the sound from a
speaker location does NOT match the
position indicated in the display, stop the
test tone by pressing the
Test Tone
Button
h twice, then turn the
CVR700 off using the
Main Power
Switch
1 and check the speaker wiring
to make certain that each speaker is con-
nected to the correct output terminal.
After checking for speaker placement, let
the test noise circulate again, and listen
to see which channels sound louder than
the others. Using the front left speaker as
a reference, press the
‹/› Navigation
Controls
q to bring all speakers to
the same volume level. When the
‹/›
Navigation Controls q are
pressed, the test noise circulation will
pause on the channel being adjusted to
give you time to make the adjustment.
When you release the button, the circula-
tion will resume after 5 seconds. Continue
to adjust individual channels until the vol-
ume level sounds the same from each
speaker. Adjustments should be made
with only the
‹/› Navigation Controls
q, NOT the main volume controls.
If you are using a sound-pressure level
(SPL) meter for precise level adjustment,
set the volume so that the meter reads
75dB on the C-W
eighting, Slow scale.
Using the Remote as an SPL Meter
The EzSet feature on the main remote
may also be used as an SPL meter to
assist in accurate setting of the output
levels, when either the internal test tone
or favorite source material, such as a test
disc, is used. To use the remote as an
SPL meter
, follow these steps:
1.
Press and hold the
SPL Select Button
9 until the red LED under the Set
Button
s lights and the LCD screen
in the remote changes to the display
shown in Figure 24. (You may also nav-
igate to the screen shown in Figure 24
by pressing and holding the
Remote
Menu Button
b for 3 seconds until
the main remote menu appears; then
scroll to the
SET SPKR LEVELS
option and press the Set Button s.)
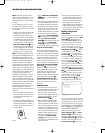
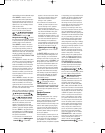
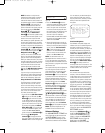
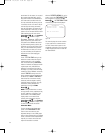
2. Press the
⁄/¤ Navigation
Controls
q to change the bottom
line of the remote’
s LCD display to read
MANUAL SPL as shown in Figure 28.
Figure 28
3. Press the Set Button s within 5
seconds to activate the remote’s manual
mode, so that it functions as an SPL
meter
. The right corner of the bottom
line of the remote’s display will show
the output level of the speakers as the
test tone circulates. The level will
show as a direct SPL indication
between 66dB and 79dB. Below 66dB
the remote will read
LOW and above
79dB it will read
HIGH.
4. When all channels have an equal vol-
ume level, the adjustment is complete.
When you are finished with all adjust-
ments, press the
Test Tone Button
7 to return the remote to normal
operation. The word
EXITING will
blink four times, and the remote will
switch to the
DVD/MAIN mode.
NOTE: The subwoofer level is not
adjustable when the normal test tone is
in use. The subwoofer output level may
be adjusted when the channel levels are
being trimmed to a program source rather
than the test tone.
The output levels may also be adjusted at
any time using the remote control and
front-panel display. To adjust the output
levels in this fashion, press the
Test
Tone Button
7. As soon as the button
is pressed, the test tone will begin to cir-
culate as indicated earlier
. The correct
channel from which the test noise should
be heard will be shown in the
Lower
Display Line
E. While the test noise is
circulating, the proper channel position
will also be indicated in the
Speaker/
Channel Input Indicators
F by a
blinking letter within the correct channel.
T
o adjust the output level, press the
⁄/¤ Navigation Controls q until
the desired level is shown in the display
.
Once the buttons are released, the test
noise will begin to circulate again in 5
seconds. When all channels have the
same output level, press the
T
est T
one
Button
7 again to complete the process.
NOTE: Output level adjustment is not
available for the Surround Off mode.
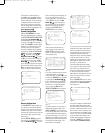
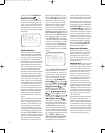
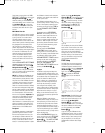
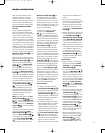
Advanced Settings
The ADVANCED
SETTINGS
sub
-
menu (Figure 29) may be accessed from
the
MAIN MENU (Figure 6). It con-
tains some additional settings that will
enhance the convenience of the CVR700.
It is not necessary to make these adjust-
ments during the initial setup, and you
may skip this section, returning to it later
when you have more experience with
the system.
Figure 29
Front-Panel Brightness
The CVR700’s front-panel displays and
indicators are set at a default brightness
level that is sufficient for viewing in a
normally lit room. However, you may wish
to occasionally lower the brightness of
the display, or turn it off completely. The
FRNT PNL BRGHTNESS setting
defaults to full brightness, but you may
adjust it to dim the display to half bright-
ness, or turn the display off altogether.
The LED inside the
Main Power On/Off
Button
1 will always remain lit to
remind you that the unit is turned on. The
setting is temporary, and will only remain
in effect until the unit is turned off.
Volume Default
As is the case with most audio/video
receivers, when the CVR700 is turned on,
it will always return to the volume setting
in effect when the unit was turned off.
However, you may prefer to always have
the CVR700 turn on at a specific setting,
regardless of what was last in use when
the unit was turned off. The
VOLUME
DEFAULT
feature may be turned on
or off. The factory default setting is
OFF.
To set the feature, first turn the OSD sys-
tem off and adjust the system volume to
the desired default turn-on level. This
level will be displayed on the front panel
as a negative offset from the reference
volume of 0dB, which is the system maxi
-
mum. For example, you may find a level
of –25dB to be a comfortable default
turn-on volume. Make a note of this num-
ber, as you will not be able to adjust the
volume from within the
ADVANCED
SETTINGS
submenu.
Next, press the
OSD Button D to
display the
MAIN MENU, and then
scroll to the
ADVANCED line and
select it to display the
ADVANCED
SETTINGS
submenu (Figure 29).
Scroll down to the
VOLUME
DEFAULT
line and set it to ON.
33
34
35
36
37
38
39
40
41
42
43
44
45
46
47
48
49
50
51
52
53
54
55
56
57
38
39
40
41
31
32
30
28
29
25
26
27
28
29
30
24
23
22
21
20
31
37
36
35
34
33
32
31
37
36
35
34
33
32
48
49
50
51
47
46
45
44
43
42
1 2 3 4 5
6
7
8 9 10 11 12
13 14 15 16 17 18
19 20 21 22 23 24
25 26 27 28 29 30
31 32 33 34 35 36
37 38 39 40 41 42
43 44 45 46 47 48
* ADVANCED SETTINGS *
FRNT PNL BRGHTNESS
:FULL
VOLUME DEFAULT :ON
VOL DEFAULT LEVEL
:25
MAIN MENU TIMEOUT : 20
FAN: MINIMUM NOISE
RESET ALL OF THE ABOVE
TO FACTORY SETTINGS?
BACK TO MAIN MENU
›
›
SET SPKR LEVELS
MANUAL SPL
33
34
35
36
37
38
39
40
41
4
2
43
4
4
45
4
6
47
4
8
49
5
0
51
5
2
53
5
4
55
5
6
57
38
3
9
40
41
31
3
2
3
0
28
29
25
2
6
27
28
2
9
30
24
2
3
22
21
2
0
31
3
7
36
35
3
4
33
32
3
1
3
7
36
35
34
33
3
2
48
4
9
50
51
4
7
46
45
44
43
4
2
1 2 3 4 5
6
7
8 9 1
0
1
1
1
2
13 14 15 16 17 18
19 20 21 22 23 24
25 26 27 28 29 30
31 32 33 34 35 36
37 38 39 40 41 42
43 44 45 46 47 48
3
3
34
35
36
37
38
39
40
41
4
2
4
3
4
4
4
5
4
6
4
7
4
8
4
9
5
0
5
1
5
2
5
3
5
4
5
5
5
6
5
7
3
8
3
9
40
41
31
3
2
3
0
28
2
9
2
5
26
27
28
2
9
30
2
4
2
3
22
21
2
0
31
37
36
35
3
4
33
32
3
1
37
36
3
5
3
4
33
32
4
8
4
9
50
51
47
46
4
5
4
4
43
42
1 2 3 4 5
6
7
8 9 10 11 12
1
3
1
4
1
5
1
6
1
7
1
8
19 20 21 22 23 24
25 26 27 28 29 30
3
1
3
2
3
3
3
4
3
5
3
6
37 38 39 40 41 42
4
3
4
4
4
5
4
6
4
7
4
8
3
3
34
3
5
36
3
7
38
3
9
40
4
1
42
43
44
45
46
47
48
49
50
51
52
53
54
55
56
57
38
39
40
4
1
31
32
30
2
8
29
2
5
26
2
7
2
8
29
3
0
2
4
23
2
2
2
1
20
3
1
37
3
6
3
5
34
3
3
3
2
31
37
3
6
3
5
3
4
3
3
32
48
49
50
5
1
47
4
6
4
5
4
4
4
3
42
1 2 3 4 5
6
7
8 9 1
0
1
1
1
2
13 14 15 16 17 18
1
9
2
0
2
1
2
2
2
3
2
4
2
5
2
6
2
7
2
8
2
9
3
0
31 32 33 34 35 36
3
7
3
8
3
9
4
0
4
1
4
2
43 44 45 46 47 48
CVR700 OM 12/17/04 4:24 PM Page 52