55
DVD-Audio disc, change the DVD
AUDIO
line to OFF. You may switch
back and forth between the ON and OFF
settings at any time to access either set
of materials.
The
SLIDE SHOW line allows you to
set the amount of time a JPEG still image
will remain on screen before the CVR700
automatically advances to the next image
on the disc. You may set this time to 2, 3,
4 or 5 seconds.
This completes the setup of the internal
DVD/CD changer
.
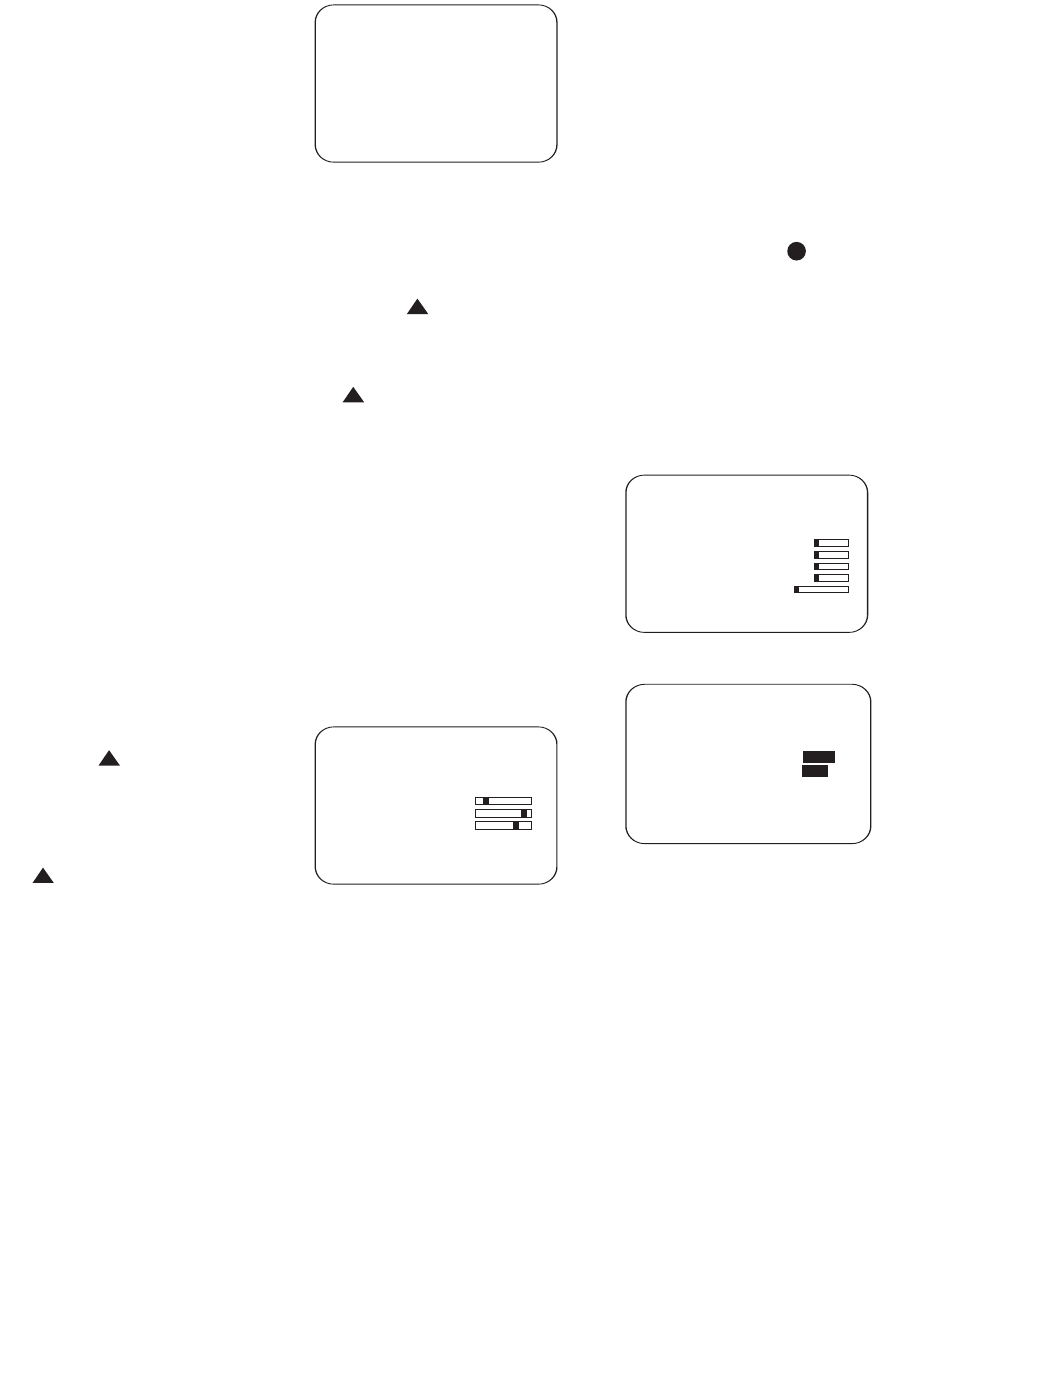
Screen Setup
The CVPD50 plasma display screen uti-
lizes state-of-the-art digital video pro
-
cessing that is contained within the
CVR700, and it is not possible to use the
CVPD50 without the CVR700 processor.
Although the video processor is extremely
flexible, making adjustments to video
display devices requires knowledge and
experience to avoid making mistakes that
could require professional assistance to
correct. Although you will not do any
damage to the CVPD50 by making these
adjustments, you could set the picture in
such a way that it is not possible to view
your favorite materials.
To access the screen setup menus, first
make sure the remote control is set to
Screen mode by pressing the
Screen
Selector
e . If this is not done,
the remote will execute the commands
programmed for the current source
device, or for the CVR700 audio section.
Press the
Screen Setup Button
j to display the SCREEN
MENU
(Figure 33). If the current source
is an external device that you are using
with component video, or if the source
has no video output, the background will
be black. If your source uses component
video, unless you have also made an S-
video connection from the source to the
CVR700, the menus will not be displayed.
Also, if the current source is the DVI/
Computer source, the menus will not be
displayed. Otherwise, the menus will be
transparent, with the program material
visible behind them. As described below,
you may adjust the transparency of
the menus from a setting in the
ADVANCED menu.
Figure 33
IMPORTANT NOTE: The Screen Setup
menus function differently from the
CVR700 audio menu system. Although
you will still use the
⁄/¤ Navigation
Controls
q to scroll from one line
to the next, in order to scroll through the
options available for each setting, you
must repeatedly press the
Set Button
s .
It is recommended that for initial setup,
you avoid changing any of the video set-
tings and allow the CVPD50 and CVR700
to automatically display your materials
using the factory default settings. As you
become more familiar with the system
and desire to tweak it, you may wish to
explore some of these settings.
Inputs and Picture-in-Picture
Settings
Scroll to the INPUTS/PIP menu
and select it. The
INPUTS/PIP
menu (Figure 34) will be displayed.
Figure 34
Main
Input
: The Main
Input
line is informational only
and you should not attempt to change it.
The setting will reflect the video format
of the current source. For the internal
DVD/CD changer, this setting will read
Digital. For external sources, this
setting will indicate which video input is
in use: i.e., component video, composite
video or S-video.
Input
Settings
: The Input
Settings
line will not be accessi-
ble when the internal DVD/CD changer is
in use. The available settings will vary
depending upon the video format of the
current source.
For DVI sources,
selecting Input
Settings
takes
you to either the
HD&PC
SETTINGS
menu (Figure
35a), or the
DVI
SETTINGS
menu
(Figure 35b), depending on the type of
source device you have connected to the
DVI/Computer input. Scroll down to the
Connected device line and
select the appropriate source type: DVD
HDCP, HD tuner or PC for a personal com-
puter. Any of these devices must be
equipped with either a DVI video output
or a VGA video output that you have con
-
nected to the CVR700’s
DVI (HDCP)/
Computer Video Input
using the
supplied VGA-to-DVI adaptor cable. This
menu affects the size and position of
the DVI/Computer source picture on the
screen, and it is set by the CVPD50 auto
-
matically the first time you connect your
computer or other device to the DVI video
input. After the first use, these menu set-
tings are no longer user-adjustable for
the DVI/Computer input.
Figure 35a
Figure 35b
This menu is also used to align an HDTV
picture if necessary. Great caution should
be used to avoid ending up with a video
image that is too small in size to be view-
able. You may select the reset function
if you adjust these settings incorrectly.
The first four lines contain information
only and are not adjustable. The
Phase
line simply reflects the settings of the
incoming signal and is not adjustable.
•
Auto Setup: This initiates the
process of detecting the incoming video
signal and adjusting the horizontal
and
vertical position and size of the display.
•
Horizontal Position:
This temperature bar reflects the hori
-
zontal positioning of the image on
screen. When the dark square is com-
pletely to the left, the image is moved
as far to the left side of the screen as
DVI SETTINGS
Horizontal frequency 33.7kHz
Vertical frequency 59.9Hz
Pixel polarities +/+
Horizontal resolution 1805
Vertical resolution 986
Connected device HDCP DVD
Back to screen menu
H
D&PC SETTINGS
Horizontal Frequency 31.3kHz
V
ertical Frequency 50.0Hz
Pixel Clock 27.0MHz
H/V Polarities 7
A
uto Setup 0
Horizontal Position 0
Vertical Position 0
H
irizontal Total 0
Vertical Resolutioin
Phase
R
eset default settings
Back to screen menu
33
3
4
3
5
3
6
3
7
3
8
3
9
4
0
4
1
4
2
4
3
4
4
4
5
4
6
4
7
4
8
4
9
5
0
5
1
5
2
5
3
5
4
5
5
5
6
5
7
38
3
9
4
0
4
1
3
1
3
2
3
0
2
8
2
9
2
5
26
27
28
29
3
0
2
4
2
3
2
2
2
1
2
0
31
37
36
35
34
3
3
32
31
3
7
3
6
3
5
3
4
33
3
2
48
4
9
5
0
5
1
4
7
4
6
4
5
4
4
43
4
2
1 2 3 4 5
6
7
8 9 10 11 12
13 14 15 16 17 18
19 20 21 22 23 24
25 26 27 28 29 30
31 32 33 34 35 36
3
7
3
8
3
9
4
0
4
1
4
2
4
3
4
4
4
5
4
6
4
7
4
8
INPUTS/PIP
Main input Digital
Input settings
PIP mode Off
PIP size
PIP horiz. pos.
PIP vert. pos.
Back to screen menu
3
3
34
35
36
37
38
39
40
41
42
4
3
44
4
5
46
4
7
48
4
9
50
5
1
52
5
3
54
5
5
56
5
7
3
8
39
40
41
31
32
30
28
29
2
5
26
27
2
8
29
30
2
4
23
22
2
1
2
0
31
37
36
3
5
34
33
32
3
1
37
36
3
5
3
4
33
32
4
8
49
50
51
47
46
4
5
4
4
43
42
1 2 3 4 5
6
7
8 9 1
0
1
1
1
2
13 14 15 16 17 18
19 20 21 22 23 24
25 26 27 28 29 30
3
1
3
2
3
3
3
4
3
5
3
6
3
7
3
8
3
9
4
0
4
1
4
2
4
3
4
4
4
5
4
6
4
7
4
8
33
34
35
36
37
38
39
40
41
42
4
3
44
4
5
46
4
7
48
4
9
50
5
1
52
5
3
54
5
5
56
5
7
38
39
40
41
31
32
30
28
2
9
25
2
6
2
7
28
29
30
24
2
3
22
21
20
3
1
3
7
3
6
35
34
33
3
2
31
3
7
36
35
34
3
3
3
2
48
49
50
51
4
7
46
45
44
4
3
4
2
1 2 3 4 5
6
7
8 9 1
0
1
1
1
2
1
3
1
4
1
5
1
6
1
7
1
8
1
9
2
0
2
1
2
2
2
3
2
4
25 26 27 28 29 30
31 32 33 34 35 36
3
7
3
8
3
9
4
0
4
1
4
2
43 44 45 46 47 48
SCREEN MENU
INPUTS/PIP
PICTURE SETTINGS
DISPLAY SETTINGS
ADVANCED
INFORMATION
EXIT
33
34
35
36
37
38
39
40
41
4
2
4
3
4
4
4
5
4
6
4
7
4
8
4
9
5
0
5
1
5
2
5
3
5
4
5
5
5
6
5
7
3
8
3
9
4
0
4
1
3
1
3
2
3
0
28
29
25
26
27
28
29
30
24
23
22
21
20
31
37
36
35
34
33
32
31
37
36
35
34
33
32
4
8
4
9
5
0
5
1
47
46
45
44
43
42
1 2 3 4 5
6
7
8 9 10 11 12
13 14 15 16 17 18
19 20 21 22 23 24
25 26 27 28 29 30
31 32 33 34 35 36
37 38 39 40 41 42
43 44 45 46 47 48
33
34
35
36
37
38
39
40
41
4
2
4
3
4
4
4
5
4
6
4
7
4
8
4
9
5
0
5
1
5
2
5
3
5
4
5
5
5
6
5
7
38
3
9
40
41
3
1
3
2
3
0
28
2
9
25
2
6
27
28
2
9
30
24
23
22
21
2
0
31
3
7
36
35
3
4
33
32
3
1
37
36
35
34
33
32
48
4
9
50
51
47
46
45
44
43
42
1 2 3 4 5
6
7
8 9 1
0
1
1
1
2
1
3
1
4
1
5
1
6
1
7
1
8
19 20 21 22 23 24
25 26 27 28 29 30
3
1
3
2
3
3
3
4
3
5
3
6
37 38 39 40 41 42
43 44 45 46 47 48
CVR700 OM 12/17/04 4:24 PM Page 55


