


110 SMV 3000 Transmitter User’s Manual 1/99
9.5 Replacing Meter Body Center Section, Continued
Procedure, continued
Table 29 Replacing Meter Body Center Section, Continued
Step Action
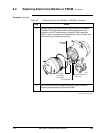
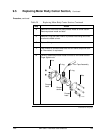
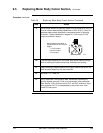
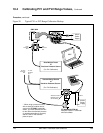
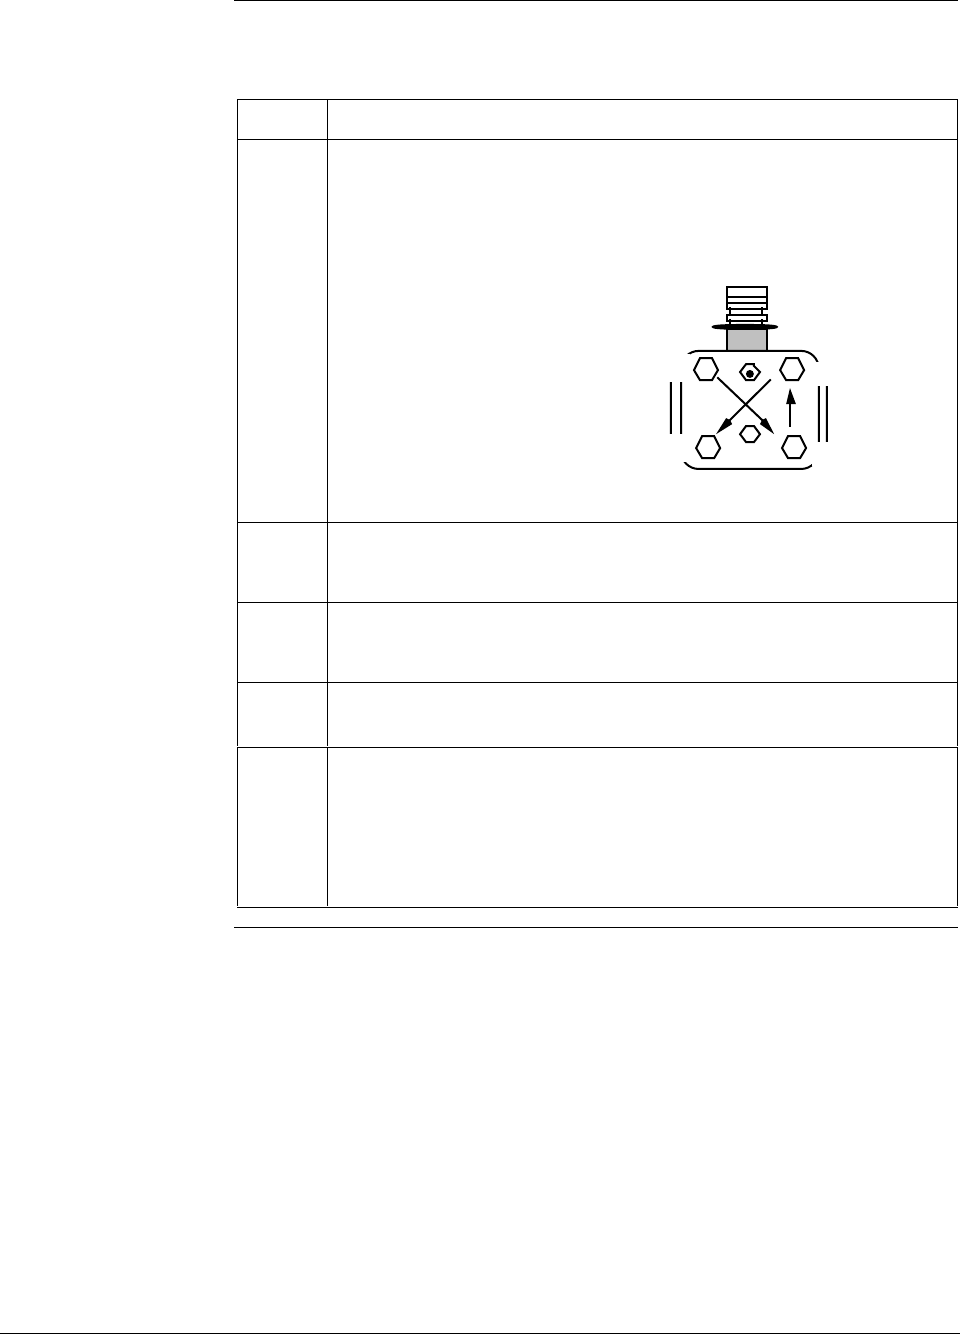
9
Use a torque wrench to gradually tighten nuts to torque of 40 ft-lb (54
N•m) for carbon steel process heads bolts or 35 ft-lb (47.5 N•m) for
stainless steel process head bolts in sequence shown in following
illustration. Tighten head bolts in stages of 1/3 full torque, 2/3 full
torque, and then full torque.
22519
1
2
3
4
Always tighten head bolts in
sequence shown and in these
stages:
1. 1/3 full torque
2. 2/3 full torque
3. Full torque
10
Feed flex-tape assembly on new meter body center section through
neck of housing and screw meter body clockwise into housing.
11
Rotate housing to desired position and tighten outside set screw. Be
sure set screw seats fully into set screw slot.
12
See Step 11 in Table 28.
13
Verify transmitter’s configuration data. Recalibrate transmitter to
achieve highest accuracy; if this is not convenient, reset calibration
(See Section 10.6 in this manual) for PV1 and PV2, and do an input
zero correction for PV1 to compensate for any minor error. Also,
check PV3 zero point.