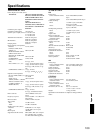
76
Enjoying Net Audio—Continued
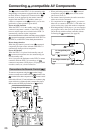
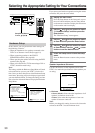
Before you can use the DTR-7.4 to play music contained
in the music library on the Network Audio Server and
listen to Internet radio, you must correctly configure the
DTR-7.4’s network settings so that it can connect to
your LAN and the Internet.
It is strongly recommended to use a broadband connec-
tion (via an xDSL or CATV leased line) and a router. If
you are connected to the Internet via a narrowband dial-
up connection, you may not be able to enjoy Internet
radio as you expect or at all.
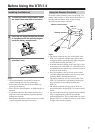
Before setting up the DTR-7.4, make sure that you are
already using a router that provides Internet access and
that the DTR-7.4 is correctly connected with your router
or hub via a LAN cable.
For more information on Internet connectivity, consult
with your ISP (Internet Service Provider) or refer to the
router documentation.
DHCP (Dynamic Host Configuration Protocol) and
AutoIP are mechanisms for network configuration,
which assign IP addresses automatically to network
devices such as the DTR-7.4, PC, and broadband router.
DNS (Domain Name System) is a mechanism which
translates domain names into IP addresses or vice versa.
Domain names such as www.onkyo.co.jp are used for
Web browsing, and IP addresses such as 210.199.170.69
are used for actual network data transfer.
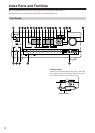
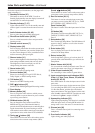
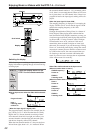
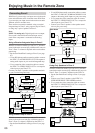
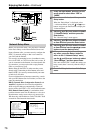
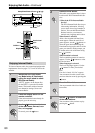
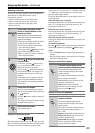
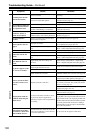
Network Setup Menu
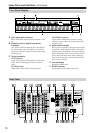
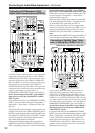
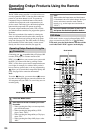
Master Volume
Standby/On
UpsamplingPure Audio
Audio
Selector
Tape
Tuner Phono Net AudioCD
Video 1
VCR 1
Video 3
Video 2
VCR 2
Video 4 Video 5
DVD
Zone 2
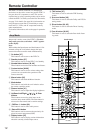
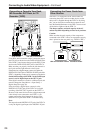
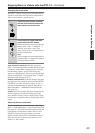
()
GRN
Rec
()
RED
A
-
FO
RM Listening Mode Memory
Video 5 Input
StereoDirect
/
Pure Audio
DSP
Surround THX
Clear
Rec Out
Zone 2 Of
f
Setup
Tuning
Preset
Enter
Return
DimmerDisplay
S Video
Audio
Video L R
Phones
Standby
Memory FM Mode
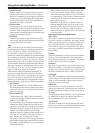
DTR
-
7.4
Digital
--
/
---
PQRS TUV WXYZ
GHI JKL MNO
TV VOL
+
10 0
456
789
-
+
-
Direct Tuning
Custom
Display
Dimmer
T
V
Input
Sleep
Muting
A
u
d
i
o
A
D
J
E
x
i
t
G
u
i
d
e
Clear
T
o
p
M
e
n
u
M
e
n
u
S
e
t
u
p
R
e
t
u
r
n
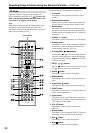
Zone
2
InputMode
Macro
CH
VOL
Disc
Enter
SetupReturn
Enter
///
Setup
Return
Input
Enter
///
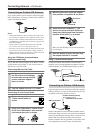
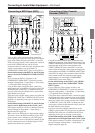
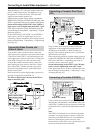
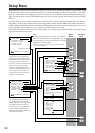
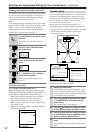
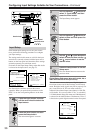
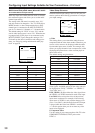
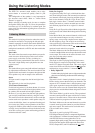
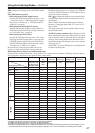
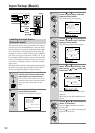
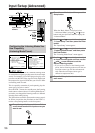
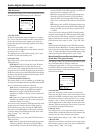
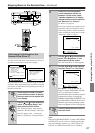
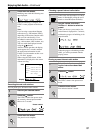
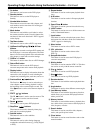
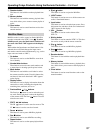
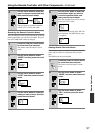
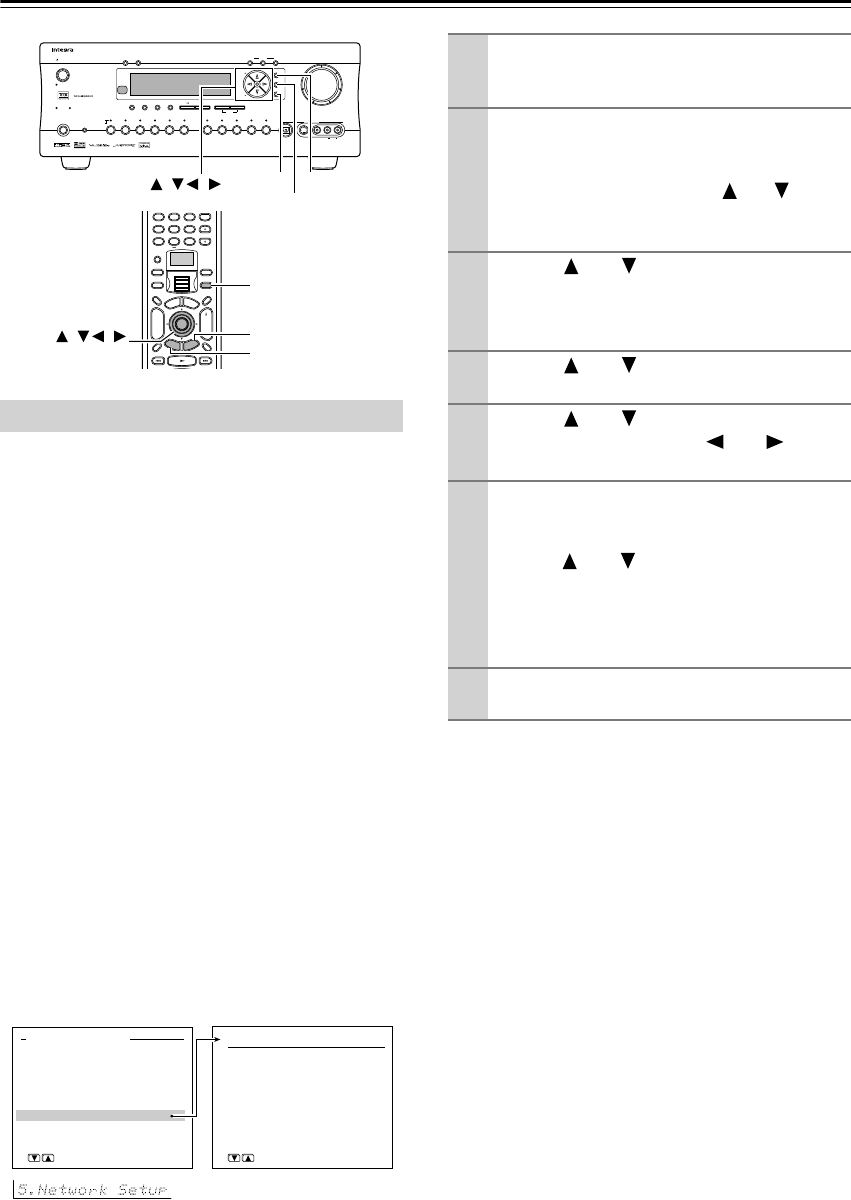
5.Network Setup
1.IP Address
2.Proxy Setup
3.MAC Address
4.Client Setup
→
Save Settings
[ENTER]Quit:[SETUP]
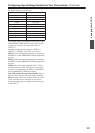
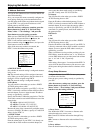
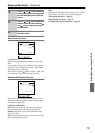
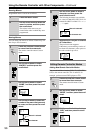
Advanced Menu
0.Hardware Setup
1.Speaker Setup
2.Input Setup
3.Audio Adjust
4.Preference
5.Network Setup
[ENTER]Quit:[SETUP]
→
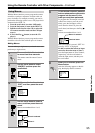
Basic Menu
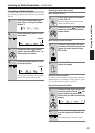
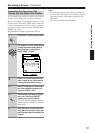
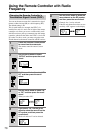
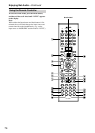
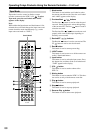
1
Press the Input button, and then roll the
scroll wheel to select either “IRD” or
“MSRV.”
2
Press the scroll wheel, and then press the
Setup button.
When the “Basic Menu” is displayed, select
“→Advanced Menu” using the and cursor
buttons and press the Enter button to display the
“Advanced Menu.”
3
Use the and cursor buttons to select
“5. Network Setup” and then press the
Enter button.
The “Network Setup” menu appears.
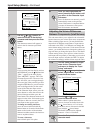
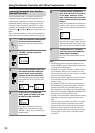
4
Use the and cursor buttons to select
an item and then press the Enter button.
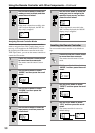
5
Use the and cursor buttons to select
an item and then use the and cursor
buttons to set the desired value.
6
When you’ve completed the settings on
any menu, press the Return button to
return to the “5. Network Setup” menu,
use the and cursor buttons to select
“Save Settings,” and then press Enter.
Don’t turn off the DTR-7.4 while the settings are
being saved (about 2 seconds), otherwise they’ll
be lost.
7
Press the Setup button to exit the Setup
menu.