113
1. In the Faceplate window, select the ports that are to serve as donor ports. Click Port / Port Properties.
In the Port Properties window, click Donor / OK.
✏ NOTE
Donor ports are incapable of transmitting or receiving data.
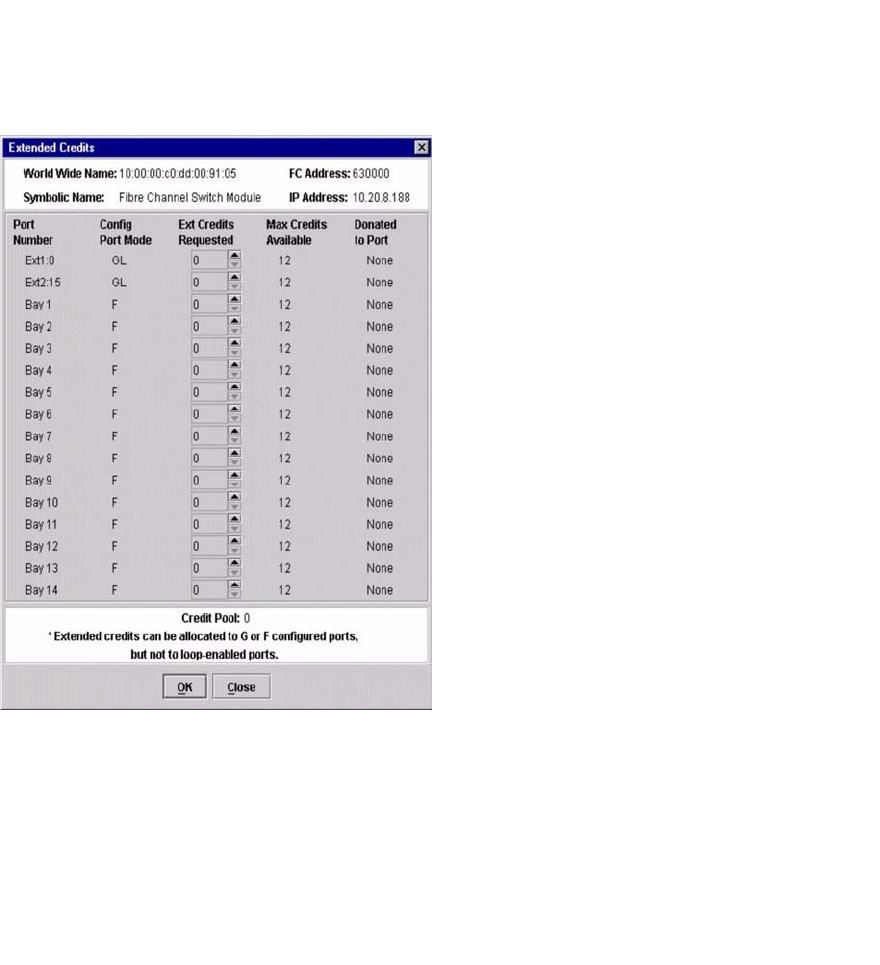
2. In the Faceplate window, select the recipient port. Recipient ports must be external ports configured as
G_Ports or F_Ports. Click
Port / Extended Credits. The Extended Credits window opens as
shown in
Figure 20
Figure 20. Extended Credits window
3.
Distribute the borrowed credits by incrementing the Ext Credits Requested field for the
recipient ports up to the total credits in the pool. Click OK
. If you exceed this total, a message is
entered in the alarm log indicating that some recipient ports did not receive the requested credits.
4. To confirm that the requested credits were received, reopen the Extended Credits window and match the
number of credits in the
Ext Credits Requested column with the number in the Donated to Port
column.
✏ NOTE
As credits are used, the Logged-in LEDs on the corresponding donor ports are lit continuously. In
addition, donor port Activity LEDs will reflect the same traffic as the recipient port. Donor ports
whose credits are being used are unavailable to devices that are connected to them.
Resetting a port
The Reset Port option reinitializes the port using configuration parameters stored in memory. Complete the
following steps to reset a port:
1. In the Faceplate window, select the ports to be reset.
2. Click Port / Reset Port.


