


3. Press [ ].
• The next page is displayed.
4. Use [ ][ ] to select "Self Diag." and press
[Enter].
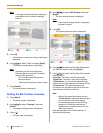
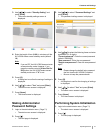
• The self diagnosis screen is displayed with the
dialog box.
Note
• You can hide or display the dialog box by
pressing [B].
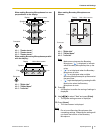
• Set the microphone at least 1 m (3.3 ft)
away from the speakers.
5. Press [R].
• The self diagnosis starts.
Note
• Check the image that is displayed from the
main video camera.
• To
avoid
feedback, slowly raise the volume
using the remote control’s [+] button.
• When someone speaks into the
microphone, confirm whether the sound
plays back through the speakers.
• During self diagnosis, all Boundary
Microphones will be set to "Center
stereo".
• During self diagnosis, the tone will be set to
"Standard".
6. Press [R].
• The self diagnosis ends.
Note
• If you do not press [R], the self diagnosis
will automatically end after about 10
minutes.
7. Press [Home].
• The Home screen is displayed.
Performing Remote
Maintenance
The following operation is for performing remote
maintenance by your dealer. After performing the
operation, you cannot use the
KX-VC500 until remote
maintenance is finished. However, turning the power off
and then back on cancels remote maintenance, and you
can use the KX-VC500. For details, contact your dealer.
1. Press [Menu].
• The Menu screen is displayed.
2. Use [ ][ ] to select "Settings" and press
[Enter].
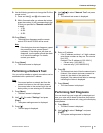
• The system settings screen is displayed.
3. Press [
] twice.
• The third page is displayed.
4. Use [ ][ ] to select "Remote
access" and press
[Enter].
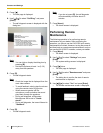
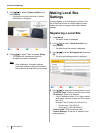
• The dialog box to confirm the start of remote
maintenance is displayed.
5. Use [
][ ] to select "Yes" and press [Enter].
• The remote maintenance screen is displayed.
70 Operating Manual Document Version 2010-10
Contacts and Settings