Note
• If the manual settings screen is displayed,
press [B] to return to the auto settings
screen.
5. Press [G].
• A dialog
box to confirm the saving of settings is
displayed.
6. Use [
][ ] to select "Yes" and press [Enter].
• The system settings screen is displayed.
Note
• Depending on how many Boundary
Microphones are connected, the output
settings differ as follows:
– 2 or more Boundary Microphones:
Monaural output
– 1 Boundary Microphone: Stereo output
7. Press [Home].
• The Home screen is displayed.
Setting the Mic Position manually
1. Press [Menu].
• The Menu screen is displayed.
2. Use [
][ ] to select "Settings" and press
[Enter].
• The system settings screen is displayed.
3. Press [ ].
• The next page is displayed.
4. Use [ ][ ] to select "MIC Setting" and press
[Enter].
• The auto settings screen is displayed.
Note
• If the manual settings screen is displayed,
proceed to step 6.
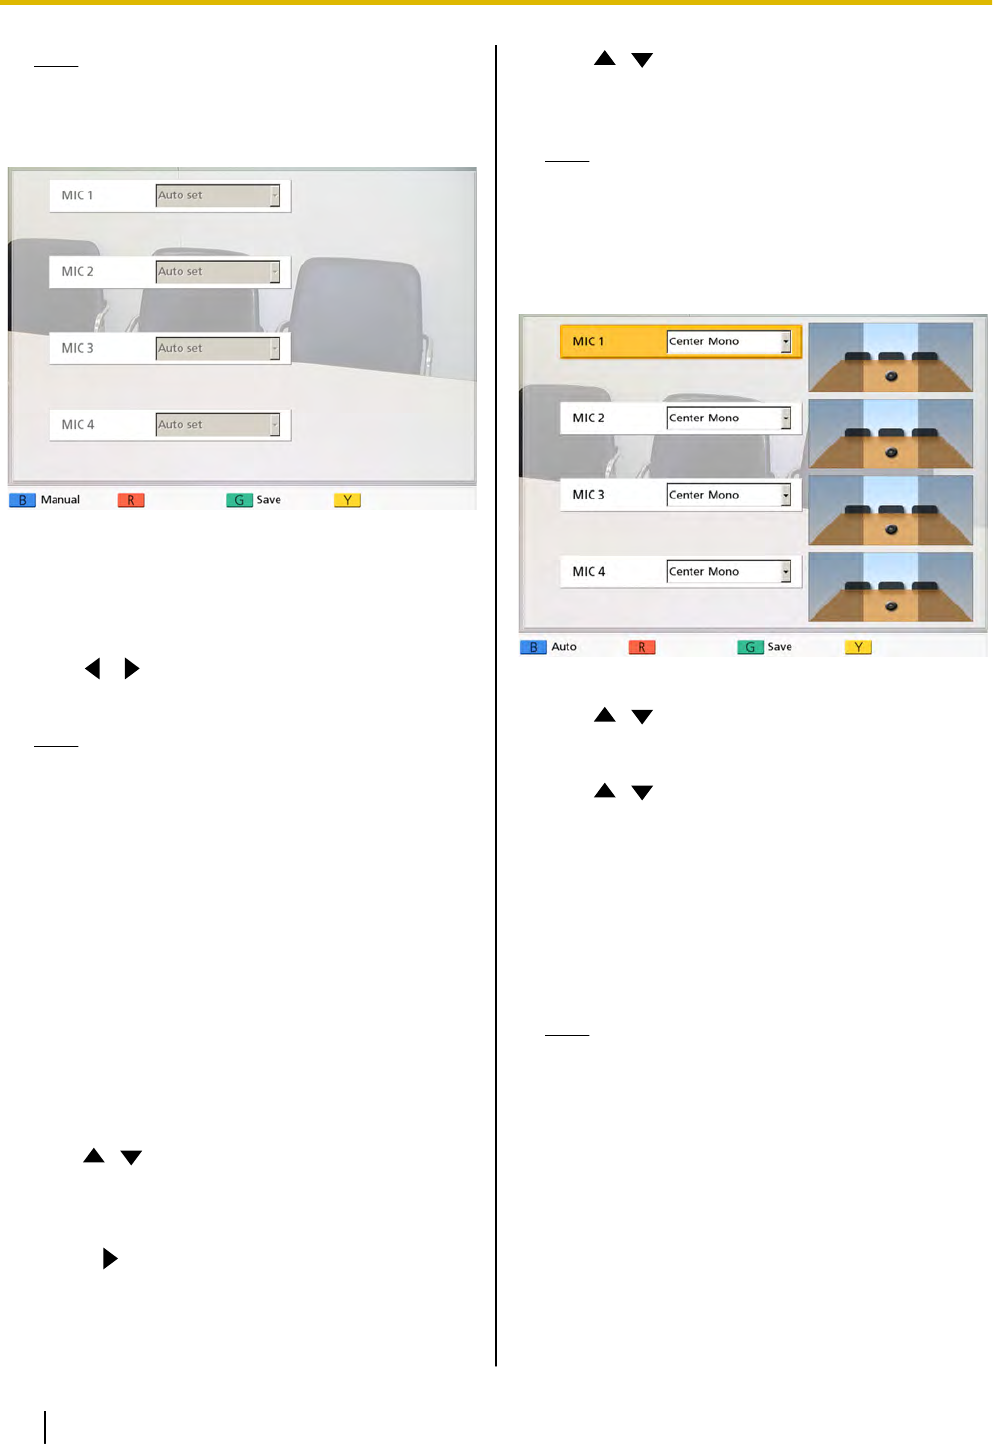
5. Press [B].
• The manual settings screen is displayed.
6. Use [ ][ ] to select the Boundary Microphone
you want to configure and press [Enter].
7. Use [
][ ] to select the Boundary Microphone’s
relative position.
"Left side"
: Sounds on left side are played.
"Right side": Sounds on right side are played.
"Center Mono": All sounds are played through
both the left and right speakers at the same volume.
"Center stereo": Sounds centered on the
microphone are played through both the left and
right speakers at the same volume.
Note
• When a Boundary Microphone is set to
"Center stereo
", make sure that it is placed
with its connector facing the display.
• For the settings shown in the following
diagrams, the left/right channels are
displayed as viewed from the side of the
main video camera.
Here are examples of the relative position of
Boundary Microphones.
66 Operating Manual Document Version 2010-10
Contacts and Settings


