


65
CD player
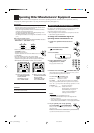
After pressing CD, you can perform the following operations on the
CD player:
PLAY : Starts playing.
4 : Returns to the beginning of the current (or
previous) track.
¢ : Skips to the beginning of the next track.
STOP : Stops playing.
PAUSE : Pauses playing. To release it, press PLAY.
1 – 10, +10 : Selects a track number directly.
For track number 5, press 5.
For track number 15, press +10, then 5.
For track number 20, press +10, then 10.
For track number 30, press +10, +10, then 10.
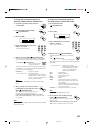
CD player-changer
After selecting “CD DISC” by pressing CONTROL repeatedly, you
can perform the following operations on a CD player-changer:
PLAY : Starts playing.
4 : Returns to the beginning of the current (or
previous) track.
¢ : Skips to the beginning of the next track.
STOP : Stops playing.
PAUSE : Pauses playing. To release it, press PLAY.
1 – 6, 7/P : Selects the number of a disc installed in a CD
player-changer.
After pressing CD, you can perform the following operations on the
CD player-changer:
1 – 10, +10 : Selects a track number directly.
For track number 5, press 5.
For track number 15, press +10, then 5.
For track number 20, press +10, then 10.
For track number 30, press +10, +10, then 10.
EXAMPLE:
• Selecting disc number 4, track number 12, and starting playback.
1.Press CONTROL repeatedly until “CD DISC” appears on
the remote’s display, then press 4.
2.Press CD, then press +10, 2.
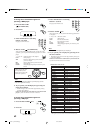
If your CD changer is of 200-disc loading capability (except for
XL-MC100 and XL-MC301)
You can do the following operations using the number buttons after
pressing CD.
1. Select a disc number.
2. Then select a track number (always enter two digits).
3. Start playback.
EXAMPLES:
• Selecting disc number 3, track number 2, and starting playback.
Press 3, then, 0, 2, then PLAY.
• Selecting disc number 10, track number 5, and starting playback.
Press 1, 0, then, 0, 5, then PLAY.
• Selecting disc number 105, track number 12, and starting
playback. Press 1, 0, 5, then 1, 2 then PLAY.
Turntable
After pressing PHONO, you can perform the following operations
on a turntable:
PLAY : Starts playing.
STOP : Stops operations.
CD recorder
After pressing CDR, or selecting “CDR” by pressing CONTROL
repeatedly, you can perform the following operations on a CD
recorder:
PLAY : Starts playing.
4 : Returns to the beginning of the current (or
previous) track.
¢ : Skips to the beginning of the next track.
STOP : Stops playing.
PAUSE : Pauses playing. To release it, press PLAY.
1 – 10, +10 : Selects a track number directly.
For track number 5, press 5.
For track number 15, press +10, then 5.
For track number 20, press +10, then 10.
For track number 30, press +10, +10, then 10.
Notes:
• When you start recording on the CD recorder, use the buttons on
the CD recorder itself or on the remote control supplied for it.
• You can use either the CDR or CONTROL button to activate the
buttons listed above. If you press CDR, the playing source
changes. On the other hand, if you press CONTROL repeatedly to
select “CDR,” the playing source does not change.
Cassette deck
After pressing TAPE/MD or selecting “TAPE” by pressing
CONTROL repeatedly, you can perform the following operations on
a cassette deck:
PLAY : Starts playing.
REW : Fast-winds the tape from right to left.
FF : Fast-winds the tape from left to right.
STOP : Stops operations.
PAUSE : Pauses playing. To release it, press PLAY.
¶ REC : Press this button together with the PLAY button to
start recording (for the main room operation only).
Press this button together with the PAUSE button to enter
recording pause (for the main room operation only).
Notes:
• When connecting the cassette recorder to the TAPE/MD jacks,
change the source name to “TAPE”—initial setting (see page 25).
• You can use either the TAPE/MD or CONTROL button to activate
the buttons listed above. If you press TAPE/MD, the playing source
changes. On the other hand, if you press CONTROL repeatedly to
select “TAPE,” the playing source does not change.
MD recorder
After pressing TAPE/MD, you can perform the following operations
on the MD recorder:
PLAY : Starts playing.
4 : Returns to the beginning of the current (or previous)
track.
¢ : Skips to the beginning of the next track.
STOP : Stops playing.
PAUSE : Pauses playing. To release it, press PLAY.
¶ REC : Press this button together with the PLAY button to
start recording (for the main room operation only).
Press this button together with the PAUSE button to
enter recording pause (for the main room operation
only).
Note:
When connecting an MD recorder to the TAPE/MD jacks, change the
source name to “MD” (see page 25).
EN61-77_RX-DP10VBK[J]_f 01.6.19, 0:54 PM65