


3-11
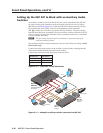
USP 507 • Front Panel Operation
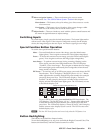
2. With the applicable input showing, rotate the right Adjust knob ({) to turn the
Auto-Image on or off.
3
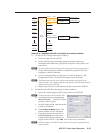
. Press Next to go to the next sublevel (Input EDID), or
press Next repeatedly to get to any applicable level. At each
level, rotate the adjustment knobs (right only or both) as needed to change the
settings to the desired value.
N
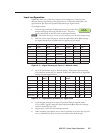
The Input EDID setting adjustment applies only to the VGA and DVI inputs.
Refer to figure 3-5 for resolution and refresh rate details.
For some settings follow any on-screen instructions.
The internal temperature is a “read-only” screen. No adjustment is possible.
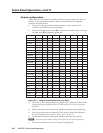
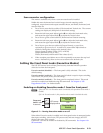
4. Press Next to enter the next sublevel, Auto Memory, and rotate either
Adjust knob ([{) to turn the Auto Memory on or off. See figure 3-6 for
a description of the interaction between Auto-Image and Auto Memory
settings.
5
. Press Next to enter the next sublevel, RGB Delay. Rotate either Adjust knob
([{) to adjust the RGB delay from 0.0 seconds to a maximum of 5.0 seconds
in 0.1 second increments.
6
. Press Next to enter the next sublevel, Switch Effect. Rotate either Adjust
knob ([{) to select the switch effect; Cut (Blank), Cut (Freeze), or Fade. Cut
(Blank) blanks the screen before showing the new input image. Cut (Freeze)
freezes the current image while switching to the selected input image. Fade
effect fades the images through black during transition from the current input
to the new selected input.
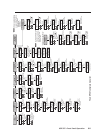
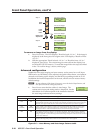
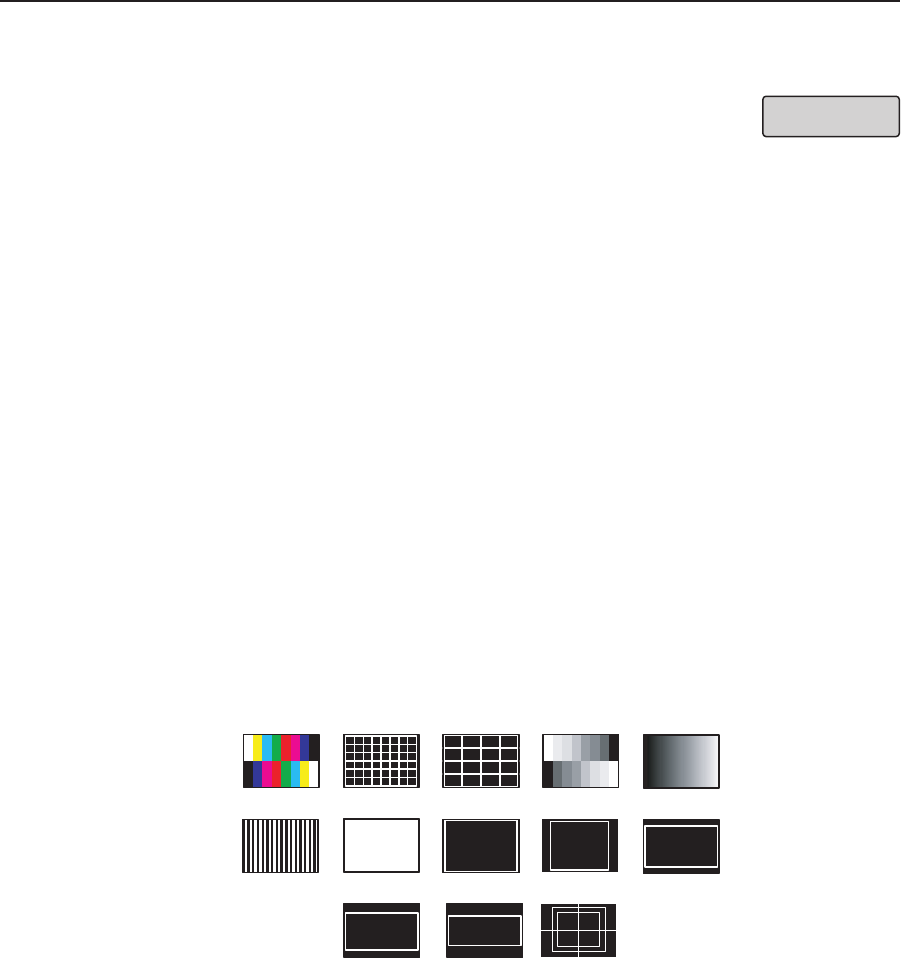
7
. Press Next to enter the next sublevel, Test Pattern. Rotate either Adjust knob
([{) to select the Test Pattern. The following test patterns are available:
None (default), Split Color Bars (8), Crosshatch 4x4, 32 Level Grayscale,
Ramp, Alternating Pixels, Whitefield, Crop, 1.33 Aspect ratio, 1.78 Aspect
ratio, 1.85 Aspect ratio, 2.35 Aspect ratio, Safe Area, Blue Mode.
Color Bars
Split Grayscale
4x4 Crosshatch
Alternating
Pixels
Crosshatch
1.78 Aspect
1.85 Aspect 2.35 Aspect
Crop
Ramp
White Field
1.33 Aspect
Safe Area 5% 10%
N The test patterns may vary based on the output rate selected. For example
if a 4:3 rate is selected, then the 4:3 crosshatch (32x24) and aspect ratio crop
patterns appear.
The raster border is independent of the aspect ratio, always surrounding the
active area of the screen.
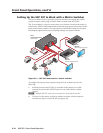
8. Press Next to enter the next sublevel, MTP Pre-Peaking. Rotate either Adjust
knob ([{) to turn Pre Peaking on or off.
N
When using the MTP (mini twisted pair) output, the pre-peaking can be turned
on or off to compensate for the poor image quality of video signals transmitted
over long distance twisted pair cable runs to a remote display.
9. Press Next to view the internal temperature (degrees Celsius and Fahrenheit.
10. Press Next to enter the device Reset to Factory settings mode. Press Detail to
confirm and reset the device, or Next to exit the mode without resetting.
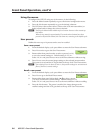
Input EDID
1024x768 60.0Hz