


90
TASCAM HS-20
10 – Internal settings
You can perform the following operations using the
computer keyboard when the VNC viewer application is
active.
F1 to F12 keys: Functions in the same way as an
external keyboard connected with
this unit.
See "List of keyboard operations"
in "Operation using a computer
keyboard" of “12 – Other functions”
in this manual.
HOME key: Functions in the same way as the
HOME key of this unit and opens
the HOME screen. Press the End
key while holding the HOME key to
open the LOCK SETUP screen.
End key: Functions in the same way as the
MENU key of this unit and opens
the MENU screen. Press the End
key while holding the HOME key to
open the LOCK SETUP screen.
PageDown: Functions in the same way as the
FILE LIST key of this unit and opens
the FILE LISTscreen.
Cursor 2 key:
Functions in the same way as
turning the DATA dial of this unit
clockwise.
Cursor x key:
Functions in the same way as
turning the DATA dial of this unit
counterclockwise.
Character input keys: Use to input characters when this
unit shows a keyboard screen.
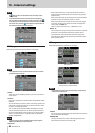
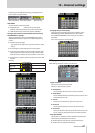
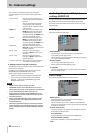
o Settings necessary for VNC connection
The settings necessary to connect a VNC viewer application
to this unit are as follows.
IP Address: The IP Address of this unit is shown on the
NETWORK page of the REMOTE SETUP screen.
Password: The default password is “HS-20”.
Uppercase and lowercase letters are distinguished.
You can change the password with the Password
[Change…] button on the NETWORK page of the
REMOTE SETUP screen.
NOTE
•
Only one active VNC connection is possible.
•
If EXTERNAL Control on the LOCK SETUP screen is set to
LOCK, viewing in the VNC viewer application is possible, but
mouse and keyboard operations will be ignored.
•
If you change any setting on the NETWORK page of the
REMOTE SETUP screen while a VNC connection is active, it
will be disconnected.
•
Please consult with TASCAM Customer Support for infor-
mation about VNC viewer applications that have been
tested with this unit.
•
VNC viewer application display and operation will not be
smooth when files are being transferred by FTP, or at high
system sampling frequencies (88.2kHz/96kHz/176.4kHz/1
92kHz).
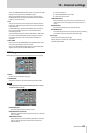
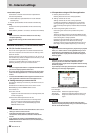
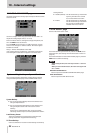
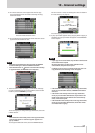
Audio Signal Input and Output
settings (AUDIO I/O)
Change audio signal input and output settings on this screen.
The AUDIO I/O screen has two pages: INPUT and OUTPUT.
Touch the tabs at the bottom of the screen to open the corre-
sponding page.
INPUT page
Make input settings on this page.
INPUT SOURCE
You can set the input source. Select analog XLR input,
analog RCA input or digital input.
Setting buttons: Analog XLR (default), Analog RCA, Digital X
(“X” is either AES/EBU or S/PDIF)
DIGITAL SOURCE
You can select the digital input source.
Setting buttons: AES/EBU (default), S/DIF
Fs CONVERT
Turn the sampling frequency converter ON or OFF (default)
for each pair of inputs.
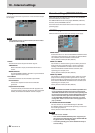
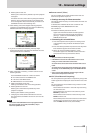
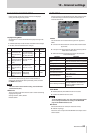
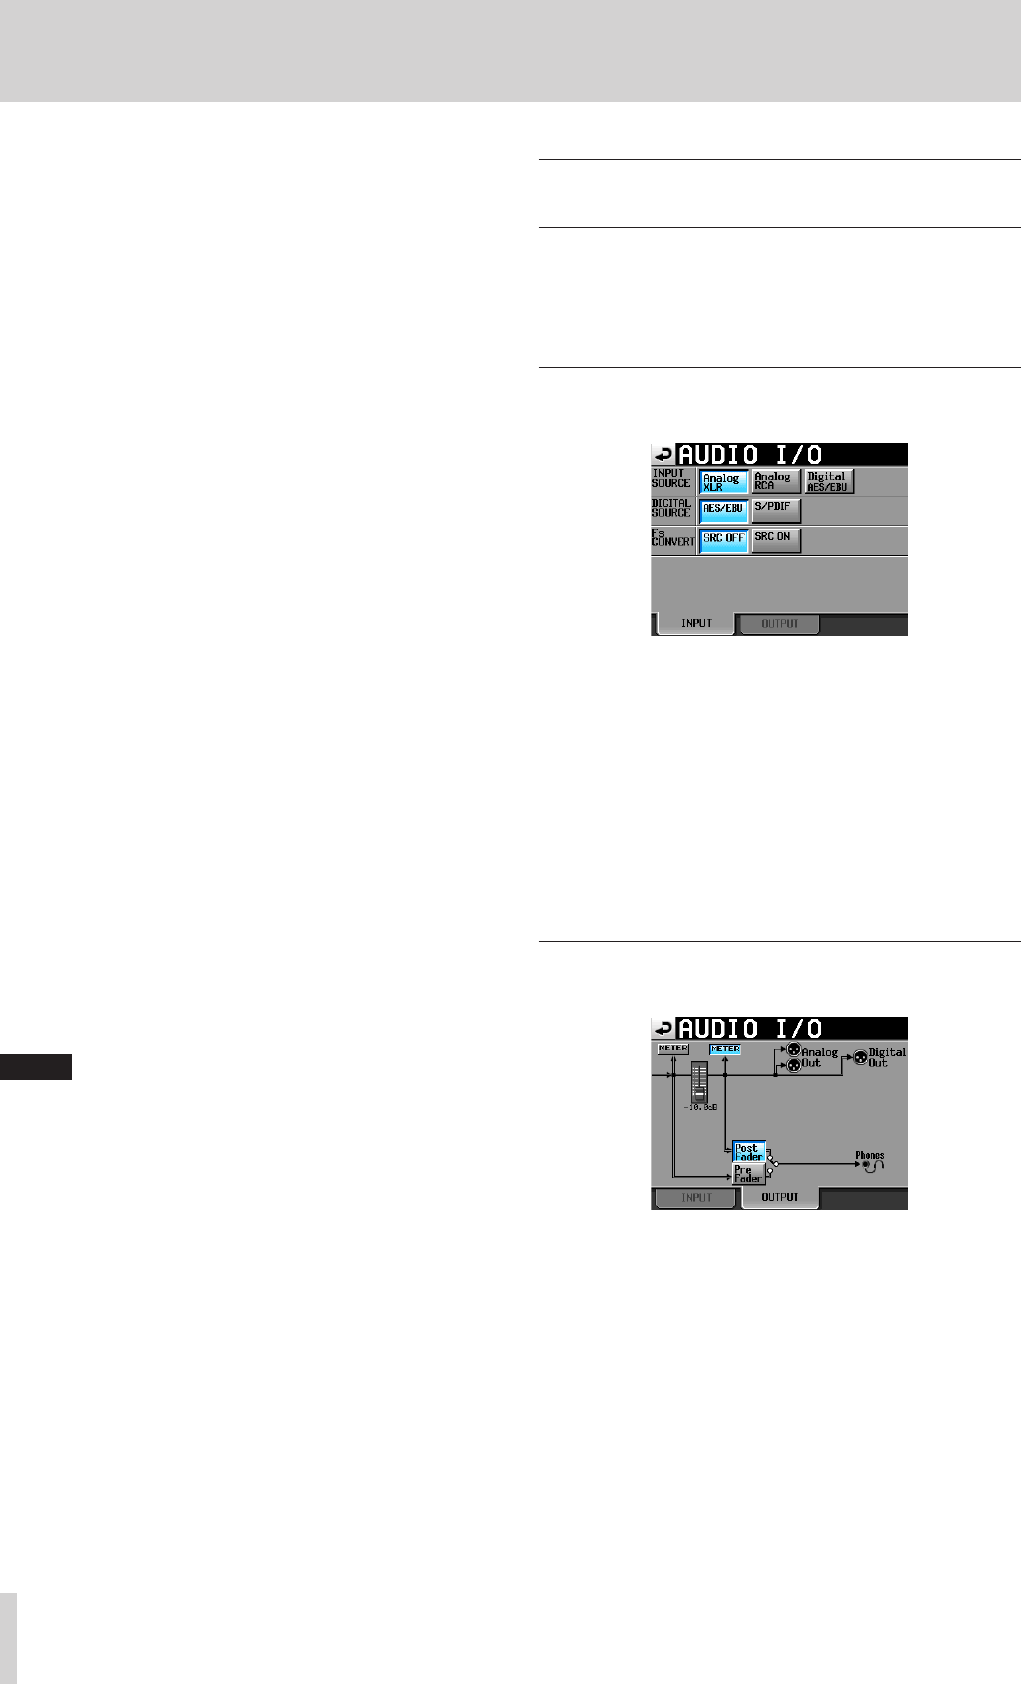
OUTPUT page
This shows the output settings and signal routes.
METER buttons
Use these buttons to set whether the meter shows the
position before or after the fader.
Touch the button on the left to show the level before the
fader or touch the button on the right to show the level after
the fader on the meter.
Post/Pre Fader buttons
Use these buttons to set whether the headphone output is
from before or after the fader.
Pre Fader button:
Signals before the fader are output for headphones.
Post Fader button (default):
Signals after the fader are output for headphones.
Fader