20
TASCAM HS-20
2 – Names and functions of parts
CREATE PLAYLIST button
This opens the PLAYLIST NAME screen where you can
create a new playlist.
(See “Creating a new playlist” on page 65.)
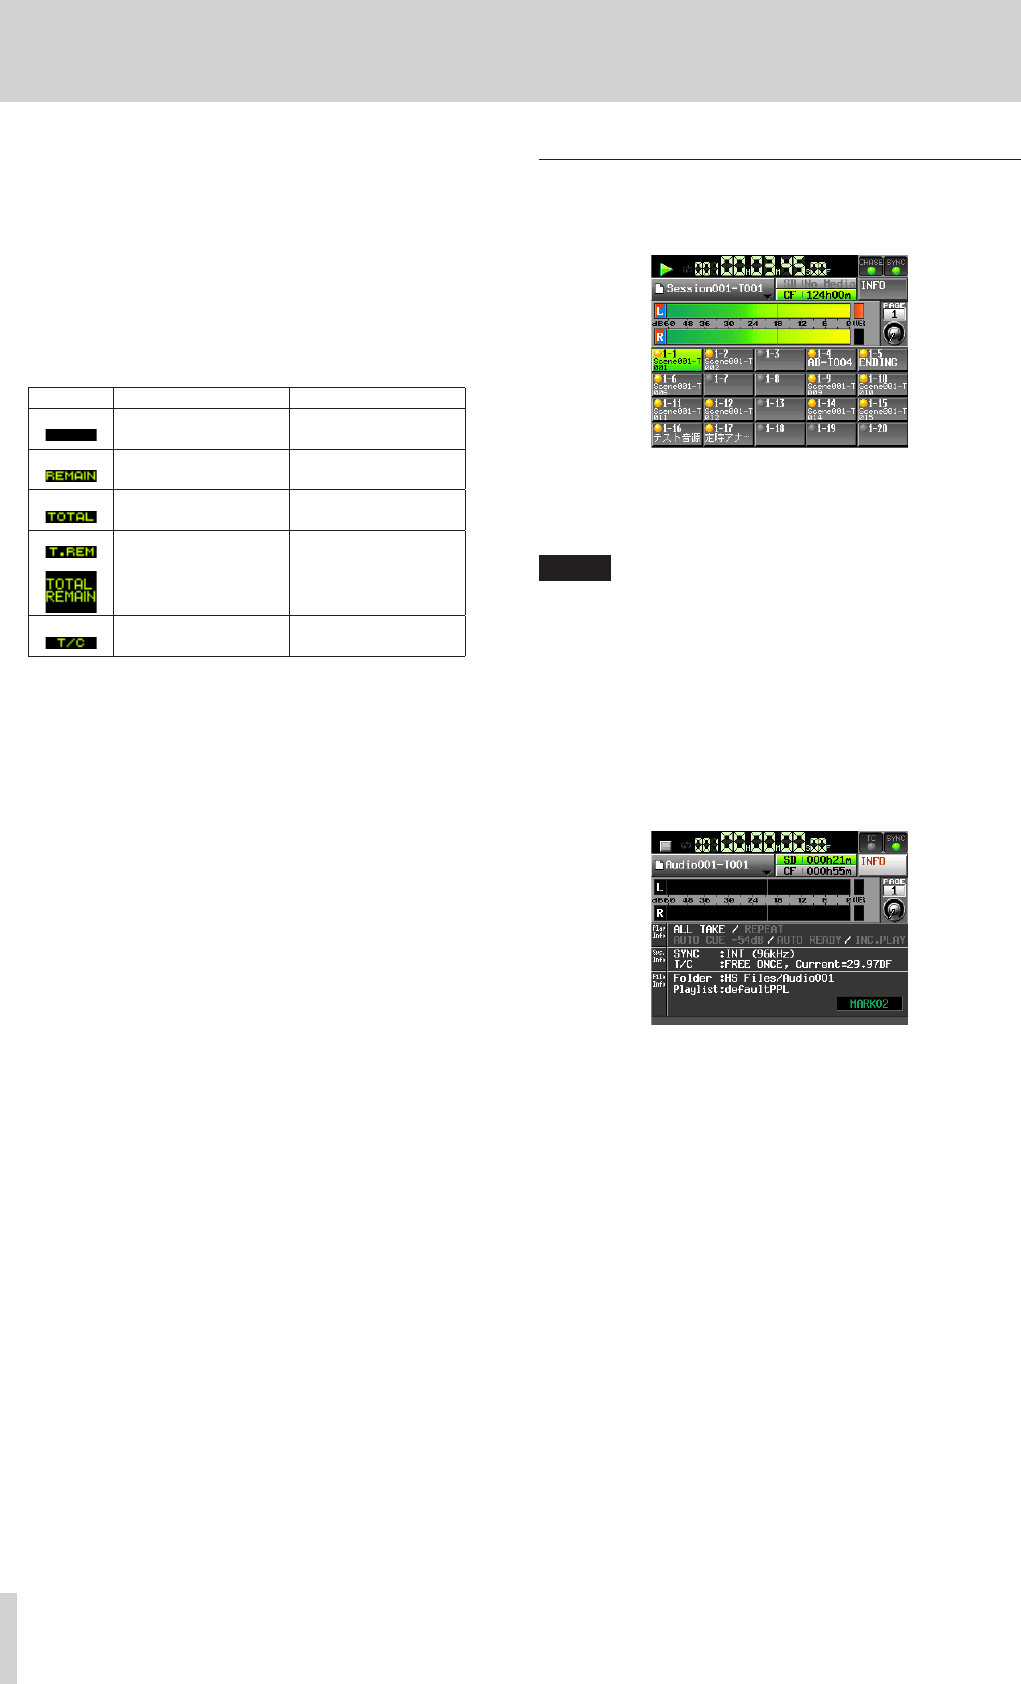
; Level meters
These are the same as on the Home Screen in timeline
mode.
z Time display area
The appearance depends on the time display mode.
Mode Left end Right end
00:00:00:00
Total take or entry
length
Total take or entry
length
00:00:00:00
00:00:00:00
Total folder or playlist
length
Total folder or playlist
length
00:00:00:00
Starting time of folder
or playlist
Ending time of folder
or playlist
When recording and in recording standby, however, the time
bar and division lines are not shown.
x Flash Page number and knob
This shows the Flash Page number. Touch this area to enable
selection (yellow background), and turn the DATA dial to
change the page number (turn right to increase and turn left
to decrease).
c Current time cursor
This cursor shows the playback position. This scrolls horizon-
tally in correspondence with the time counter.
It is not shown when recording (take mode only).
v Mark name
This is the name of the mark at the current time or the
nearest preceding mark.
Touch this part while a mark name other than the auto mark
is shown to open the mark name editing screen.
b INPUT MONITOR button
These are the same as on the Home Screen in timeline
mode.
n EDIT button
Touch this button to open a pull-up menu for take editing.
m NEXT TAKE NAME button
These are the same as on the Home Screen in timeline
mode.
Flash start screen
1. Press the HOME key when the Home Screen is already open
to open the flash start screen.
2. Use the DATA dial to select the page that contains the
takes or entries that you want to play after touching and
highlighting (yellow background) the operation/display
knob on the flash page.
NOTE
The flash start screen has five pages (PAGE 1–5) that can
each show 20 takes.
3. Touch a take or entry button that has a flash start indicator
lit orange on the display to use flash start playback. Flash
starting is also possible using a connected PS/2 keyboard
and devices connected to this unit’s remote connectors
(REMOTE, RS-232C and PARALLEL).
4. Touch the INFO button to open the information screen.
The contents of this screen are the same as the information
screen that opens by pressing the INFO button when the
Home Screen is open.


